
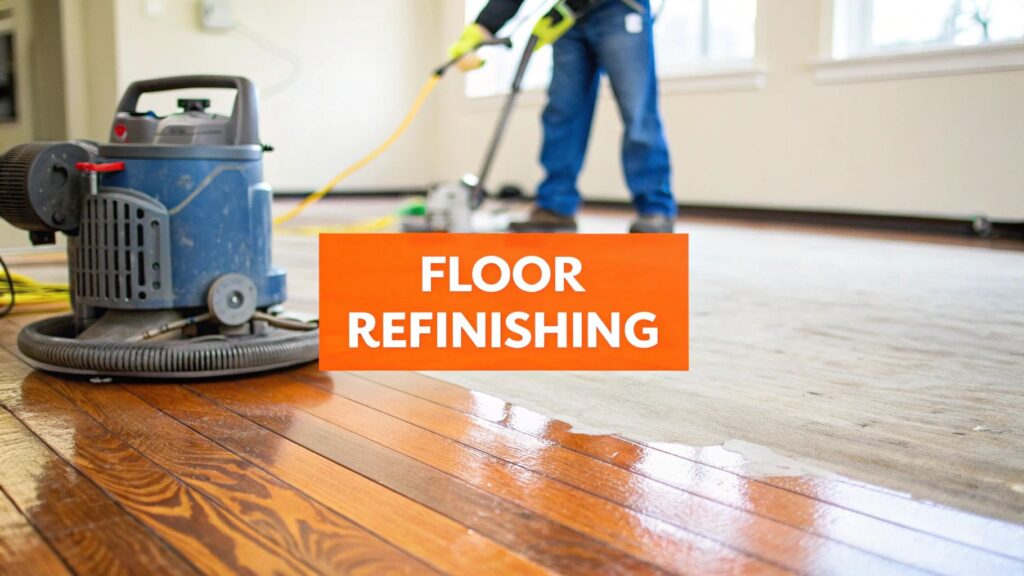
Refinishing your hardwood floors is a craft. It’s a meticulous process of sanding away years of wear and tear—the old finish, scratches, and dings—to reveal the beautiful, raw wood underneath. Once we have a fresh surface, we apply a new stain and several protective topcoats.
The result? A floor that looks brand new but retains its original character. For discerning homeowners in Orange County who appreciate quality, understanding the hardwood floor refinishing process is the first step toward a brilliant home upgrade. It is a far smarter, more sustainable, and cost-effective route than a full replacement.
Why Refinishing Is a Smart Investment for Your Home
When your hardwood floors start looking tired and worn, you’re faced with a big decision: refinish or replace? A full replacement is certainly one way to get a new look, but more often than not, refinishing is the more strategic choice. You’re not just getting a visual refresh; you’re preserving the unique soul of your home. It’s an investment in beauty, longevity, and the integrity of your property.
Here in Orange County, property value is paramount. Refinishing is a project that directly enhances and protects that investment, especially in homes with original hardwood floors—that’s a timeless feature you just can’t replicate.
The True Value of Restoration
The choice to refinish comes down to core benefits that go beyond just fixing a few scratches. When you choose restoration, you are making a conscious decision to:
- Preserve Original Character: We have had the privilege of working in countless historic homes in places like Newport Beach and Irvine that feature stunning, unique wood species and grain patterns you just don’t see anymore. Refinishing is all about celebrating and reviving that history, not tearing it out.
- Increase Property Value: Gleaming hardwood floors are a significant selling point. A professional refinishing job can deliver a serious return on investment by making your home stand out on the competitive Southern California market.
- Embrace Sustainability: Restoring your existing floors is the responsible, eco-friendly choice. It saves trees, keeps old flooring out of landfills, and avoids the carbon emissions from manufacturing and shipping new materials.
At Sparkle Restoration Services, we don’t just see this as a job; we see it as a craft. As IICRC Master Certified professionals and winners of the BBB Torch Award for Ethics, our entire philosophy is about turning chaos into calm. We bring a level of precision and integrity to every project to ensure your home’s foundation is as beautiful as it is strong.
Making an Informed Decision
Getting a grasp on the full benefits of professional wood floor restoration helps solidify the decision. This isn’t just about making your living space look better today; it’s about protecting one of your home’s most important assets for years to come.
Think of it as a proactive step in your home maintenance plan and a key piece of your overall improvement strategy. For affluent homeowners, refinishing is more than a simple repair—it’s a renewal that brings lasting elegance and value right back where it belongs.
Preparing Your Space for a Flawless Finish
A beautifully refinished hardwood floor is born from meticulous preparation. The true craftsmanship begins long before the first sander ever touches the wood. This foundational work—the careful, detail-oriented setup—paves the way for a perfect, long-lasting finish. It’s all about creating a controlled environment to transform the wood without any compromises.
First, the room must be completely empty. This goes beyond just moving the sofa into the hallway. Every piece of furniture, every rug, and even wall hangings must be removed. This gives our team total access to every inch of the floor and, just as importantly, keeps your belongings safe and out of the work zone.
With the room cleared, our attention turns to containment. Sanding creates dust—there’s no way around it. But we can control where that dust goes. It cannot be allowed to settle into your new finish or drift through the rest of your house. We take this very seriously, using heavy-duty plastic sheeting and painter’s tape to meticulously seal off doorways, air vents, built-in cabinets, and light fixtures. This creates a self-contained work area, which is vital for protecting your home’s air quality. For more on this, check out our guide on the war on dust during spring cleaning.
The Professional Floor Assessment
Once the room is prepped and protected, the expert assessment begins. This is where experience truly matters. We inspect every square foot of your floor, looking for any issues that must be addressed before we start sanding.
This is far from a quick once-over. We’re on the hunt for specific problems that could derail the final look:
- Deep Gouges or Scratches: We need to know if these are surface-level flaws that will sand out or if they’re deep enough to require a professional-grade wood filler.
- Pet Stains or Water Marks: Dark stains, especially from pets, can soak deep into the wood grain. We have to determine if sanding will be enough or if the board itself is compromised and needs replacement.
- Loose or Damaged Boards: Any plank that’s creaky, cracked, or warped has to be secured or replaced. A stable surface is non-negotiable for a uniform finish.
- Gaps Between Planks: Are the gaps from normal seasonal expansion, or do they point to a bigger subfloor problem? The answer determines whether we use a specialized filler or investigate further.
As a licensed General Contractor, our assessment goes beyond the surface. We’re trained to spot underlying issues, like minor moisture damage, that a less experienced eye might miss, ensuring the refinishing project is built on a sound foundation.
Making the Right Repairs
Finding the problems is one thing; applying the right solution is another. For instance, a common challenge we see in older Orange County homes is deciding whether to fill a gap or replace the entire board. A small, stable gap can often be filled with a high-quality filler matched perfectly to the wood species.
But if a board is cupped from old water damage or has a deep, unsightly stain that won’t come out, replacement is the only way to achieve a flawless look. When that’s the case, we source a matching board—paying close attention to the wood species, grain pattern, and cut—and weave it in seamlessly with the existing floor. This detail-oriented prep work defines a luxury result and guarantees the final wooden canvas is perfect.
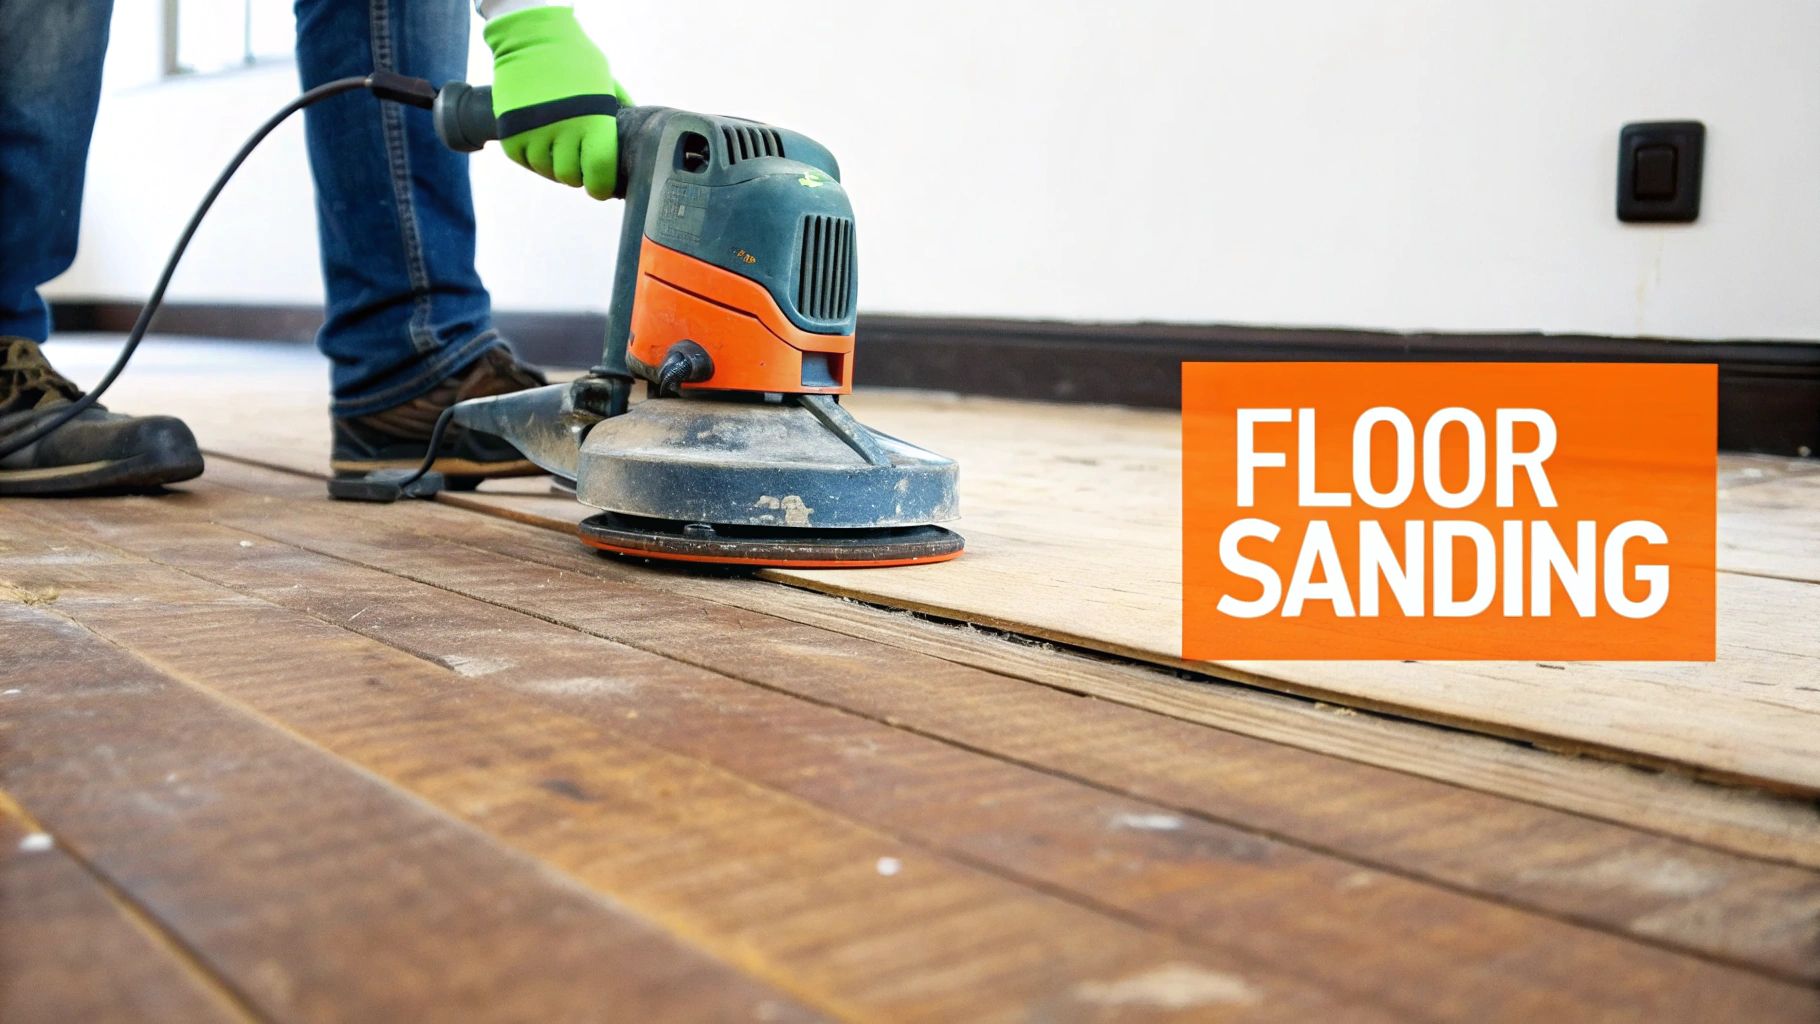
The Art and Science of Sanding Your Hardwood Floors
Sanding is where the real transformation happens. This is the heart of the hardwood floor refinishing process, a meticulous, multi-stage procedure that carefully strips away decades of wear to reveal the clean, untouched wood underneath. It’s more than just smoothing the surface; it’s a careful act of renewal that sets the stage for a stunning, long-lasting finish.
The whole process is a delicate balance of power and precision. We begin by methodically grinding away the old layers of finish and stain, along with all the surface-level scratches and scuffs that have built up over the years. It’s like peeling back time, layer by layer, until we get back to the floor’s original, pristine state.
Mastering The Grit Progression
To get a perfectly flat and buttery-smooth surface, we work through a specific progression of sandpaper grits, moving from coarse to very fine. Think of it like a sculptor refining a piece of stone—each pass is designed to achieve a higher level of smoothness and erase the marks of the previous one. Starting with an aggressive, low-grit paper is essential for taking down deep imperfections and leveling uneven floorboards.
However, jumping to a finer grit too soon (or skipping a step) will leave behind subtle but damaging swirl marks from the sander. These flaws, often called “chatter,” might not be visible at first. But once the stain and finish go on, they become glaringly obvious, trapping the imperfections under the finish forever. This is exactly where a seasoned professional’s touch is non-negotiable.
Here’s a look at how the different grits work together to create that flawless surface.
Sanding Grit Progression Guide
| Grit Level | Grit Range | Purpose in Refinishing |
|---|---|---|
| Coarse | 20-36 Grit | Aggressively removes old finish, deep scratches, and levels uneven boards. This is the heavy-lifting stage. |
| Medium | 40-60 Grit | Smooths out the scratches left by the coarse grit and continues the leveling process. |
| Fine | 80-100 Grit | Prepares the wood for the final finish, removing all visible sanding marks for a smooth-to-the-touch feel. |
| Extra Fine | 120+ Grit | Used between coats of finish (buffing) to ensure maximum adhesion and a glass-like final surface. |
Each step in this progression is critical; cutting corners here will always show in the final product.
The Tools of The Trade
Two primary machines do the bulk of the work, each with a specific job:
- The Drum Sander: This is the powerful, walk-behind workhorse for the main field of the floor. It’s built to remove large amounts of material efficiently and evenly across the length of the room.
- The Edger: A smaller, handheld sander, the edger lets us get into all the areas the big drum sander can’t, like right up against baseboards, inside tight corners, and closets. Skillfully blending the work of the edger with the drum sander is what creates a truly seamless, professional look.
It’s also important to know that different woods respond uniquely to sanding. The dense grain of walnut, for instance, requires a different touch than the more porous grain of red oak, common in Orange County homes. An expert understands these nuances and adjusts the technique and grit progression to prevent gouging the wood and ensure a beautiful result.
Our Commitment to a Dust-Free Environment
Let’s be honest: the biggest homeowner concern is always the dust. Traditional sanding methods are notoriously messy, blanketing your entire house in a fine layer of wood dust that can linger for weeks. We have completely eliminated that problem.
At Sparkle Restoration, we use state-of-the-art dust containment systems that connect directly to our sanding equipment. These powerful vacuums capture up to 99% of airborne dust right at the source, channeling it completely outside the home. This protects your belongings and air quality, and also helps us achieve a cleaner, more flawless final finish by preventing dust from settling on the wet polyurethane.
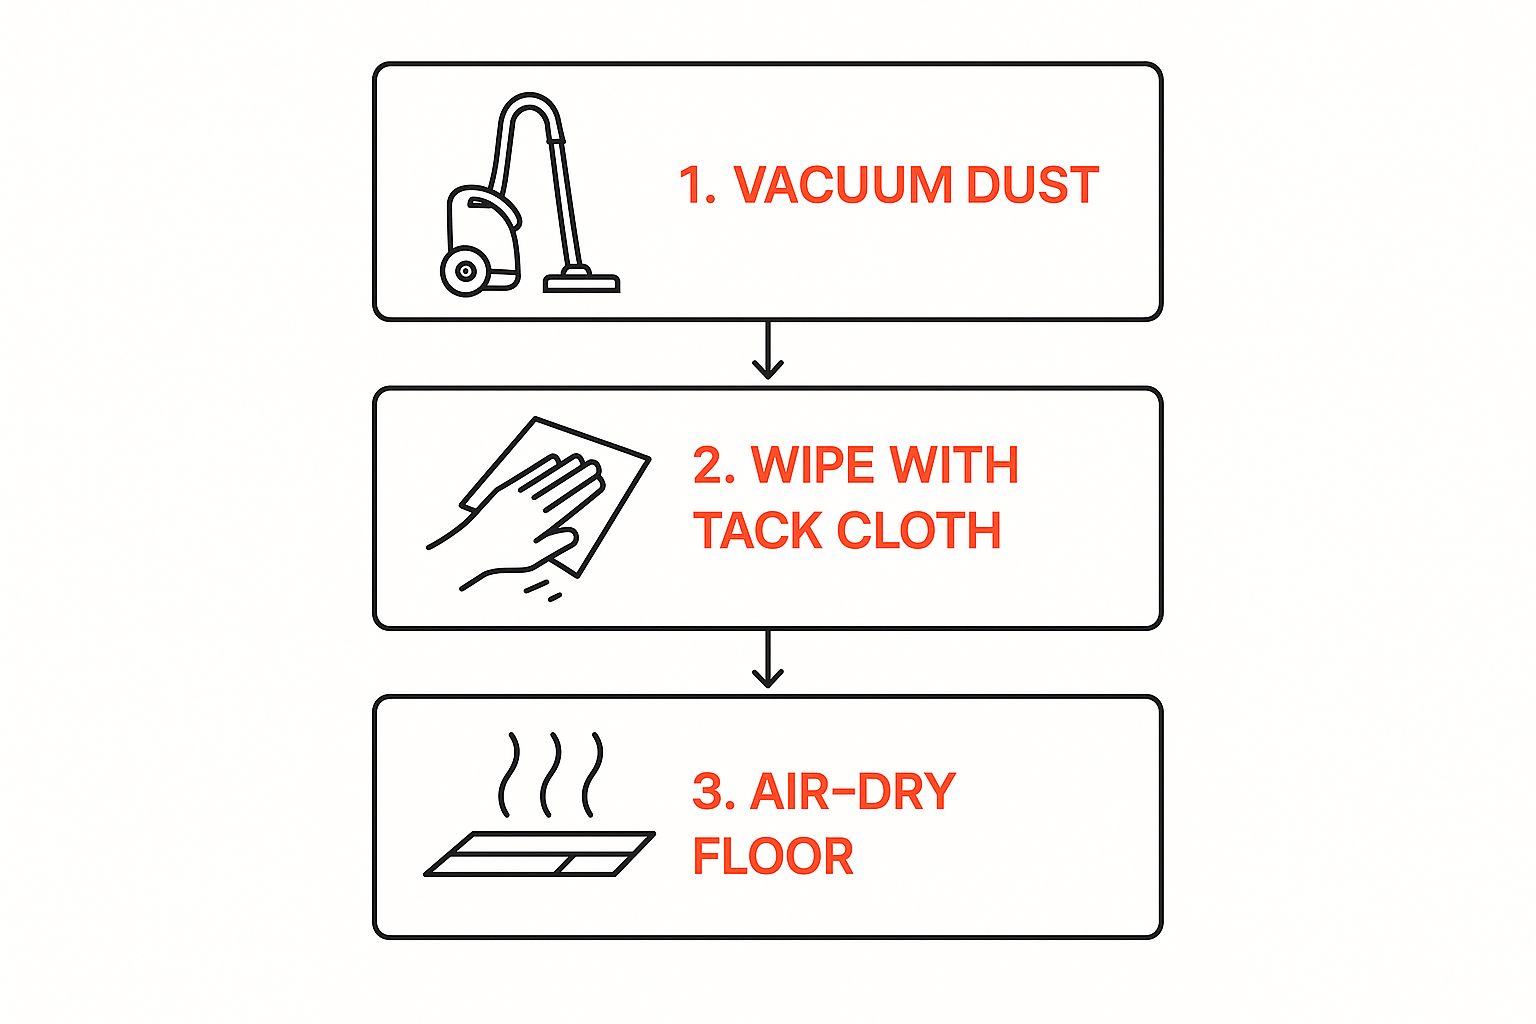
A dust-free environment is critical, which is why a thorough cleanup after the final sanding pass is a standard part of our process. It ensures no stray particles compromise the adhesion and clarity of the final finish coats. This meticulous attention to detail is what separates a good result from a great one.
The industry is definitely moving toward cleaner methods. With a 55% adoption rate of dustless technology among contractors and a 41% increase in demand for premium, durable finishes, homeowners are expecting a higher standard.
Ultimately, keeping your home pristine is our priority. Our dust containment also ensures that microscopic particles don’t get sucked into your home’s ventilation system. For total peace of mind after any renovation, it’s a great idea to consider professional HVAC system cleaning, which removes any residual dust from your ductwork. It’s the final touch that truly returns your home to a state of calm.
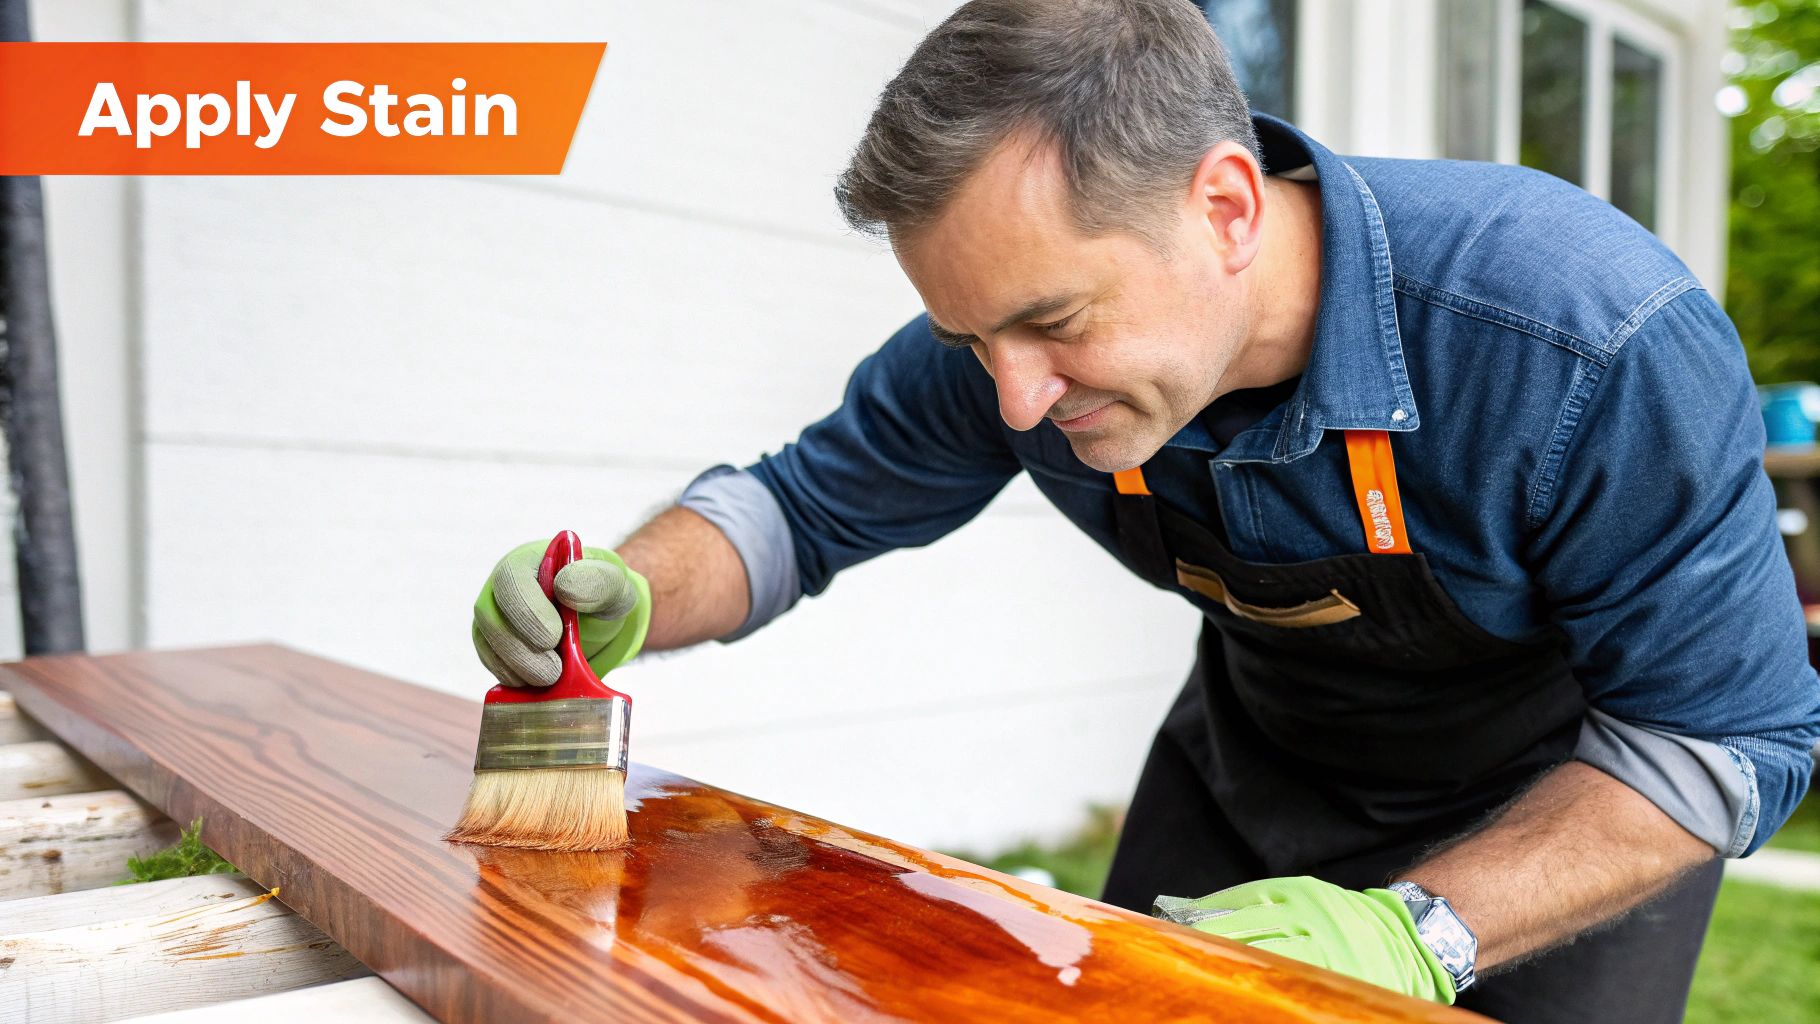
Choosing the Right Stain and Finish for Your Style
Now for the rewarding part. With the sanding done, you have a beautiful, raw wood canvas ready to be transformed. This is the moment we define the new personality of your floors and, indeed, your entire home. The stain and finish you choose will dictate everything from the color and sheen to how the floor feels under your feet and holds up over the years.
This decision is always a personal one, a balance between the look you’re dreaming of and the realities of your household. Whether you’re after that light, airy feel popular in coastal Newport Beach homes or a deep, rich tone for a more formal Irvine estate, finding the right products is what brings your vision to life. Let’s walk through the options.
Oil-Based vs. Water-Based Finishes
The first major decision is whether to go with an oil-based or a water-based polyurethane finish. Each one has its own personality, and there’s no single “best” choice—just the right one for your home and lifestyle.
An oil-based finish is the traditional choice for a reason. It soaks deep into the wood, giving it a rich, warm, amber glow that actually gets better with age. It’s known for being incredibly durable and a bit more forgiving to apply, creating a thick, protective layer. The trade-offs? It has a strong odor while it cures and takes longer to dry, which can add a day or two to the project.
Water-based finishes, on the other hand, are prized for being crystal clear. They don’t add an amber tint, so they preserve the natural, lighter color of the wood—perfect for modern and minimalist designs. These finishes have a very low odor, are lower in volatile organic compounds (VOCs), and dry much faster. We can often apply multiple coats in a single day. While older formulas had a reputation for lesser durability, today’s professional-grade water-based finishes are exceptionally tough and absolutely rival their oil-based cousins.
A Tale of Two Finishes: A Quick Comparison
Here’s a simple breakdown of how they stack up against each other.
| Feature | Oil-Based Polyurethane | Water-Based Polyurethane |
|---|---|---|
| Final Appearance | Rich, amber tone that deepens over time | Crystal clear, non-yellowing finish |
| Durability | Extremely durable, slightly softer finish | Very durable, harder surface finish |
| Drying Time | 8-12 hours between coats | 2-4 hours between coats |
| Odor/VOCs | High odor, higher VOC content | Low odor, lower VOC content |
| Best For | Traditional looks, high-traffic areas | Natural wood tones, modern designs |
The Sparkle Signature Test Swatch Process
Picking a stain color from a tiny chip at a big-box store is one of the biggest mistakes a homeowner can make. It never looks the same on your actual floor. Why? The final color is a combination of the stain, your specific wood species, its porosity, and the unique light in your home.
To eliminate guesswork, we take an essential step before committing. We apply several of your top stain choices in test patches, right there on your freshly sanded floor. Not on some random piece of wood, but in your room, where you’ll see it every day.
This simple but vital step lets you see exactly how each color interacts with your wood’s grain and how it looks in the bright morning sun versus under your evening lamps. It’s the only way to make a confident decision that you’ll be happy with for decades.
This is a cornerstone of our client-focused approach. It puts you in the driver’s seat and makes sure the final result is exactly what you envisioned.
Embracing Southern California Design Trends
While classic looks never go out of style, we see clear trends in the Orange County homes we service. The biggest shift has been a move away from once-dominant reddish stains toward more natural and contemporary palettes.
- Light & Natural: A clear, water-based finish over a light wood like white oak is immensely popular right now. It provides an airy, coastal vibe that makes any space feel bigger and brighter.
- Subtle Grays & “Greige”: Stains with gray undertones are fantastic for neutralizing the natural yellow in woods like red oak. The result is a sophisticated, modern look that works with almost any decor.
- Deep & Dramatic: You can never go wrong with a bold choice. Dark walnut or ebony stains create instant luxury and drama, providing a stunning contrast to light-colored walls and furniture.
Whether you need to match existing architectural details or you’re starting a complete redesign, we can help you find the perfect look. If this project is part of a larger update, exploring options for professional flooring sales and installation might give you even more inspiration for a cohesive home design. This is where your floor’s new story truly begins.
Applying the Final Coats for Lasting Protection
This is where all the hard work pays off. The final coats of polyurethane are what give your floors that stunning, liquid-smooth sheen and, more importantly, create the tough-as-nails shield that protects your investment from daily life. This step is an art form that requires a steady hand and a meticulous eye for detail.
This isn’t just about making the floors shine. We’re sealing in the beautiful stain color and protecting the raw wood from scuffs, spills, and the fading effects of UV light for years to come.
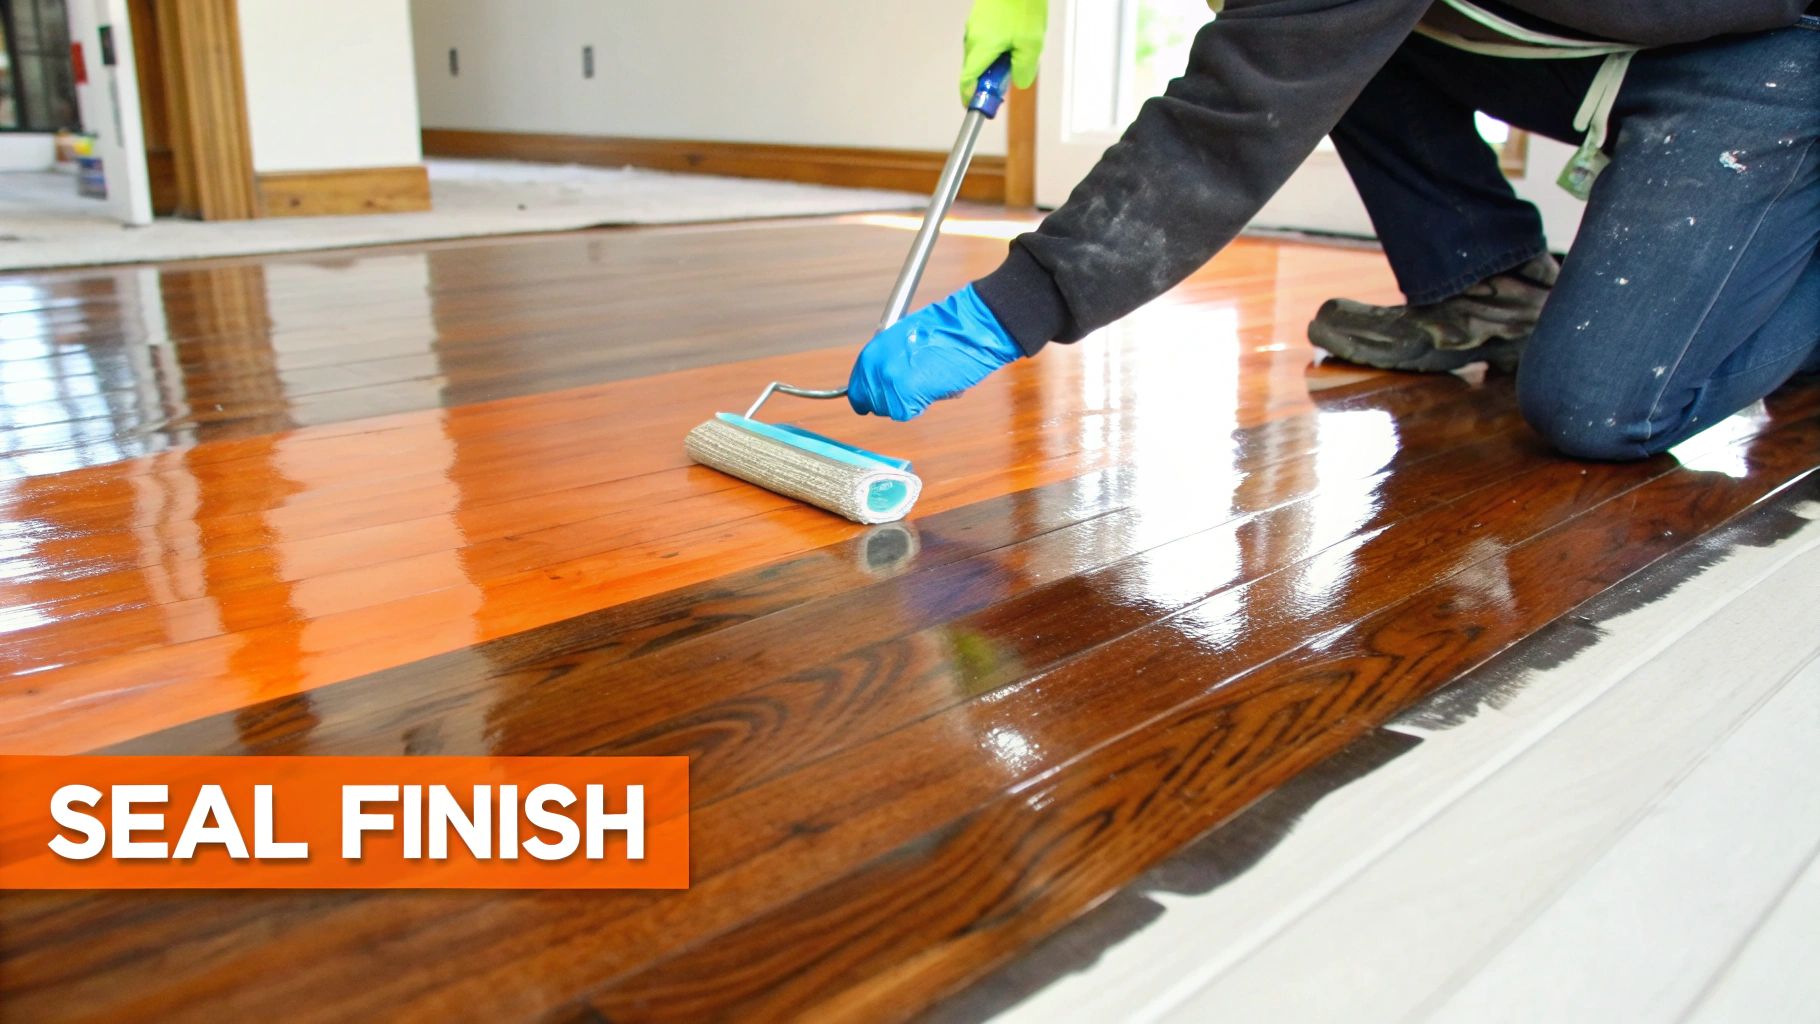
Our method, which is the industry gold standard, is to apply multiple thin, even coats. This builds a far more durable and visually flawless finish than one or two thick layers. A heavy coat is prone to bubbles, drips, and an uneven, plastic-like appearance.
This focus on quality and longevity reflects a broader trend. The global market for hardwood floor refinishing is projected to jump from USD 4.47 billion in 2024 to over USD 8.5 billion by 2034. A huge part of that is a shift towards sustainability; 62% of homeowners now prefer to restore their existing floors rather than replace them. They are also savvy about products, with 48% requesting high-quality, low-VOC options. You can explore more data in the latest market report from Business Research Insights.
Why We Screen Between Coats
To achieve a truly professional, high-end look, there’s a crucial step we never skip: screening between each coat of polyurethane. This involves lightly buffing the dried surface with a very fine-grit abrasive screen attached to a floor buffer.
Let’s be clear: this isn’t sanding. It’s a gentle but vital process that does two critical things:
- It builds a stronger bond. The light abrasion creates a microscopic texture on the surface, giving the next coat of polyurethane something to grab onto. This mechanical bond is key for long-term durability.
- It erases imperfections. Screening knocks down any tiny dust nibs, bubbles, or minor irregularities that might have settled into the previous coat. The result is a final surface that’s as smooth as glass.
This step is often skipped by less experienced crews, but it can lead to a weaker finish that might peel or flake down the road.
Understanding the Curing Process
Once the final coat is down, the waiting game begins. The floor needs time not just to dry, but to cure. Drying is when the solvents evaporate and the surface is no longer tacky. Curing, on the other hand, is the chemical process where the finish cross-links and hardens to its maximum strength—and that takes longer.
Adhering to this timeline is essential to protect your brand-new floors from damage.
Patience during the curing phase is non-negotiable. Rushing to move furniture back or lay down rugs can leave permanent indentations or trap solvents, ruining the finish before you’ve had a chance to enjoy it.
Here’s a practical timeline you can count on after we apply the final coat:
- After 24 Hours: You can typically walk on the floors, but in socks only. No shoes, and definitely no bare feet—the natural oils from your skin can interfere with the fresh finish.
- After 72 Hours: Light furniture can be carefully moved back. Every single piece must have new felt pads on its legs to prevent scratches. Nothing should be dragged across the floor.
- For 7 to 14 Days: Hold off on area rugs. Laying them down too soon can trap solvents, preventing the finish from hardening evenly and potentially leaving a permanent outline of the rug.
- After 30 Days: The polyurethane has finally reached its full cure and maximum hardness. Now you can get back to normal life, place your area rugs, and begin cleaning the floors with the proper maintenance routine.
Got Questions About Refinishing Hardwood Floors?
It’s completely normal to have questions before starting a project of this magnitude. To give you clarity and confidence, here are straightforward answers to the questions we hear most often from homeowners in Orange County. We believe in setting clear expectations from the start.
How Long Does The Refinishing Process Take?
For an average-sized project of about 300-500 square feet, you can expect the entire hardwood floor refinishing process to take between 3 to 5 days. This timeline allows us to perform each step correctly, without rushing.
Typically, day one is for preparation and the heavy sanding. Day two involves applying the stain and the first coat of protective finish. The following days are dedicated to adding more coats and allowing for crucial initial drying. Keep in mind, factors like high humidity or opting for a classic oil-based finish (which cures slower) can extend this timeline. We will always provide a firm schedule after our in-person consultation.
Can I Stay Home During The Project?
We strongly recommend you make other arrangements, at least during the sanding and coating phases. Even with our advanced dust-containment systems, there’s no getting around the disruption to your daily life.
More importantly, the fumes from stains and finishes can be strong, even with today’s low-VOC products. Giving the house space is not only better for your comfort and safety, but it also guarantees a perfect cure for the finish, free from any accidental footprints or settled dust.
Your peace of mind is our priority. A temporary relocation is the best way to ensure a stress-free experience for you and a flawless outcome for your floors.
What Is The Cost To Refinish Floors In Orange County?
The investment depends on several factors: the total square footage, the current condition of the wood, the complexity of the layout, and the stain and finish you choose. While a DIY approach might seem like a money-saver, a mistake with a drum sander or a blotchy stain can cause permanent damage, costing you far more in the long run.
Think of this as an investment in your home’s value. Professional floor refinishing is a significant part of the global floor services industry, which is expected to hit nearly USD 11.5 billion soon. Residential projects, like yours, account for over 50% of that demand. To deliver the best results, about 36% of professional firms have invested in superior equipment for cleaner, faster work, as highlighted in these industry trends and statistics. At Sparkle, we provide a detailed, transparent proposal after our consultation, so there are no surprises.
How Do I Care For My Newly Refinished Floors?
Once the job is done, proper care will keep your floors looking beautiful for decades. It comes down to a few simple habits.
- Let it cure: Hold off on putting down any area rugs for at least the first week to let the finish harden completely.
- Protect from scratches: This is the big one. Put soft felt pads on the feet of every single piece of furniture. It’s the easiest way to prevent gouges and scrapes.
- Clean the right way: Stick with a microfiber mop and a pH-neutral cleaner made specifically for hardwood. Never use vinegar and water, soap-based cleaners, or steam mops—they will damage your new finish over time.
- Stop dirt at the door: A high-quality mat at every entrance will catch the grit and tiny rocks that can act like sandpaper on your floors.
Following this simple routine is all it takes to protect your investment. If you have more questions, we have more answers on our comprehensive FAQ page.
Ready to bring back the natural beauty of your hardwood floors? The IICRC Master Certified experts at Sparkle Restoration Services are here to turn your vision into a reality with precision, care, and an unwavering commitment to excellence. As a Licensed General Contractor and BBB Torch Award Winner, we turn chaos into calm, fast.
Contact us today to schedule your complimentary, in-home consultation.
Schedule Your Free Consultation at sparklerestoration.com
Ready to create a space that’s as beautiful as it is functional? Schedule your complimentary design consultation today by visiting Ready to Work with Sparkle?