

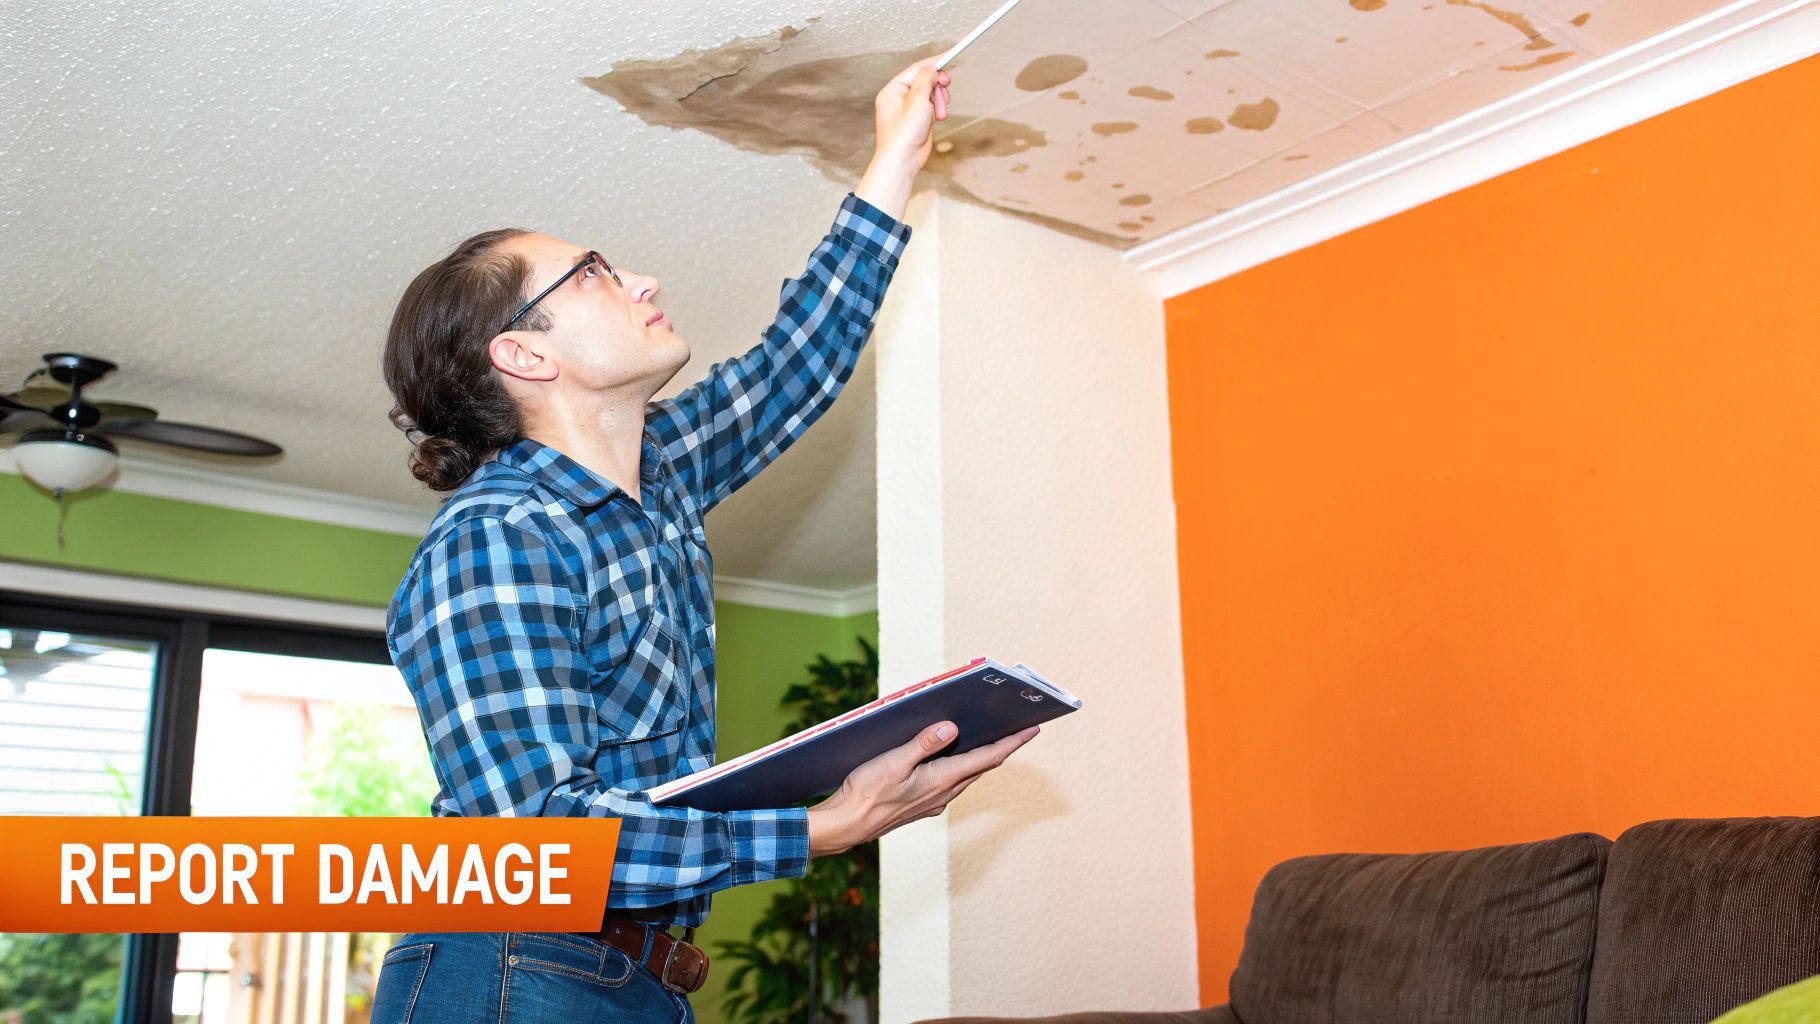
When you first discover damage to your property, the shock can feel paralyzing. But what you do in those first few moments is absolutely critical for the success of your home insurance claim process. Your first job is to make sure everyone is safe. After that, you need to stop the damage from getting any worse. As an IICRC Master Certified firm and licensed General Contractor serving Orange County, Sparkle Restoration Services understands that once the scene is secure, your next step is to start documenting everything with photos and notes—this becomes the bedrock of your entire claim.
What to Do Immediately After Home Damage Occurs
Discovering a burst pipe, fire damage, or storm destruction in your Orange County home is incredibly stressful. In that chaos, having a clear game plan is everything. The actions you take in that first hour can genuinely make or break your insurance settlement. The key is to shift from a state of shock into a proactive mindset, taking control to protect both your property and your path to financial recovery.
Prioritize Safety Above All Else
Before you even touch your insurance policy, you have to assess the danger.
- Evacuate if Necessary: If there’s any chance of structural collapse, electrical hazards from standing water, or lingering smoke, get everyone out of the house. Don’t hesitate.
- Shut Off Utilities: For water damage, find and turn off your main water valve. If you’re dealing with electrical issues or the aftermath of a fire, kill the power at the main circuit breaker, but only if it’s safe to get to it.
- Alert Authorities: Call 911 for any fire or major structural damage. Your safety is not something to gamble with.
Prevent Further Damage (Mitigation)
Once everyone is safe and the immediate danger has passed, your policy actually requires you to take “reasonable steps” to prevent the problem from escalating. This is what the insurance world calls mitigation.
For instance, if a storm smashes a window, you need to board it up to keep rain from pouring in and causing more damage inside. If a pipe has a minor leak, grabbing buckets to contain the water is a smart move. These are the kind of temporary, common-sense fixes you should be focused on. For bigger water problems, our guide on building a water emergency first aid kit has some great, practical tips you can use right away.
Expert Insight: This is a big one: do not start permanent repairs or throw away damaged belongings before the insurance adjuster has seen everything. Acting too soon can seriously jeopardize your claim. Your goal right now is temporary prevention, not a permanent fix.
To help you stay on track, we’ve created a simple checklist summarizing these crucial first steps. This table lays out what to do, why it’s so important for your claim, and a pro tip from our years of experience in the field.
Immediate Action Checklist After Property Damage
| Action Item | Why It’s Critical for Your Claim | Pro Tip from Sparkle Restoration |
|---|---|---|
| Ensure everyone is safe and evacuate if needed. | Safety is paramount. It also shows you acted responsibly in a crisis, which is important. | If you have to leave, grab your wallet, phone, keys, and any critical medications on your way out. Everything else can be replaced. |
| Shut off main water/gas/electrical supplies. | This is a key part of “mitigating damages.” Failing to do this could lead to the insurer arguing you let the damage worsen. | Take a quick video with your phone as you shut off the valves or breakers. It’s instant proof you took immediate action. |
| Notify your insurance company immediately. | This officially starts the clock on your claim and fulfills your policy’s requirement for prompt notification. | Don’t try to have all the answers. Just give them the basic facts: who you are, your policy number, what happened, and when. |
| Take extensive photos and videos of everything. | This is your primary evidence. You can’t have too many photos. Capture the big picture and the small details. | Get wide shots of the room, then zoom in on specific damage. Open cupboards, lift soggy carpet corners—document it all. |
| Make only temporary, emergency repairs. | Boarding a window or tarping a roof prevents more damage, which your policy requires. It shows due diligence. | Keep every single receipt for tarps, plywood, or supplies you buy for these temporary fixes. They are often reimbursable. |
| Do not throw anything away. | Your adjuster needs to see the damaged items to approve their replacement. Discarding them can lead to those items being denied. | If you absolutely must move items (e.g., soggy furniture), move them to another area like a garage, but don’t put them out for trash collection. |
Following these steps methodically will put you in the strongest possible position as you move forward with the claims process.
The infographic below gives you a bird’s-eye view of the four main stages you’ll go through, and it all starts with the documentation and mitigation steps you’re taking right now.
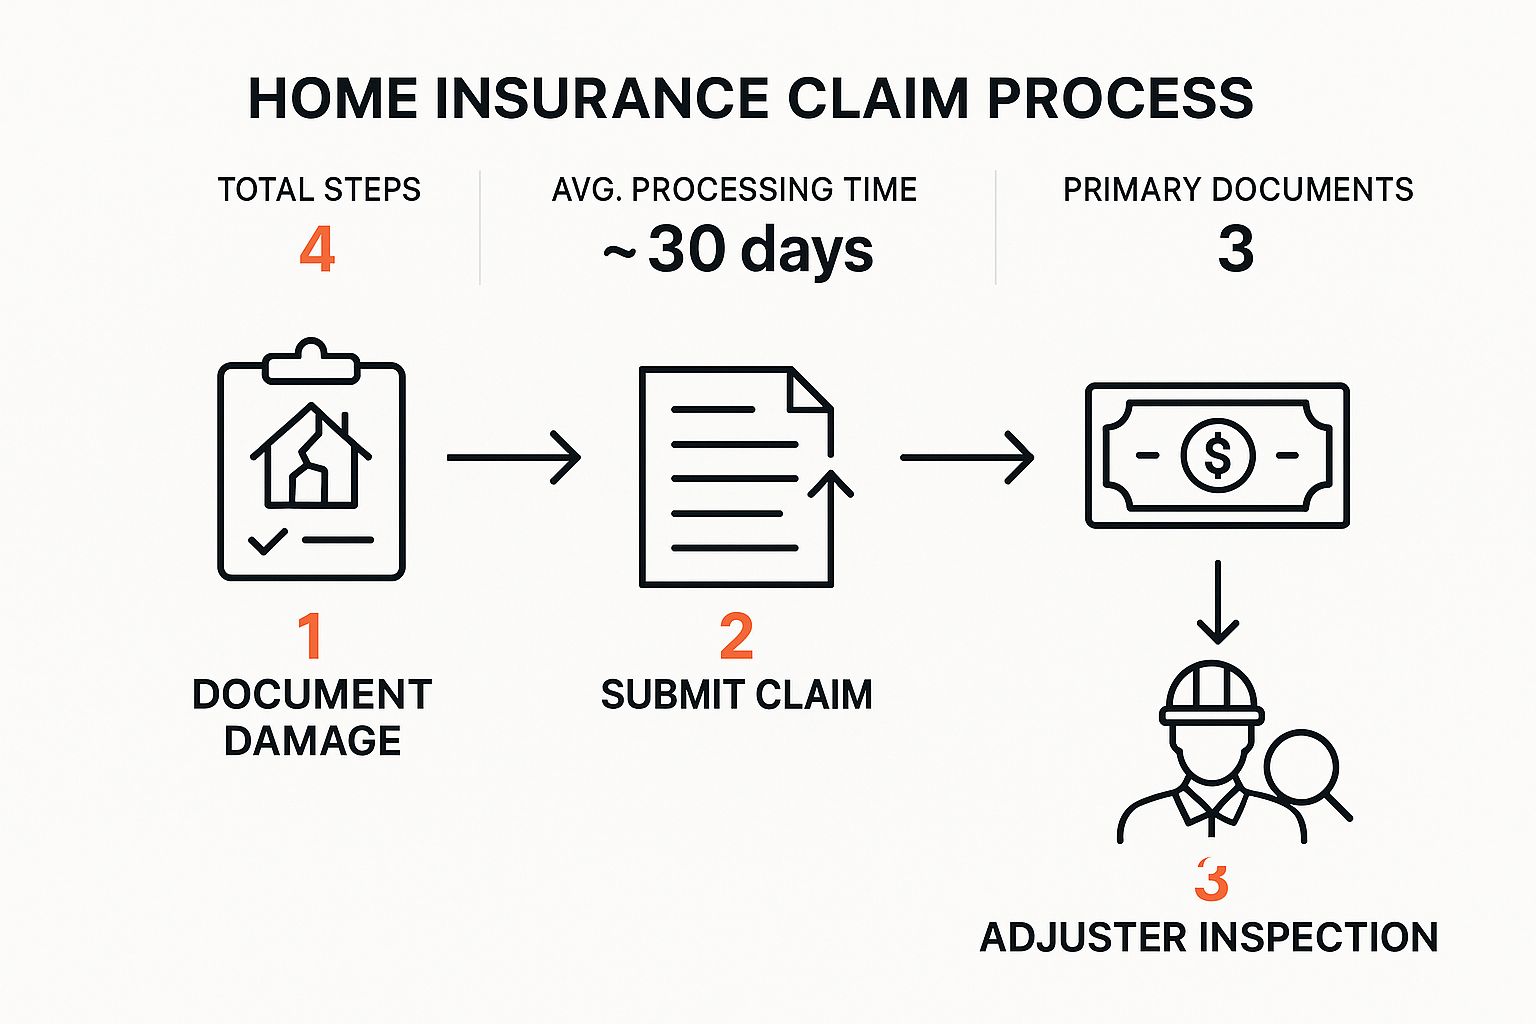
As you can see, even though the process has a clear path, its success hinges heavily on the quality of the information you gather at the very beginning.
Filing Your Claim and Communicating with Your Insurer
Once you’ve done what you can to secure the property and have a good initial record of the damage, it’s time to officially get the ball rolling on your home insurance claim process. This means calling your insurance company right away. Procrastination is not your friend here; most policies have a clause that requires you to give “prompt notice,” so making that call within 24 to 48 hours is the right first move.
When you do call, a little preparation goes a long way. Have your policy number handy, and be ready to give a straightforward, factual summary of what happened. Stick to the basics: when the incident occurred and the immediate damage you can see. This isn’t the time to guess about the cause or estimate the total cost of repairs. Just state the facts as you know them, calmly and clearly.
The Role of the Insurance Adjuster
After you’ve filed the claim, the insurance company will assign a claims adjuster to your case. Think of this person as the insurance company’s investigator. Their job is to look into the loss, figure out how much of the damage is covered by your policy, and ultimately come up with the settlement amount.
You’ll generally work with one of two kinds of adjusters:
- Staff Adjuster: This person is a direct employee of your insurance company.
- Independent Adjuster: This is a contractor the insurance company hires, often when they’re swamped with claims after a big event like a major storm in Orange County. They work for the insurer, not for you.
No matter who they are, their objective is the same. Your job is to arm them with the detailed documentation you’ve already started gathering. This ensures they get a full and accurate picture of what you’ve lost.
Navigating the First On-Site Inspection
The adjuster’s first visit to your home in Newport Beach or Irvine is a critical moment in the process. You absolutely need to be there for this inspection. By walking them through the property yourself, you can point out damage they might otherwise miss, like the faint signs of water seeping behind a baseboard or the subtle smell of smoke in a closet.
Have your photos, videos, and notes ready to share. Remember, this isn’t a showdown; it’s a collaborative effort to document the facts. Answer their questions honestly, but don’t speculate. If you don’t know something, it’s far better to say “I’m not sure” than to take a wild guess.
A Proactive Approach to Communication: Start a claim journal. It can be a simple notebook or a digital file. After every single interaction—phone call, email, or in-person meeting—log the date, time, who you spoke to, and a quick summary of what was discussed. This simple step creates a powerful record that keeps everyone accountable and prevents “he said, she said” issues down the line.
Keep your communication professional, but don’t be afraid to be persistent. A great habit is to follow up any phone conversation with a polite email that recaps the key points you discussed. By creating a clear, documented trail of communication, you’re building a solid foundation for a fair settlement and turning a stressful process into a manageable one.
Creating Undeniable Proof of Your Loss
When it comes to the home insurance claim process, thorough documentation is your single most powerful tool. After a disaster strikes, your main job is to build a detailed, undeniable record of your loss. This isn’t just about snapping a few quick pictures on your phone; it’s about creating a compelling case file that fully justifies every penny you’re claiming.
A meticulous approach here provides the solid evidence you need to get a fair and complete settlement. This is the moment you switch from reacting to the damage to proactively taking control of your recovery.

Go Beyond Photos with a Walkthrough Video
Still images are definitely important, but a walkthrough video tells a story that static pictures just can’t. Start right at your front door and move slowly through your home, narrating what you’re seeing. This technique really captures the full scope—and the emotional weight—of the damage.
As you film, make sure you do a few things:
- Narrate the Tour: Speak clearly about the damage in each room, and be sure to state the date and time. For instance, you might say, “It’s Tuesday at 2 PM, and I’m in the master bedroom. The ceiling has collapsed from water, and you can see the hardwood floors are completely soaked.”
- Capture Cause and Effect: If you can see where the problem started, like a burst pipe under the sink, film it. Then, pan out to show how the damage spread across the rest of the kitchen. It’s crucial to understand how water travels, and you can learn more by reading our guide on the sources of water damage.
- Don’t Forget the Senses: Describe things you can’t see in a photo. Talk about the smells, like smoke or mildew, and any sounds you hear, like dripping water. These details add a powerful layer of context that helps an adjuster, who isn’t there in person, truly grasp the situation.
This video becomes one of your most powerful pieces of evidence, weaving together a complete story of what happened.
Build a Detailed Inventory of Damaged Property
Next up, it’s time to create an itemized list of every single personal item that was damaged. For homeowners in communities like Newport Beach or Irvine, this can be a pretty big job, often involving high-value items, so being precise is everything. An organized spreadsheet is your best friend for this task.
Your inventory should have columns for these key details:
- Item Description: Be as specific as you can (e.g., “Samsung 65-inch QLED 4K Smart TV,” not just “TV”).
- Brand & Model Number: Include it if you can find it.
- Estimated Age: Be honest and as accurate as possible.
- Original Cost: Dig up old receipts or check credit card statements if you have them.
- Estimated Replacement Cost: Do a quick search online to find out what it would cost to buy a new, comparable item today.
Expert Tip: Whatever you do, don’t throw anything away until the adjuster has seen it. If you absolutely have to move things, store them in the garage or another dry area of your home. Discarding damaged property before it’s been assessed is one of the quickest ways to get that part of your claim denied.
Save Every Single Receipt
Finally, you need to become a fanatic about record-keeping for any expenses you rack up because of the loss. This means everything from the plywood you bought for temporary repairs to hotel bills if your home is unlivable. These costs are often covered under the “Additional Living Expenses” (ALE) part of your policy.
Keep a dedicated folder for all your receipts, no matter how small they seem. This organized financial trail proves the full monetary impact of the event and is absolutely essential for getting fully reimbursed.
Negotiating a Fair Settlement with Your Adjuster
The on-site meeting with your insurance adjuster is a pivotal moment in your entire home insurance claim process. This is where all your hard work documenting the damage comes face-to-face with their professional assessment. How you prepare for this meeting can make a huge difference in the fairness and accuracy of your initial settlement offer.
When the adjuster arrives at your Orange County home, make sure you’re there to walk them through everything. Don’t just hand them a stack of photos and hope for the best. Guide them personally through the damaged areas. You know your home better than anyone. Point out the subtle things they might miss—the slight warping of a cabinet near a water leak, the faint smell of smoke still trapped in the insulation, or the water stains creeping up behind a baseboard. These details matter.
Understanding the Settlement Offer
Once the inspection is done, the adjuster will put together a settlement offer. This isn’t just one big number; it’s broken down into different parts, and you need to understand what each one means before you can know if the offer is fair.
- Structural Repairs (Dwelling Coverage): This is the money to cover the labor and materials needed to fix the physical structure of your house—think drywall, flooring, roofing, and electrical work.
- Personal Property (Contents Coverage): This portion is for replacing your damaged belongings, from furniture and electronics to clothing and kitchenware. How this is calculated depends on whether you have a Replacement Cost Value (RCV) or Actual Cash Value (ACV) policy.
- Additional Living Expenses (ALE): If your home is unlivable while repairs are being made, this covers the extra costs you incur for things like temporary housing, meals out, and other essentials that go beyond your normal budget.
When the Initial Offer Is Too Low
It’s actually pretty common for the first settlement offer to feel too low. Don’t panic. Insurance adjusters handle a high volume of claims and often rely on standardized pricing software that might not accurately reflect the cost of materials and labor for high-end finishes common in places like Newport Beach or Irvine.
If their numbers don’t match yours, you don’t have to accept the offer. This is where you transition from documenting to negotiating. Calmly and politely let the adjuster know that you believe their estimate is insufficient and explain exactly why. This is your chance to present the estimates you got from your own contractors and show them the detailed replacement costs from your personal property inventory. A calm, fact-based discussion will get you much further than an emotional argument.
Know Your Rights as a Policyholder: Insurance companies have to follow specific laws and regulations designed to protect you. Knowing what these rules are gives you a major advantage during negotiations. For a closer look, you can learn more about your rights as a policyholder to make sure you’re being treated fairly.
Bringing in an Expert Advocate
If you hit a wall in negotiations or just feel like the claim has gotten too complex, it’s time to call in a professional. An experienced, IICRC Master Certified firm like Sparkle Restoration can act as your expert advocate. We can create an independent, line-by-line estimate that uses real, local costs for labor and materials.
We’ll review the adjuster’s scope of work and pinpoint anything they missed or underestimated. As a licensed General Contractor with a reputation for integrity—backed by our BBB Torch Award for Ethics—our detailed assessment carries a lot of weight. We become your expert second opinion, providing the hard evidence you need to justify a higher, more accurate settlement that will truly cover the cost of bringing your home back to the way it was.
Choosing the Right Contractor for Your Restoration
Once you have a settlement check in hand, you move into the next phase of the home insurance claim process: the actual, physical restoration of your home. This is where you switch gears from paperwork and documentation to reconstruction. It’s also where you’ll make one of the most critical decisions of the entire process—choosing the right contractor.
Your insurance company will likely offer you a list of their “preferred vendors.” While this might look like a helpful shortcut, it’s vital to understand the dynamic at play. These are contractors who have an ongoing relationship with the insurer, which can sometimes mean their focus is more on speed and cost-cutting than on the custom, high-quality work an Orange County homeowner rightfully expects.
A Crucial Distinction: An insurer’s preferred vendor works for the insurance company. Your contractor should work for you. You have the absolute right to choose your own licensed general contractor, one whose primary loyalty is to you and your vision for the restored property.
Decoding Repair Estimates
You’ll probably be looking at a few different estimates from the adjuster and the contractors you’re considering. These documents can be dense and confusing, but you can make sense of them if you know what to look for. A good estimate is much more than a final number; it should be a detailed, line-by-line breakdown of the entire job.
Here’s what to look for:
- Materials: What grade of drywall are they planning to use? What type of flooring or brand of paint? Vague terms like “standard grade” can be a red flag that they’re using builder-grade materials.
- Labor: How many hours are they budgeting for each part of the job, from demolition all the way to the final touches?
- Contingencies: Does the estimate include a plan for potential hidden damage? You never know what you’ll find when you open up a wall, and a good contractor accounts for that possibility.
Comparing these estimates isn’t just about finding the lowest price. It’s about making sure the scope of work is complete and matches the quality your home deserves.
The Sparkle Advantage in Restoration

When you choose an IICRC Master Certified firm and licensed General Contractor like Sparkle Restoration, you aren’t just hiring a builder—you’re getting an advocate. Our team is trained to see the details others might miss, ensuring every part of the restoration is accounted for from the very beginning.
We’ve seen time and again how a well-managed project can turn a deeply stressful situation into a smooth recovery.
When it comes to specialized repairs, like a broken automatic gate, you need a qualified professional who understands the specific mechanics. It’s always a good idea to research finding trusted repair services for specific damaged components to ensure the job is done right.
By partnering with a credentialed, client-focused contractor, you guarantee the integrity of every single repair. You’re not just restoring your property; you’re restoring your peace of mind.
Got Questions About Your Home Insurance Claim? We’ve Got Answers.
Even if you’ve done everything right, the whole home insurance claim process can feel like a maze. It’s totally normal to have questions swirling around your head, especially when you’re dealing with the stress of a damaged home here in Orange County. Let’s tackle some of the most common concerns we hear from homeowners just like you.
How Long is This Actually Going to Take?
This is the big one, right? The honest answer is: it depends. But there are some timelines baked into California law. Once you’ve filed, state regulations give your insurance company 15 calendar days just to acknowledge they’ve received your claim and start looking into it. After they have everything they need to make a decision, they have 40 days to either pay or deny the claim.
In our experience, a straightforward claim, like a burst pipe in an Irvine condo, might wrap up in a few weeks. But for something more complicated, like significant fire or storm damage in a Newport Beach estate, you could be looking at several months. The best thing you can do to speed things up is to be hyper-organized and respond to their requests right away.
They Sent a Check. Should I Cash It?
Seeing that first check arrive can feel like a massive weight has been lifted. But hold on a second. It’s really important to know exactly what that check is for. If it’s marked as a “full and final payment,” cashing it could legally be interpreted as you accepting their offer. That might slam the door shut on any further negotiations.
Expert Advice: Before you even think about depositing a check, get confirmation from your adjuster—in writing—that it’s just a partial payment for the damages everyone agrees on. This simple step protects your right to ask for more money if a contractor finds hidden damage later or if the repair costs end up being higher than the initial estimate.
Will My Rates Go Up if I File a Claim?
This is a perfectly valid worry. Filing a single claim, especially for something you couldn’t control like a storm, probably won’t affect your premiums. The red flag for insurers is multiple claims in a short time frame—think two or more within about three years. That pattern can signal you’re a higher risk, and that’s when you might see a rate hike or even a non-renewal notice.
It’s a balancing act. If you have some minor damage that will cost less than your deductible to fix, it often makes financial sense to just pay for it yourself. But for major losses? That’s the whole reason you pay for insurance in the first place. Don’t let the fear of a potential premium increase stop you from using your policy when you really need it.
When you’re facing the chaos of a damaged home, you need an expert team to restore order and make sure you’re treated fairly. That’s where Sparkle Restoration Services comes in. Our IICRC Master Certified professionals manage your entire project with integrity, turning a stressful situation into a calm, controlled process. Contact us today for a complimentary consultation.
Ready to create a space that’s as beautiful as it is functional? Schedule your complimentary design consultation today by visiting Ready to Work with Sparkle?