
When you discover dark, unsightly soot streaks on your walls, your first instinct might be to grab a wet cloth and start scrubbing. As an IICRC Master Certified restoration firm, we can tell you this is the biggest—and most costly—mistake a homeowner can make.
Soot isn’t like regular dust; it’s an oily, greasy, and acidic residue. Wiping it with water or a standard household cleaner will instantly smear the mess, pushing the fine black particles deeper into the pores of your paint and drywall. What was a surface-level problem can quickly become a permanent stain, turning a simple cleanup into a complex restoration project.
Your First Moves When You Find Soot on Walls
Whether it’s from a candle left burning too long or a furnace “puff-back” that left a fine layer of grime, the initial moments are about damage control, not aggressive cleaning. Before you even think about touching the wall, your focus should be on safety and preparation.
Soot particles are microscopic and can easily become airborne, posing a risk to your respiratory system and indoor air quality. Taking a few minutes to properly prepare the area will protect your health and prevent the mess from spreading throughout your Orange County home.
Prioritize Safety and Preparation
Creating a safe, contained workspace is non-negotiable for any restoration project. This isn’t just about being careful; it’s about preventing a small problem from turning into a much larger one that requires professional intervention.
- Ventilate the Area: Open windows and doors to create cross-ventilation. This helps clear out lingering airborne particles and reduces the tell-tale smokey smell.
- Wear Personal Protective Equipment (PPE): At a minimum, you’ll need gloves, safety goggles, and a high-quality N95 respirator mask. Soot is acidic and can irritate your skin, and you definitely don’t want to breathe in those fine particles.
- Protect Your Belongings: Soot gets everywhere. Cover your furniture, floors, and anything else in the room with drop cloths or plastic sheeting. During cleaning, particles will fall, and this step will save you a significant cleanup headache later.
The Essential First Cleaning Step
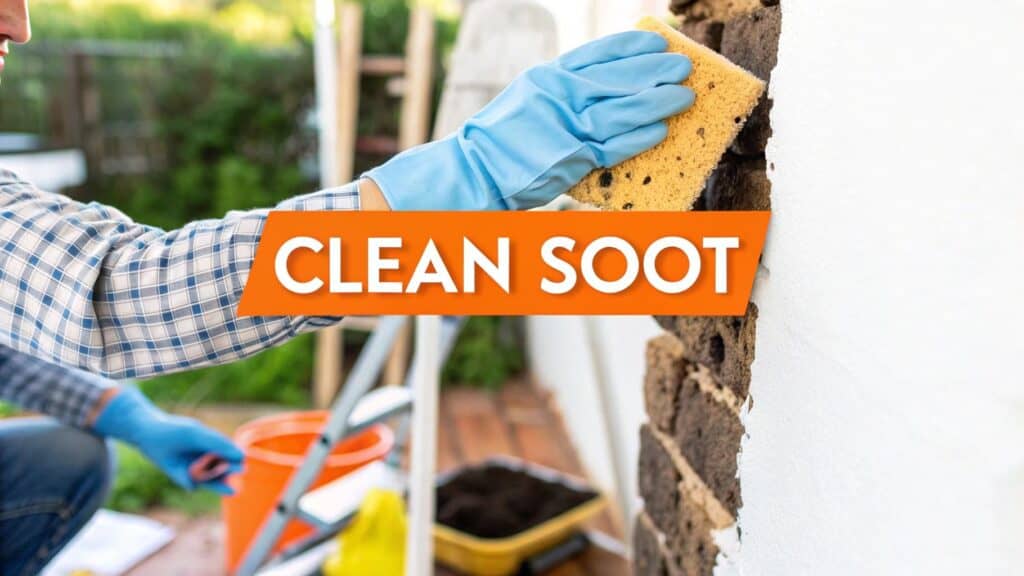
The professional standard for the first pass on a sooty wall is always a dry method. This is where a dry cleaning sponge, often called a chemical sponge, is your most valuable tool.
These aren’t your typical kitchen sponges. They’re made of a special vulcanized rubber designed specifically to grab and lift soot, smoke, and dirt without any liquid.
Expert Insight: Think of a dry cleaning sponge as a giant eraser for soot. Its unique texture gently plucks the fine, oily particles right off the surface. The trick is to use straight, slightly overlapping strokes with very little pressure. Let the sponge do the work.
Before you start, it’s a good idea to have a quick reference for best practices. Many homeowners make simple mistakes in the first few minutes that can make the cleanup much harder.
Initial Soot Cleaning Do’s and Don’ts
| Action | Why It’s Important |
|---|---|
| DO use a dry cleaning sponge first. | It lifts loose, oily soot without smearing it into the wall’s surface. |
| DON’T use water or liquid cleaners initially. | This will turn the soot into a greasy, permanent stain that’s much harder to remove. |
| DO wear proper safety gear (mask, gloves, goggles). | Soot particles are harmful if inhaled and can irritate skin and eyes. |
| DON’T apply heavy pressure or scrub aggressively. | This pushes soot deeper into porous materials like drywall and paint. |
| DO vacuum loose soot with a brush attachment. | Gently vacuuming removes the loosest particles before you even touch the wall. |
| DON’T use a standard household sponge or rag. | These materials will just smear the soot and make the problem significantly worse. |
This crucial first pass with the sponge removes the bulk of the loose residue. For a very minor soot issue, this might be all you need. For anything more substantial, this dry-cleaning step is the essential foundation for any wet cleaning that follows. If you’re looking at widespread damage, understanding Sparkle’s variety of services can help you decide if it’s time to call in the professionals.
Proven DIY Soot Cleaning Methods That Work
Once you’ve tackled the loose, powdery soot with a dry cleaning sponge, you’re often left with a stubborn, oily film clinging to the wall. This is where you bring in the wet cleaning process. For minor stains, a simple DIY solution can work wonders, but your technique is everything. Get it wrong, and you can actually make the damage worse.
The goal is to gently dissolve that greasy residue without damaging the paint. I’ve seen it happen countless times—a homeowner in Orange County gets frustrated, grabs the harshest chemical cleaner they can find, and ends up stripping the paint or leaving a dull, patchy mess behind.
Crafting a Gentle Yet Effective Cleaning Solution
Your best bet for a gentle cleaner is likely already in your kitchen. A good quality dish soap is designed to cut through grease without being abrasive, which makes it perfect for this kind of job.
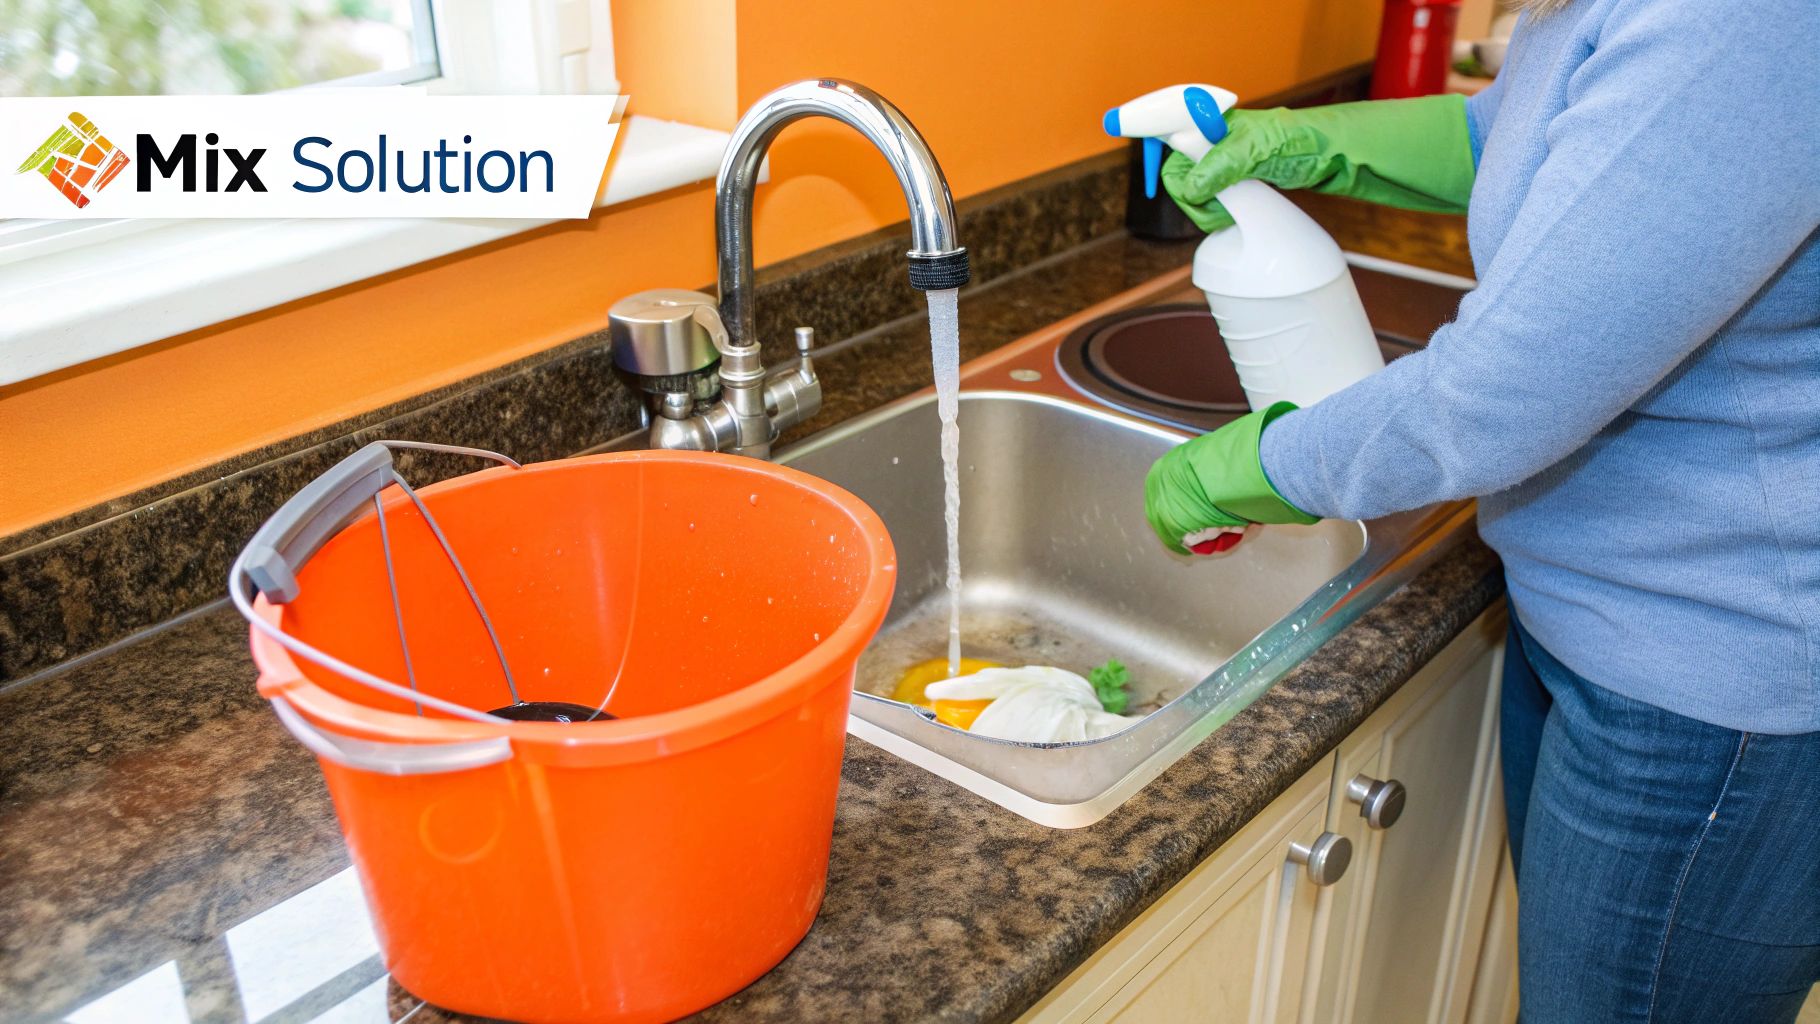
Here’s the simple mixture we often recommend for an initial wet-cleaning attempt:
- Mix a small amount—about one teaspoon—of a quality degreasing dish soap into a gallon of warm water.
- Stir it gently until the soap dissolves. Avoid whipping it into a sudsy mess.
This mild solution is often all you need to lift the remaining soot film.
For tougher jobs, Trisodium Phosphate (TSP) is the next step up. If you go this route, mix 1 tablespoon of TSP per gallon of warm water. You can increase it to 2 tablespoons for severe stains, but do not exceed this amount. Any more can dull or even damage your paint, so measure carefully. For more details on using TSP safely, the University of Georgia Extension has a great guide on stain removal worth reviewing.
Before you tackle the entire wall, it is absolutely essential to test your solution on a small, inconspicuous area. Pick a spot behind a sofa or inside a closet. This small test ensures the paint won’t react poorly before you commit to the entire wall.
Sparkle Pro Tip: Always clean walls from the bottom up. If you start at the top, dirty water will run down and create clean streaks that are a real headache to remove later. Working from the base of the wall upward prevents this streaking and ensures a much more uniform, professional-looking finish.
The Correct Rinsing Technique
How you rinse is just as critical as how you clean. Leaving soap residue behind creates a sticky surface that attracts new dirt, and you’ll be dealing with another problem down the line.
You’ll want two buckets for this: one for your cleaning solution and one with clean, plain water for rinsing.
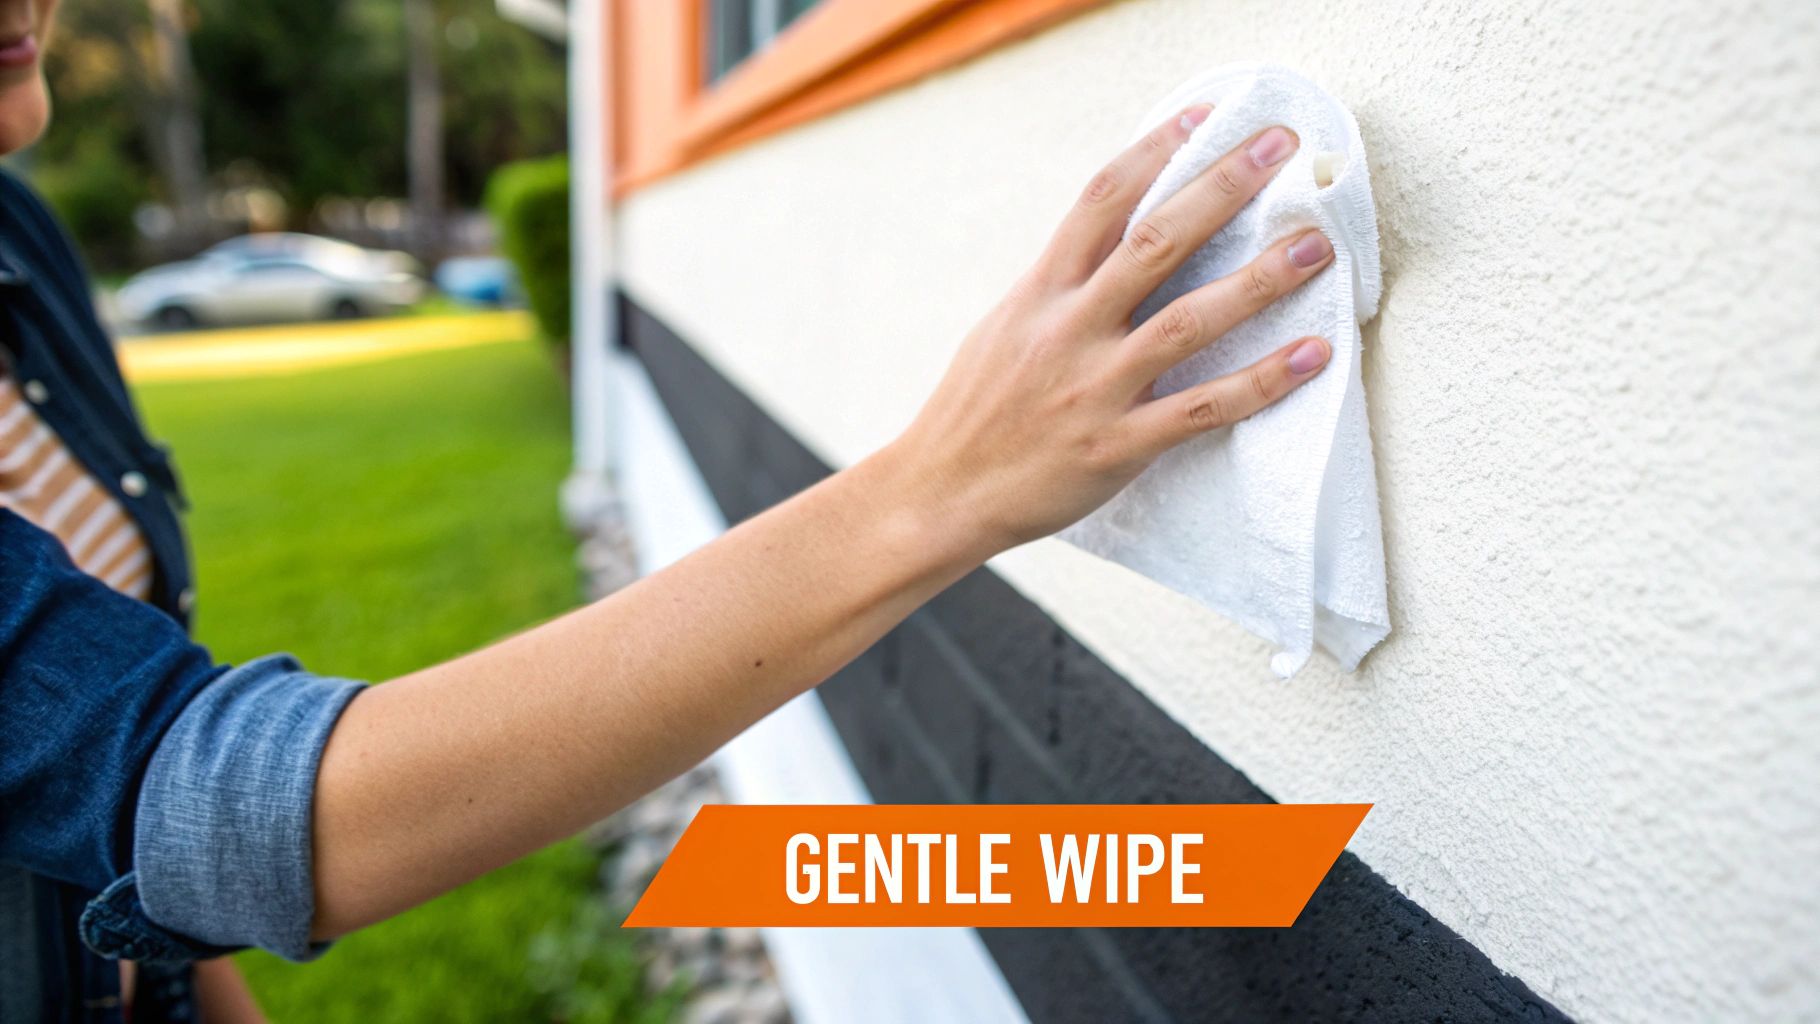
- Dip a clean sponge or microfiber cloth into your soap mixture, wring it out so it’s damp (not dripping), and gently wipe a small section.
- Immediately, grab a second sponge, dip it in the clean rinse water, wring it out thoroughly, and wipe away the soap residue.
- Finish by patting the area dry with a clean, dry towel.
Keep a close eye on your rinse water. The second it starts looking murky, dump it and get fresh water. If you don’t, you’re essentially just smearing a thin layer of soot back onto the wall. This detail separates a DIY job from a professional-grade result.
Safety is critical, even with a mild soap solution. This quick visual guide shows the personal protective equipment (PPE) you should be wearing, without exception.
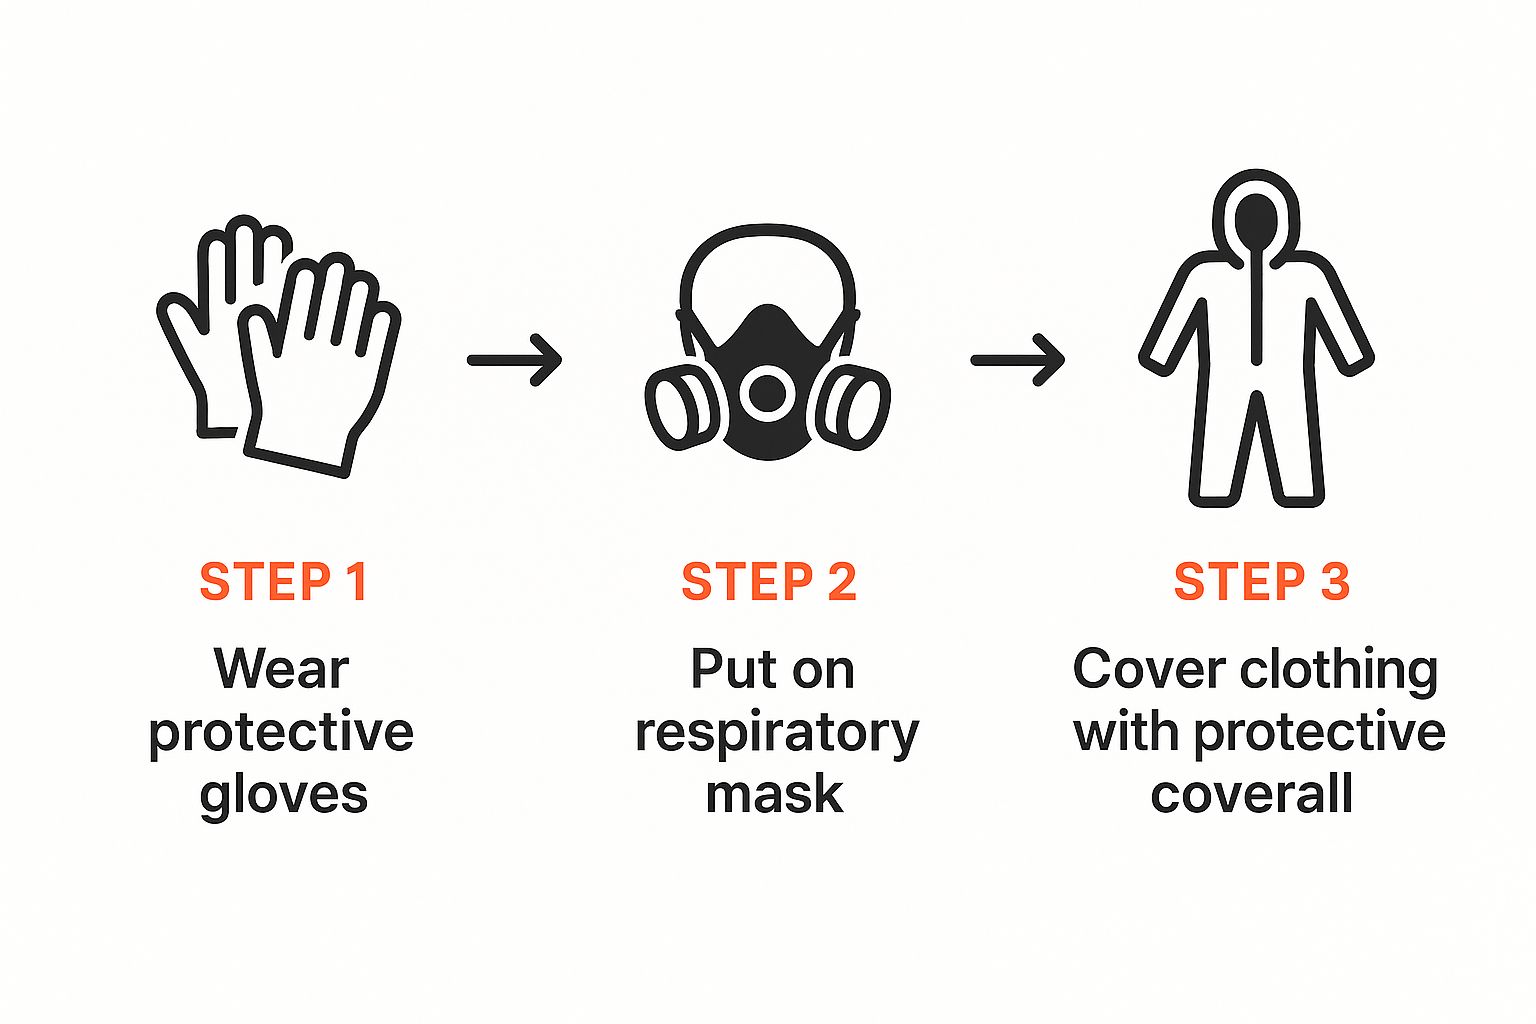
This shows exactly what’s needed to protect your skin, lungs, and clothes from fine soot particles.
As you clean, also be mindful of introducing excess moisture. Lingering dampness can create a whole new set of problems, including mold growth. To see how quickly moisture can affect your home’s air quality, you can learn more from our insights on professional mold remediation.
The Pro Tools and Techniques for Soot Removal
It’s a common scenario we encounter in communities like Irvine and Newport Beach: a homeowner tries their best to clean up after a small fire, but the soot stains and smoky smell just won’t go away. This is usually where frustration sets in, because significant soot damage goes far beyond a simple surface stain. This is exactly where professional-grade tools and techniques make all the difference, turning a seemingly impossible job into a complete restoration.
A classic mistake is grabbing a standard household vacuum to tackle heavy soot. This almost always makes the situation worse. Your typical vacuum lacks the filtration needed to trap microscopic soot particles. Instead, it sucks them up and shoots them right back into the air, effectively spreading contaminants throughout your home.
High-Efficiency Particulate Air (HEPA) Filtration
Our IICRC-certified technicians never arrive without vacuums equipped with High-Efficiency Particulate Air (HEPA) filters. This isn’t just a minor upgrade; it’s the single most critical piece of equipment for ensuring the air in your home is truly clean and safe again.
Soot particles are highly acidic and can corrode electronics and embed themselves deep into porous surfaces if not handled correctly. Professionals use HEPA-filter vacuums because they are engineered to capture over 99.97% of airborne particles down to a minuscule 0.3 microns. This prevents the soot from becoming airborne again, protecting your family and your property. You can learn more about the science behind professional soot cleanup on Belfor.com.
This level of filtration is absolutely essential for restoring your home’s indoor air quality and stopping the hidden, long-term damage soot can cause.
Turning Chaos Into Calm: After a fire, the air itself needs to be cleaned. It’s not just about what you can see on the walls. Restoring healthy indoor air quality is just as important as removing the visible stains, and that requires specialized equipment and expertise.
Advanced Odor and Air Quality Control
Even after every visible speck of soot is gone, that persistent smoky smell often lingers. The odor comes from microscopic particles that have embedded themselves deep into drywall, wood, and fabrics. Spraying air fresheners is like putting a band-aid on a broken leg—it’s a temporary fix at best.
To eliminate the odor for good, our teams utilize advanced restoration technology:
- Air Scrubbers: These industrial-strength air purifiers are strategically placed in the affected area, where they continuously pull air through a series of filters—including both HEPA and activated carbon—to trap odor-causing molecules and other pollutants.
- Thermal Foggers: For the most stubborn, deeply embedded odors, thermal fogging is the ultimate solution. This technique heats a powerful deodorizing agent into a fine mist, or “fog.” This fog behaves just like the original smoke, penetrating into the same tiny cracks and porous surfaces to neutralize odor molecules at their source.
By using these advanced tools, we don’t just clean the soot from your walls—we restore your home’s entire environment, ensuring it is safe, clean, and completely free from any reminders of the damage.
Cleaning Soot From Different Types of Walls
Here’s something I’ve learned from years of experience in fire damage restoration: soot isn’t just soot, and a wall isn’t just a wall. The technique that makes a semi-gloss kitchen wall look brand new could completely destroy delicate wallpaper or a flat matte finish in a bedroom.
Getting this right is all about understanding what you’re up against. Using the wrong method in your Orange County home won’t just fail to clean the wall—it can make the problem much, much worse.
Before you touch that wall, you need to identify what kind of soot you’re dealing with. It generally falls into two categories, and each demands a different approach.
- Dry, Powdery Soot: This is the result of a fast-burning fire with plenty of oxygen, like a wood fire. It’s finer, less sticky, and usually responds well to dry methods like HEPA vacuuming and a chemical sponge.
- Oily, Greasy Soot: This is the nasty, sticky residue from a slow, smoldering fire that lacked sufficient oxygen—think burning plastics or rubber. This type smears easily and almost always requires a wet cleaning approach with a professional-grade degreasing agent.
Working With Different Paint Finishes
The sheen of your paint is a huge factor in how to clean soot from walls. A glossier paint has a tighter molecular structure, making it naturally more resistant to moisture and stains.
A flat or matte finish is your most delicate surface. It’s highly porous, and if you scrub too hard or use harsh chemicals, you’ll remove the paint right along with the soot. Always start with the gentlest tool—a dry chemical sponge. If that doesn’t work, you can try a very mild, heavily diluted cleaner, but always test it on a hidden spot first.
Eggshell and satin finishes offer a bit more durability. These can usually handle a mild degreasing solution, but gentle application is key. Avoid abrasive sponges or cloths that can scratch the finish and leave a dull patch.
Semi-gloss and gloss paints are the most resilient. Typically found in kitchens and bathrooms, their non-porous surface makes it difficult for oily soot to get a grip, and they can handle more robust cleaning without showing damage.
How to Handle Wallpaper and Textured Surfaces
Wallpaper is extremely tricky. Water can easily get behind the seams and cause peeling, or it can discolor the paper itself. For most types of wallpaper, a dry chemical sponge is the only DIY method we would ever recommend. If stains remain, it’s time to call a professional before causing irreversible damage.
Textured ceilings, like the classic “popcorn” style, are another challenge. The rough surface is a magnet for soot particles, and wiping at it will just break off chunks of the texture. The best approach is a HEPA-filter vacuum with a soft brush attachment to gently lift the soot. If that doesn’t work, professional intervention is necessary to avoid damaging the ceiling.
Expert Insight: In our experience, moisture is the biggest enemy of soot-covered porous surfaces. Introducing water too early can turn a manageable cleanup into a complex restoration project, especially if it leads to secondary issues like mold. We’ve seen cases where improper cleaning techniques have caused more problems than the initial fire, a situation we address often in our comprehensive water damage restoration services in Orange County.
Knowing your wall type and the kind of soot you’re facing empowers you to make the right call, protecting your home and preventing a small issue from becoming a major headache.
Knowing When to Call a Restoration Professional
While a proactive attitude is great for tackling minor soot stains, one of the most important skills in any home project is knowing your limits. Recognizing when it’s time to put down the sponge and call a certified expert can save you from bigger headaches, permanent damage, and even health risks down the road.
Some situations are clear indicators that the job has grown beyond a simple weekend task. If you’re seeing any of these red flags, it’s time to call in an IICRC-certified professional who handles these situations every day.
Signs the Soot Damage Requires an Expert
The line between a manageable cleanup and a hazardous restoration project is often finer than people think. Certain types of soot damage come with hidden complexities that only trained technicians can safely and effectively handle.
You should contact a professional restoration company if you encounter any of these scenarios:
- Widespread Contamination: If soot has spread to multiple rooms or covers large surface areas—from a kitchen fire or furnace puff-back—the scope is too large and complex for DIY methods.
- Persistent Smoke Odor: A lingering smoky smell is a clear sign that odor-causing particles have penetrated deep into porous materials like drywall, insulation, and your home’s wood framing.
- Soot on Delicate Surfaces: Attempting to clean soot from wallpaper, unsealed wood, or textured “popcorn” ceilings can permanently ruin them without the right techniques and products.
- Structural Concerns: If you see any charring, blistering, or warping on the walls, that’s a major warning sign. The heat may have compromised the structural integrity behind the surface.
When soot damage is this extensive, or the job requires specialized equipment, your best and safest option is to call in the experts. It helps to understand the benefits of professional cleaning services when weighing your decision.
At Sparkle Restoration Services, our philosophy is simple: Turning Chaos Into Calm, Fast. We understand the stress and uncertainty fire damage brings to your Orange County home. Our IICRC Master Certified and licensed team is here not just to clean, but to fully restore your property and your peace of mind.
For homeowners in Newport Beach, Irvine, and the surrounding areas, a large-scale cleanup attempt can expose your family to harmful airborne particles. Our teams use commercial-grade air scrubbers, HEPA vacuums, and proven techniques to ensure your indoor air quality is restored to safe levels.
We provide comprehensive fire damage restoration services that tackle both the soot you can see and the hidden dangers you can’t. Before a small problem turns into a major restoration nightmare, contact Sparkle for an expert assessment.
Common Questions About Cleaning Soot From Walls
Even with a solid plan, it’s natural to have questions. To help you feel more confident about how to tackle soot on the walls in your Orange County home, here are the answers to the questions we hear most often from our clients.
Can Soot Stains Be Permanently Removed?
Yes, in most cases, soot stains can be completely removed. The key is using the right method for the surface and, most importantly, resisting the urge to scrub with water first. This will smear the oily residue and can lock in the stain permanently.
Starting with a dry chemical sponge to lift loose particles before introducing a liquid degreaser is the professional standard for a reason—it works.
However, for stubborn stains that have penetrated porous surfaces like unsealed wood or flat paint, you are fighting an uphill battle. In those situations, the best path forward is often a high-quality, stain-blocking primer followed by a fresh coat of paint to fully restore the wall.
Is It Safe to Paint Directly Over Soot?
Absolutely not. Painting over soot without proper cleaning and priming is a surefire way to waste your time and money. Soot is both oily and acidic; it will bleed right through new paint, leaving you with ugly gray or yellow splotches. Furthermore, the smoky smell will remain trapped behind the paint, only to reappear later.
Before a paintbrush enters the room, the wall must be meticulously cleaned, rinsed, and allowed to dry completely. After that, applying a stain-blocking primer is a mandatory step. This special primer creates a seal that prevents residue from bleeding through and helps neutralize any lingering odors, ensuring a clean, lasting finish.
The challenge of removing soot isn’t new—it’s been tackled in priceless historical settings. Conservators restoring the ancient Egyptian temple of Seti I used a specialized gel to lift thick layers of soot off delicate painted reliefs without causing any damage. You can learn more about how modern science restores ancient treasures on Nature.com. It’s a great reminder that proper removal is always the better solution than simply covering up a problem.
Does Soot Go Away on Its Own?
Unfortunately, no. Soot will not disappear over time. Unlike regular dust, soot is a sticky, acidic substance that adheres to surfaces. If left alone, it will cause progressive damage—discoloring and corroding paint, and embedding a persistent, unpleasant odor into your home.
The key is to act quickly. The longer soot sits, the deeper its fine particles work into walls and other materials, making the cleanup job more difficult and more expensive.
Have more questions about the restoration process? You can always explore our comprehensive FAQ page for more answers.
When the questions get complicated or the damage feels too overwhelming, it’s time to call in a professional. As a BBB Torch Award Winner for Ethics, Sparkle Restoration Services is committed to providing honest, expert guidance. Our team is available 24/7 to restore your property and your peace of mind. Contact us today for a free consultation and let our experts turn chaos into calm for you.
Ready to create a space that’s as beautiful as it is functional? Schedule your complimentary design consultation today by visiting Ready to Work with Sparkle?