
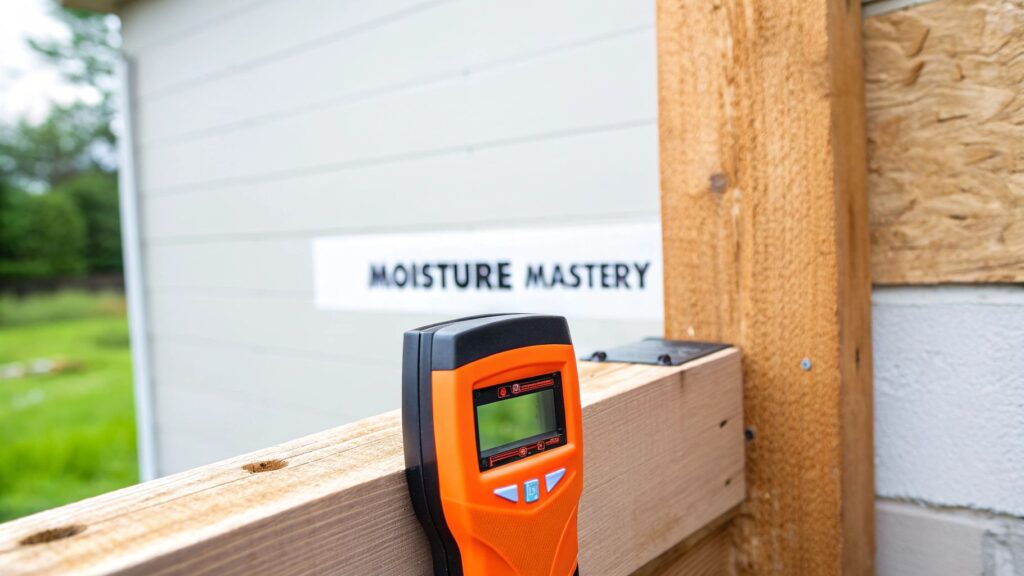
Learning how to read a moisture meter is more than just looking at a number; it’s the first critical step in protecting your valuable Orange County property. This skill transforms a simple device into a powerful diagnostic tool, empowering you to uncover hidden water issues before they escalate. The core principle is simple: compare a reading from a suspicious area to a known dry standard to confirm if moisture has intruded. For discerning property owners, this is your best defense against the silent, costly threat of water damage.
Why Accurate Moisture Readings Matter for Your Property
Here in Orange County, where property values are significant, even a small, undetected leak can spiral into a major financial and structural disaster. Identifying hidden moisture early is the single most effective action you can take to prevent extensive repair bills. A moisture meter isn’t just another gadget—it’s an essential instrument for any proactive homeowner or property manager dedicated to preserving their investment.
Think of it this way: what you can’t see can cause the most harm. Water seeping behind drywall from a slow pipe leak, or moisture collecting under custom hardwood floors, might not show visible signs for weeks or even months. By the time you notice a stain or smell that musty odor, the damage is already well underway.
Preventing Silent Destruction
The true value of a moisture meter lies in its ability to detect problems long before they become visible nightmares. Here’s what an accurate reading helps you prevent:
- Mold Growth: Mold requires only moisture and an organic food source (like drywall paper or wood) to flourish, often within just 24-48 hours. A high moisture reading is your earliest warning of a potential breeding ground inside your walls or under your floors.
- Structural Rot: Persistent moisture is wood’s worst enemy. It weakens the material, causing it to rot and lose its structural integrity. This can compromise everything from floor joists to the very framing of your home.
- Compromised Indoor Air Quality: Mold and mildew don’t just cause aesthetic damage; they release spores into the air that can significantly impact your family’s health and well-being. Finding the moisture source stops this process before it begins.
The Professional’s First Step
At Sparkle Restoration, the first action our IICRC Master Certified technicians take on a water damage call is to utilize a professional-grade moisture meter. This allows us to map the precise migration path of the water, turning an invisible threat into a clear, actionable restoration plan. This initial data is crucial; it dictates our entire drying strategy and ensures we are addressing the root cause, not just the symptoms. You can learn more about these foundational steps in our comprehensive guide to water damage.
The restoration industry increasingly relies on this technology. In fact, the market for building material moisture meters is projected to grow from $2.5 billion in 2025 to roughly $4.2 billion by 2033. This growth underscores how critical moisture data has become for preserving property integrity. As you become familiar with these devices, remember the general safe thresholds: for wood, you generally want readings below 15%, and for concrete, under 4% by weight.
Choosing Your Tool: Pin vs. Pinless Meters
Before you can obtain an accurate reading, you must select the right tool for the job. The primary choice is between a pin-type (invasive) meter and a pinless (non-invasive) one. This isn’t a matter of which is “better” overall, but which is appropriate for your specific situation. As professionals serving clients throughout Orange County, the task at hand dictates our tool selection.
Think of it like this: a surgeon wouldn’t use a scalpel when an X-ray provides the necessary insight.
A pin-type meter is our scalpel. It features two sharp metal probes that physically penetrate a material’s surface to deliver a precise, localized reading from within. An electrical current travels between these probes, and the meter measures the resistance to calculate the moisture content. This makes it our go-to for confirming suspected water intrusion deep inside a wall cavity or in wood framing.
Conversely, a pinless meter is our X-ray. It uses an electromagnetic sensor pad to scan beneath a surface without leaving a mark. It’s ideal for a quick, non-destructive sweep over a large area. When we’re inspecting high-end hardwood floors in a Newport Beach home, the pinless meter is the first tool we use to identify potential moisture hotspots without causing any damage.
Making the Right Call for Your Situation
The decision hinges on a trade-off: do you need deep, specific data, or is it more important to preserve the surface you’re inspecting? For homeowners, using the wrong tool can quickly worsen the situation. Understanding your limits is key, which is why we always caution clients about the potential dark side of DIY projects when dealing with water damage. A small misstep can easily escalate into a major restoration project.
This infographic breaks down how a professional thinks when choosing the right meter for the job.
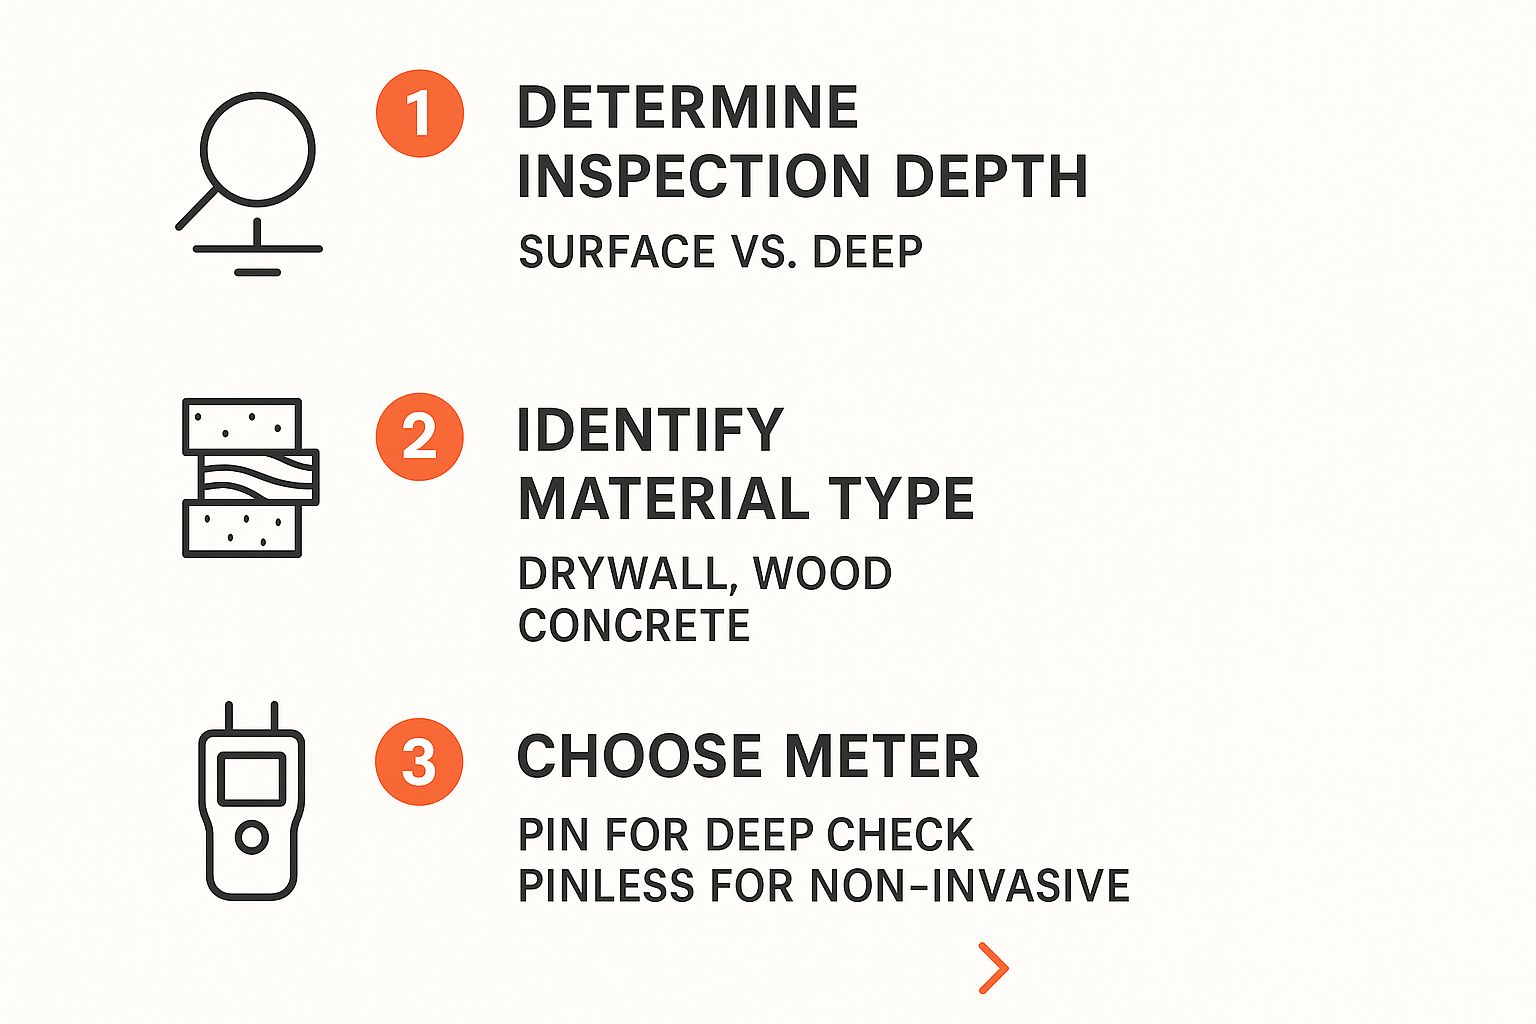
Ultimately, your choice should be guided by the material you’re testing and how deeply you need to investigate.
To help you decide which meter might be right for your needs, here is a simple side-by-side comparison.
Pin vs. Pinless Moisture Meter Comparison
| Feature | Pin-Type Meter (Invasive) | Pinless Meter (Non-Invasive) |
|---|---|---|
| How It Works | Measures electrical resistance between two probes inserted into the material. | Uses an electromagnetic sensor pad to detect moisture below the surface. |
| Best For | Getting precise readings in specific spots, especially for porous materials like wood. | Quickly scanning large, flat surfaces to find moisture hotspots. |
| Material Types | Wood, drywall, insulation, concrete, and other materials the pins can penetrate. | Hardwood floors, tile, concrete slabs, drywall, cabinetry, and finished surfaces. |
| Pros | Highly accurate at specific points. Can measure moisture deep within a material. | Non-damaging. Fast and efficient for initial assessments. Good for finding relative moisture. |
| Cons | Leaves small holes in the surface. Readings can be affected by wood temperature. | Less accurate for exact moisture percentages. Can be affected by metal nails or rebar. |
| Typical Use Case | Confirming a suspected leak behind a wall or checking the moisture content of firewood. | Scanning a floor after a spill or checking for moisture before installing new flooring. |
Both tools have a clear, distinct purpose. While a pinless meter is excellent for an initial assessment, a pin meter is often required to confirm the extent of the problem and gather the hard data needed for proper remediation.
Practical Scenarios: Pin vs. Pinless
Let’s walk through a couple of real-world examples our IICRC-certified technicians encounter daily:
- Scenario A: The Hidden Leak. A client in Irvine suspects a slow leak behind their primary bathroom shower wall. In this case, we select a pin meter. By carefully inserting the probes into the drywall at various points, we can map out the precise location and depth of saturation, providing a clear picture of the damage.
- Scenario B: The Post-Spill Check. A dishwasher leaked in a kitchen with new custom cabinetry. Here, a pinless meter is the ideal tool. We can quickly scan the cabinet bases, toe-kicks, and adjacent walls to determine if any moisture was absorbed—all without leaving a single hole.
For property owners, the most effective approach often involves using both. A pinless meter is invaluable for an initial, broad scan to identify problem areas quickly. Once a hotspot is found, a pin meter can confirm the depth and severity of the moisture, giving you the detailed data needed for a sound plan of action.
Getting Accurate Readings with a Pin Meter
Now that we’ve covered the differences, let’s focus on the pin-type meter. This is the tool our Sparkle technicians rely on for ground-truth data, but its effectiveness depends entirely on the user’s technique. Proper methodology is essential if you want to know how to read a moisture meter accurately.

First and foremost: calibration. Never skip this step. Most quality meters include a calibration block or have a self-test feature. This takes only seconds and ensures your readings start from an accurate baseline. Next, you must select the correct material setting. Meters are programmed for the specific density of different materials, so choosing “wood” when testing “drywall” will produce inaccurate results.
The Professional Technique for Reliable Results
When you’re ready to test, gently but firmly push the pins straight into the material. For wood, align the pins parallel to the grain. Inserting the pins at an angle can stress them and, more importantly, interfere with the electrical resistance measurement.
However, a single reading is just one data point. It doesn’t tell the whole story.
At Sparkle Restoration, our IICRC Master Certified technicians never base an assessment on a single measurement. A true professional maps the entire affected area. This is the only way to understand the full scope of moisture intrusion and ensure no hidden pockets of water are missed during remediation.
To do this correctly, we use two key strategies that you can easily adopt:
- Establish a Dry Standard: Before testing the damp area, go to a similar but unaffected part of the home—like another wall in the same room. Take a reading there. This gives you a “dry standard,” or a baseline for comparison. A reading of 18% in the suspicious spot is far more meaningful when you know the dry standard for that material is only 6%.
- Use the ‘W’ Pattern: Once you find a high reading, don’t stop. From the center of that wet spot, work your way outward in a “W” or zig-zag pattern, taking a reading every few inches until you consistently hit your dry standard number again. This is how you map the true perimeter of the water damage and see exactly how far it has spread.
A Real-World Irvine Scenario
Imagine you’ve noticed a musty smell under your kitchen sink in Irvine. Here’s exactly how to apply these techniques. We see this situation frequently, as demonstrated in this Irvine water damage mitigation project showcase.
First, you’d take your pin meter and test the inside of a completely dry cabinet elsewhere in the kitchen. Let’s say it reads 7%. That’s your baseline.
Now, you move to the cabinet under the sink. You push the pins into the back corner and get a reading of 25%—a clear problem. Following the ‘W’ pattern, you test outwards. The next reading is 22%, then 16%, then 10%, and finally, you’re back down to 7% near the cabinet door. This mapping clearly shows the moisture is concentrated in the back half of the cabinet, likely near a plumbing line.
This methodical approach transforms reading a moisture meter from simple guesswork into a data-driven investigation. In restoration, knowing these thresholds is vital. For wood, moisture content above 12% to 20% signals a major risk for mold growth and structural decay. Understanding the science behind the tool is key to using it effectively.
Mastering the Non-Invasive Pinless Meter

When dealing with high-end materials that cannot be damaged, the pinless moisture meter is the professional’s tool of choice. It’s our primary instrument for initial assessments on delicate surfaces. Unlike a pin-type meter, this device uses an electromagnetic sensor pad to detect moisture beneath the surface, giving you a clear picture of what’s happening inside a material without leaving a single scratch.
Consider the custom cabinetry in a Newport Beach kitchen, ornate plaster walls, or expensive engineered hardwood floors. The last thing any property owner wants is an inspection that leaves a trail of pinholes. This is where the pinless meter demonstrates its value.
Ensuring an Accurate Scan
The key to a reliable reading is proper contact. The sensor pad on the back of the device must sit completely flat and firm against the surface. If it’s tilted or hovering even slightly, you’ll create air gaps that disrupt the electromagnetic field and yield inaccurate, usually lower, readings.
Apply firm, steady pressure, but not so much that you risk marring the finish. Once you have good contact, you can begin scanning.
For a quick and effective assessment, professionals sweep the meter across large areas in smooth, overlapping passes. This technique allows us to rapidly cover entire walls or floors, watching the digital display for any numbers that spike above the baseline. It’s like using a stud finder, but for hidden water.
This method is incredibly efficient for pinpointing the general area where moisture is lurking, allowing us to investigate further with precision.
Interpreting Relative Readings
It’s crucial to understand that pinless meters often provide relative readings, not exact moisture percentages, especially on materials like drywall or plaster. This isn’t a limitation; it’s a powerful diagnostic feature when used correctly.
Here’s how our IICRC-certified team leverages this in the field:
- Establish a Baseline: First, we find a section of the same material that we know is dry and take a reading. That number becomes our “dry standard.”
- Scan for Hotspots: With our baseline established, we scan the area of concern. Any reading that jumps significantly higher than our dry standard indicates a moisture problem that requires immediate attention.
- Confirm with Precision: Once a hotspot is identified, we may switch to a pin meter to get a precise moisture percentage and determine the depth of the saturation.
For example, if a dry section of a wall gives us a relative reading of “20,” but a water-stained area nearby reads “85,” we know instantly we’re dealing with a serious issue. This two-step process—a broad scan with a pinless meter followed by a targeted pin reading—delivers a fast, accurate, and minimally invasive assessment.
Understanding these nuances is a significant step for any homeowner trying to determine if their home is truly protected against hidden threats. Our guide on how to make your home leak-proof offers additional strategies for proactive protection.
What Your Moisture Meter Readings Mean
Obtaining a number from your moisture meter is just the first step. The real skill lies in interpreting what that number means for the health of your home. A reading is simply data until you place it in context and use it to build an intelligent plan of action.
This is a critical part of the process. Once a leak is stopped, understanding these readings is the only way to track your progress and properly effectively dry your home out after a leak. Inadequate drying can lead to secondary damage like mold and wood rot.
Translating Percentages Into Action
Every material in your home holds moisture differently. What’s perfectly safe for a wood stud could be a major red flag for drywall. As IICRC Master Certified professionals, we work with these thresholds daily in homes across Orange County, from coastal properties to inland communities.
Here are the general guidelines we use in the field to interpret the numbers:
- Wood (Framing, Flooring, etc.): Anything between 5-12% is typically considered normal and dry. When numbers creep up to 15-17%, you’ve entered the caution zone. Readings above 20% indicate saturation, creating a high-risk environment for both structural rot and mold growth.
- Drywall: This material is far less forgiving. A safe reading is generally below 1%. A reading significantly higher than that is a clear sign of water intrusion that must be addressed immediately before the material deteriorates and becomes a food source for mold.
- Concrete: While concrete slabs can hold some moisture, excessive levels can cause flooring adhesives to fail and allow moisture to wick up into walls. A reading above 4.5% usually signals a problem that needs professional drying equipment to resolve.
Expert Insight from Sparkle Restoration: Context is everything. An 18% reading in basement framing after a heavy rainstorm in Newport Beach demands a different, more urgent response than a similar reading on an interior wall far from any plumbing. The location, recent weather, and surrounding readings all tell a story, helping us diagnose the true source and scope of the problem.
To make it easier, here’s a quick-reference table showing the typical moisture levels for common building materials we encounter here in Southern California.
Acceptable Moisture Levels in Common Building Materials
| Building Material | Acceptable Moisture Content (%) | At-Risk or Saturated (%) |
|---|---|---|
| Wood Framing & Subfloor | 5 – 12% | 16% + |
| Hardwood Flooring | 6 – 9% | 12% + |
| Drywall / Gypsum Board | < 1% | 1% + |
| Concrete Slab (on grade) | < 4.5% | 5% + |
| Plaster | 5 – 10% | 15% + |
These numbers provide a solid baseline for knowing when a reading has crossed from “normal” into “needs attention.”
The Danger Zone for Mold and Decay
The most critical threshold to monitor is the point at which mold can begin to grow. Most common indoor molds start to thrive when a material’s moisture content climbs above 16%. This is precisely why a reading in the high teens should be an immediate call to action.
When moisture levels remain high, it’s not just about mold. You’re also risking structural decay. Consistently damp wood loses its integrity, becoming soft, spongy, and weak.
Understanding these risks is the first step toward prevention. For a deeper dive, read our guide on the health risks and prevention of mold contamination. An accurate moisture meter reading gives you the power to act before these serious problems can take hold.
When to Call a Water Damage Professional
Knowing how to use a moisture meter is an excellent skill for any homeowner, putting you in control of your property’s well-being. However, part of being in control is recognizing when to call for professional expertise. A DIY investigation can catch a problem early, but certain situations require a certified professional—fast—to prevent a small issue from becoming a catastrophe. Hesitation can cause the damage, and the cost, to grow exponentially.
If your meter shows high readings across a large area, such as an entire wall or a significant section of flooring, that’s your first major clue. This isn’t a minor, isolated drip; it’s a sign of a significant water event that requires commercial-grade drying equipment and an expert strategy to resolve properly.
Signs You Need an Expert Assessment
Certain discoveries should immediately prompt you to put down the meter and call a certified professional. Think of these as red flags indicating the problem is much larger than what you can see on the surface.
- Visible Mold Growth: The moment you see actual mold, the situation has changed. This is no longer just a moisture problem. Attempting to clean it yourself without proper containment can spread spores throughout your property, making a bad situation worse. This is why early moisture detection is so critical. Understanding the basics of identifying and addressing mold behind baseboards can help you recognize when you’re out of your depth.
- Moisture in Structural Components: High readings in structural beams, floor joists, or the subfloor are serious. Moisture here can rot the very framework of your home, and it takes specialized drying techniques to arrest long-term structural decay.
- Persistent or Unexplained Readings: You found a leak and fixed it, but your meter readings remain stubbornly high days later. This almost always indicates another hidden source of moisture that has not yet been found.
The Professional Advantage Beyond the Meter
When you call a team like Sparkle Restoration, you receive more than just another person with a moisture meter. Our IICRC Master Certified professionals arrive with advanced diagnostic tools that see what standard meters cannot.
Our technicians use thermal imaging cameras to create a heat map of your walls and ceilings. Wet areas are colder than dry ones, allowing us to instantly visualize the full extent of water migration, even behind surfaces that feel dry to the touch.
This technology helps us trace water to its exact source without punching exploratory holes in your walls, saving you significant time, disruption, and expense.
Don’t let a moisture problem spiral. Our team is on call 24/7 to provide a complete assessment and turn chaos into calm, fast. If you’re seeing any of these warning signs, contact Sparkle Restoration for an expert evaluation.
Still Have Questions? We’ve Got Answers
Even after you get the hang of it, moisture meters can present confusing scenarios. Here are a few of the most common questions our IICRC-certified technicians hear from property managers and homeowners around Orange County. These quick answers will give you more confidence when interpreting your readings.
Can I Use a Wood Moisture Meter on Drywall?
Yes, this is a common practice, but you must understand what the meter is really telling you. A professional-grade meter will often have a dedicated “drywall” setting or a reference scale. If yours only has a wood scale, you won’t get an accurate moisture percentage, but you can still get highly useful relative readings.
Here’s the correct procedure: start by testing a piece of drywall in another room that you know is completely dry. This number becomes your “dry standard” or baseline. Now, return and test the area of concern. If that number is significantly higher than your baseline, you have confirmed a moisture problem that requires a closer look.
How Do Temperature and Humidity Affect Readings?
They absolutely can, and it’s a factor professionals always consider. Extremely cold materials, for instance, can sometimes give a falsely low reading because temperature impacts electrical resistance. This is why high-end meters come with built-in temperature correction features.
High ambient humidity can also slightly elevate the moisture reading on a material’s surface. This is precisely why establishing a “dry standard” on-site is non-negotiable for our team. We always test an undamaged, identical material in the same environment to get a true apples-to-apples comparison. It’s the only way to ensure accuracy.
My Pinless Meter Is Reading High on a Surface That Feels Dry. What Gives?
This is a common occurrence that usually points to one of two things. First, remember that a pinless meter reads moisture under the surface. The wall might feel dry to the touch, but the meter could be detecting dampness within the wall cavity that hasn’t yet migrated to the surface.
More often, however, it’s being affected by metal behind the drywall. Consider what’s hidden in your walls:
- Copper or PEX plumbing lines
- Electrical wiring and junction boxes
- Metal studs or drywall screws
- Foil-backed insulation
If you get a surprisingly high reading, simply scan a wider area. If the high number is very localized and seems to follow a straight line where a pipe or stud would be, you’ve likely found a false positive. But if the high reading covers a broad, inconsistent area, that’s a strong indicator of subsurface moisture.
When your meter gives you confusing readings or confirms a serious problem, the safest and most effective course of action is to get a professional diagnosis. The team at Sparkle Restoration Services uses advanced equipment like thermal imaging cameras to see exactly where water is hiding and trace it back to the source—no guesswork involved. If you’re dealing with a moisture mystery in your Orange County property, don’t wait for it to become a bigger disaster.
Schedule a Free, No-Obligation Consultation Today
Ready to create a space that’s as beautiful as it is functional? Schedule your complimentary design consultation today by visiting Ready to Work with Sparkle?