
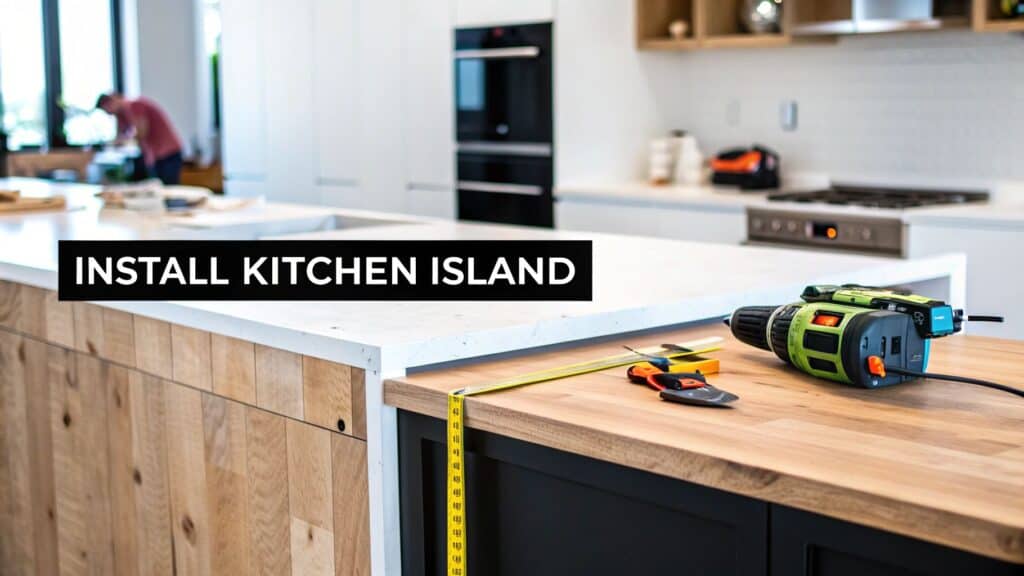
Installing a kitchen island can transform your kitchen’s aesthetics and functionality, but a successful project begins with meticulous planning long before any work starts. From ensuring proper measurements for traffic flow to selecting a design that complements your home and integrating essential utilities, thoughtful preparation is the key. A well-planned island becomes a seamless, valuable centerpiece, enhancing both the beauty and efficiency of your home.
Laying the Groundwork for Your Kitchen Island

A modern kitchen island is far more than extra counter space; it is the new heart of the home. For discerning homeowners across Orange County, from Newport Beach to Irvine, the island serves as a central hub for everything from meal preparation to family gatherings. This evolution toward multifunctional kitchen spaces reflects a significant shift in luxury home design, prioritizing both elegance and practicality.
The market data confirms this trend. The global kitchen island market was valued at approximately USD 3.5 billion in 2024 and is projected to nearly double by 2033. This growth is driven by the demand for open-plan living, where the island functions as a sophisticated and practical centerpiece. You can discover more insights about kitchen island market trends to see how these versatile additions have become a staple in modern homes.
Measuring for Optimal Flow and Functionality
Before you commit to a specific design, the first step is to measure your available space with precision. An island that is even a few inches too large can create frustrating bottlenecks, turning your dream kitchen into a daily obstacle course. The objective is to ensure ample clearance for walkways and full appliance access, creating a space that feels both open and efficient.
Proper spacing is non-negotiable for a functional kitchen. The following table provides the professional clearance guidelines we use to design high-functioning spaces for our Orange County clients.
Kitchen Island Clearance and Dimension Guidelines
| Area | Minimum Clearance (Standard) | Recommended Clearance (Multi-Cook) | Purpose |
|---|---|---|---|
| Walkways | 36 inches | 42 inches | Ensures comfortable movement around the island without feeling cramped. |
| Work Aisles | 42 inches | 48 inches | Provides enough space to open appliance doors and work without bumping into others. |
| Seating Area | 36 inches | 44 inches | Allows people to sit comfortably and lets others pass behind them easily. |
| Appliance Doors | Varies | Varies | Always measure the full swing of your oven, fridge, and dishwasher doors to prevent collisions. |
These are not merely suggestions; they are foundational principles for creating a kitchen that works seamlessly, especially when multiple people are using the space.
Expert Insight: A trusted technique we recommend is using painter’s tape to outline the proposed island’s footprint on your floor. Live with this “ghost” island for a few days to get a true feel for the traffic flow. This simple exercise can help you identify potential sizing issues before they become costly mistakes.
Matching Design to Your Home and Lifestyle
With your dimensions confirmed, you can move on to the design phase. An island’s function should always inform its form. Consider how your family will genuinely use the space on a daily basis to ensure the design meets your practical needs.
What is the primary role of your new island?
- A Simple Prep Station? A compact island with a durable butcher block or quartz surface may be all you need for additional prep space.
- An Entertainment Hub? For those who enjoy hosting, a larger island with a seating overhang, a built-in wine refrigerator, and integrated outlets for devices will become the social core of your home.
- A Full-Fledged Workstation? You can create a highly efficient culinary zone by integrating a prep sink, a cooktop, and specialized storage solutions.
The island’s aesthetic must also harmonize with your home’s existing style. A sleek, waterfall-edge quartz island is a perfect fit for a modern Newport Beach home, while a rustic wood island might be better suited for a traditional estate. Our comprehensive design-build services are structured to guide you through these decisions, ensuring your vision is translated into a meticulously executed plan.
Choosing Materials That Match Your Vision and Budget
With the layout and dimensions for your new kitchen island finalized, the next step is selecting the materials. This is where your design vision begins to materialize, transforming a blueprint into the tangible centerpiece of your kitchen.
The materials chosen for the countertop and base not only define the island’s style but also its durability and maintenance requirements. These decisions involve a careful balance between aesthetics, long-term performance, and your budget.
Selecting the Perfect Countertop Surface
The countertop is the focal point of your island. As the surface that endures the most use—from spills and hot pans to daily meal prep—it must be as resilient as it is beautiful. Each material offers a unique combination of elegance, durability, and required care.
Here in Orange County, several high-performance materials are consistently popular:
- Quartz: A top choice for luxury remodels, and for good reason. As an engineered stone, quartz is non-porous, making it exceptionally resistant to staining from coffee, red wine, or other common spills. It is incredibly durable and available in a vast array of colors and patterns that can mimic natural stone without the associated maintenance.
- Granite: A timeless classic, granite is a natural stone where every slab is entirely unique, offering a one-of-a-kind statement piece. It withstands heat and scratches beautifully, making it a workhorse in a busy kitchen. As a porous material, it requires periodic sealing to protect against stains and maintain its luster.
- Butcher Block: For those seeking a warmer, more inviting aesthetic, butcher block is an excellent choice. It introduces a natural element to the space and is highly practical for avid cooks, as you can prep directly on the surface. While nicks and scratches can be sanded and refinished, it does require regular oiling to prevent the wood from drying out.
Understanding these material differences is crucial. While quartz provides maintenance-free ease, the unique, organic beauty of a granite slab may be the perfect finishing touch for your kitchen. Our guide to kitchen remodeling in Orange County, CA offers a more detailed look at how these material choices contribute to the overall design.
A Note on Current Trends: Wood continues to be a leading choice for its timeless appeal. In 2024, the residential sector accounted for about 75% of all kitchen island demand. We are also seeing a rise in modern designs as more homeowners seek sleek, tech-integrated features. You can learn more about these kitchen island market findings to understand emerging style trends.
Choosing Between Custom and Prefabricated Bases
Once you’ve selected a countertop, it’s time to consider the base that will support it. The island’s base provides structural support and the majority of its storage. Your primary options are a prefabricated unit or custom-built cabinetry.
A prefabricated island offers convenience and faster installation. These ready-to-assemble units are a practical choice for standard layouts or projects with tight timelines and budgets. However, you are limited by the available sizes, styles, and features.
Custom cabinetry, in contrast, is crafted to fit your kitchen’s exact specifications. This approach offers complete design freedom, allowing you to perfectly match existing cabinets, create bespoke storage solutions tailored to your workflow, and achieve precise dimensions. Plywood is a durable material for custom bases; selecting appropriate plywood board sizes and dimensions is essential for ensuring structural integrity. While custom work requires a greater initial investment, the result is a truly bespoke island that elevates your entire space.
Building and Anchoring Your Island Base

With your plans finalized and materials on site, it’s time to construct the island. This stage demands precision and expert technique to achieve a professional, lasting result. A solid base is the structural heart of your island, ensuring it remains stable and secure through years of daily use.
The first step is meticulous floor preparation. Before placing any cabinetry, the installation area must be immaculate. Any dust, debris, or old adhesive can interfere with leveling and anchoring, so a thorough cleaning is essential.
Next, transfer your plans from paper to the floor. Using a chalk line or painter’s tape, carefully mark the island’s exact footprint. Double-check all measurements against the walls and surrounding cabinetry to ensure everything is perfectly square and aligned with your kitchen’s layout. This outline will serve as your guide for the entire installation.
Assembling the Island Frame
Whether using a prefabricated unit or building a custom base, the goal is to create a perfectly square and sturdy frame. For off-the-shelf cabinets, adhere strictly to the manufacturer’s instructions, ensuring every joint is tight and every fastener is secure.
For custom builds, this typically involves constructing a “toe-kick” base frame from 2×4 lumber. This frame is the first component to contact the floor and serves as the anchor for the cabinet boxes. Precision cuts and square corners are critical, as any error at this stage will be magnified as you build upward.
Expert Tip: Before securing anything, always dry-fit all components. Place the assembled cabinets or custom frame within the marked footprint. This provides a visual confirmation of placement and clearances, making it much easier to make adjustments before the island is permanently fixed to the floor.
Creating an Unshakeable Foundation
Properly anchoring the island is a critical step that ensures safety and stability. A freestanding island, particularly one with a heavy stone countertop, can shift or even tip if not securely fastened to the subfloor. This is a significant safety hazard that must be addressed professionally. The correct anchoring method depends on your flooring and subfloor type.
Key Anchoring Methods:
- Blocking: If the island aligns with the floor joists, long screws can be driven directly through the island’s base or the 2×4 toe-kick frame into the joists.
- Cleats: When direct access to joists isn’t possible, interior wood cleats are the best solution. These are 2×4 or 2×6 boards secured to the subfloor inside the island’s footprint. The island base is then screwed securely into these cleats from the sides.
- Concrete Anchors: For slab foundations, common in many Orange County homes, specialized concrete screws or anchors are required to secure the base cleats.
This anchoring process makes the island a permanent, structural part of your home. It is a critical detail that our IICRC Master Certified and licensed general contracting team at Sparkle Restoration Services never overlooks. To understand the full scope of our professional work, learn more about our dedicated remodeling and construction services.
Achieving a Perfectly Level Surface
Even in well-constructed homes, floors are rarely perfectly level. An unlevel island will lead to a host of issues, from an improperly installed countertop to misaligned cabinet doors. This is where shims are indispensable.
With the base in its final position, use a long level (at least four feet) to check for levelness in all directions—front-to-back, side-to-side, and diagonally. Identify low spots and gently tap composite or wood shims into the gaps between the floor and the island base.
Continue adjusting and checking with the level until the entire base is perfectly plumb and level. Use just enough shims to create solid support without over-lifting the base. Once perfect, score and snap off the excess shim material for a clean finish, fasten the cabinets together, and prepare for countertop installation.
Installing the Countertop and Adding Finishing Touches
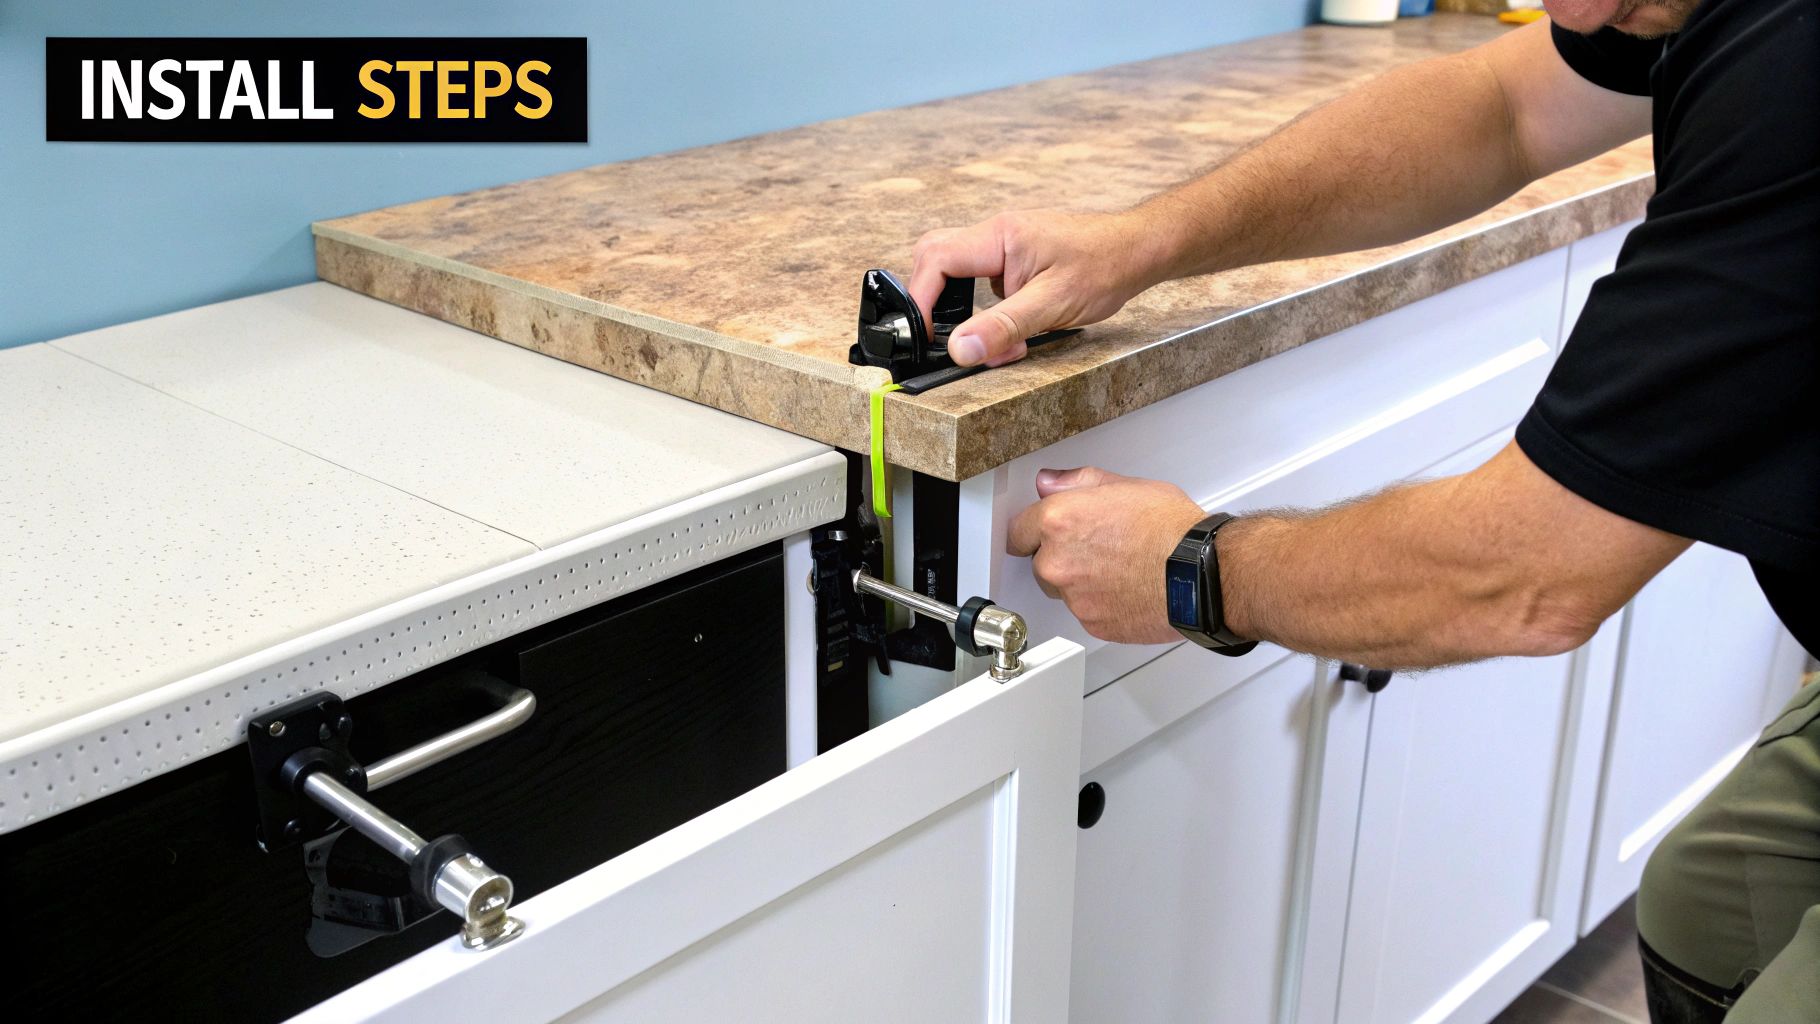
With a perfectly level and securely anchored base, you have reached a significant milestone. The next step is setting the countertop—the moment your project transforms from a set of cabinets into a beautiful and functional kitchen centerpiece.
The installation process varies significantly depending on the countertop material. While a butcher block top may be suitable for an experienced DIYer, installing a heavy slab of natural stone is a job best left to professionals.
Securing Your Countertop The Right Way
For materials like butcher block or laminate, the installation process involves creating a strong, even bond between the countertop and the island base. A high-quality construction adhesive is essential.
Apply a generous, zig-zag bead of adhesive along the top edges of the cabinet frames. With assistance, carefully lift and position the countertop, ensuring the overhang is perfectly consistent on all sides. Use clamps or evenly distributed weights to apply pressure while the adhesive cures, following the manufacturer’s instructions for drying time.
However, for heavy materials like quartz, granite, or marble, professional installation is not optional. These slabs are extremely heavy and can be fragile during transport. A single misstep can result in a cracked slab or serious injury. Professionals possess the specialized equipment and expertise to handle these materials safely and ensure a perfect fit. For stone countertops, engaging a professional is the only way to protect your investment.
The kitchen island market was valued at USD 11.2 billion in 2023 and is projected to reach USD 14.6 billion by 2031, a testament to their evolution into multifunctional family hubs. To learn more, you can explore the full kitchen island market size and forecast.
A common mistake we’ve seen is homeowners attempting to move heavy stone slabs to save on installation costs. We have been called to repair damaged flooring, cabinetry, and even cracked countertops from such attempts. The cost of professional installation is a small price to pay for the peace of mind that comes with a job done right.
Applying the Finishing Touches That Matter
With the countertop in place, the project is nearing completion, but the final details are what distinguish an average result from a truly professional one. These finishing touches provide a polished, integrated look.
This final phase includes several crucial tasks:
- Installing Trim and Molding: Add decorative trim or base molding around the bottom of the island to conceal the seam where the base meets the floor, giving it a high-end, built-in furniture appearance.
- Caulking Seams: Use a quality, paintable caulk to fill any small gaps between trim pieces or where the island meets a wall, creating clean, seamless lines.
- Filling Nail Holes: Meticulously fill every nail hole from the trim installation with wood putty. Once dry, sand it perfectly smooth to become invisible after painting.
These steps require patience and a steady hand but make an enormous difference in the final aesthetic.
Perfecting Cabinet Hardware Alignment
The final step is installing the cabinet hardware, which acts as the “jewelry” for your new island. Misaligned hardware is instantly noticeable and can detract from the overall quality of the project.
The secret to perfect alignment is a cabinet hardware jig. This inexpensive, adjustable template ensures perfectly placed holes every time. Simply set the spacing on the jig, position it on your drawer or cabinet door, and drill. This tool guarantees that every knob and pull is flawlessly aligned, achieving the high-end, professionally finished look that defines a quality project in any Orange County home.
Navigating Electrical and Plumbing Integration
Integrating a sink, dishwasher, or electrical outlets transforms your kitchen island from a piece of furniture into a high-performance workstation. This stage introduces a new level of complexity that requires expert planning and a thorough understanding of local building codes.
This is where the risks of a DIY approach increase significantly. A faulty electrical connection can create a fire hazard, while a minor plumbing error can lead to a slow leak that causes extensive water damage and mold growth over time. For these reasons, engaging licensed professionals for utility work is not just a recommendation—it is essential for the safety and integrity of your home.
Planning Your Electrical Needs
Before any wiring is done, you need a clear vision for your island’s electrical functions. Will it be a baking station with outlets for a mixer, a charging hub for electronics, or will it feature statement pendant lighting overhead?
Each function requires a specific electrical plan:
- Outlets: Building codes typically require at least one outlet on a kitchen island. If a sink is present, nearby outlets must be GFCI (Ground Fault Circuit Interrupter) protected to prevent electric shock in wet areas.
- Appliances: High-draw appliances like a built-in microwave or cooktop require their own dedicated circuits to handle the electrical load without tripping breakers.
- Lighting: Wiring for pendant lights or under-counter LED strips must be planned from the outset, often requiring cables to be run through floor or ceiling joists before the island is installed.
A Critical Safety Reminder: All electrical work must comply with the National Electrical Code (NEC) and local Orange County regulations. This includes everything from using the correct gauge wire to installing proper junction boxes. As a licensed General Contractor, Sparkle Restoration Services ensures every installation is not only functional but fully compliant and safe.
Understanding Plumbing Essentials
A prep sink can significantly enhance kitchen workflow, but it requires running hot and cold water supply lines and a drain line to the middle of your kitchen, which often involves opening up the floor.
There is no margin for error in plumbing connections. If your project includes new plumbing, it is wise to understand rough-in plumbing costs and factor them into your budget early. A licensed plumber will ensure the drain line has the proper slope to prevent clogs and that every connection is watertight.
Deciding between a DIY approach and hiring a professional is critical for these technical tasks. Here’s a breakdown to guide your decision.
Professional vs DIY Island Utility Installation
| Task | Recommended for DIY? | Why It Requires a Professional | Associated Risks |
|---|---|---|---|
| Running New Electrical Circuits | No | Requires knowledge of load calculations, NEC codes, and proper breaker installation. | Fire hazard, electrical shock, failed inspections. |
| Installing GFCI Outlets | Experienced DIYers only | While possible, incorrect wiring can negate the safety feature. | Electric shock in wet conditions, code violations. |
| Running Water Supply Lines | No | Involves soldering or crimping, which requires specific tools and skills to prevent leaks. | Major water damage, mold growth, low water pressure. |
| Connecting a Drain Line | No | Requires precise slope (pitch) to ensure proper drainage and prevent clogs/odors. | Clogs, sewer gas leaks, slow drainage, water damage. |
While a DIY approach may be tempting for some aspects of a remodel, utility work is one area where the expertise of a licensed professional is invaluable. The potential costs of a mistake—from fire and water damage to failed inspections—far outweigh any initial savings.
Investing in a professional not only guarantees the work is safe and up to code but also ensures the project is completed efficiently and correctly the first time.
Common Questions About Kitchen Island Installation
Even the most detailed plan can’t account for every question that may arise during a major remodel. At Sparkle Restoration Services, our decades of experience in Orange County have prepared us to address any concern with clear, straightforward answers.
Here are some of the most common questions we receive about installing a kitchen island.
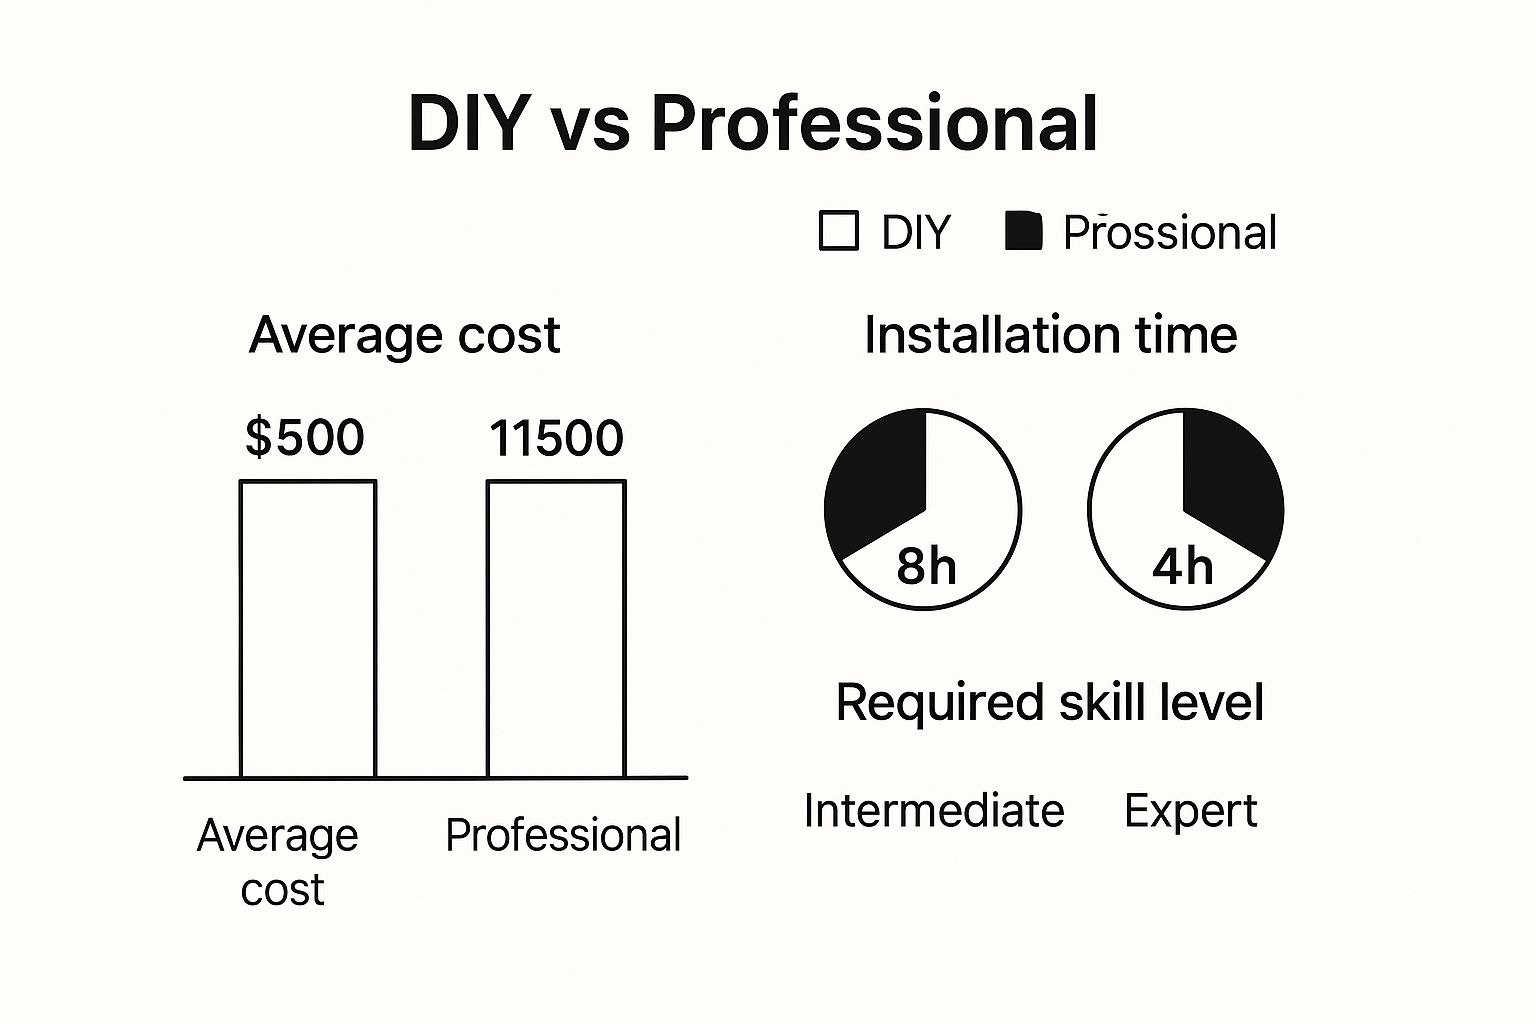
How Much Does a Kitchen Island Installation Cost?
The cost of a kitchen island installation can vary significantly based on the project’s scope.
A simple, prefabricated island with no utility work might cost a few thousand dollars for the unit and professional installation. However, a large, custom-built island with a premium quartz countertop, a prep sink, and new electrical outlets can easily exceed $10,000.
Several key factors drive the cost:
- Materials: The price difference between a butcher block top and a high-end granite or quartz slab is substantial.
- Size and Complexity: Larger islands require more materials and labor to build and install properly.
- Utilities: Integrating a sink or electrical outlets is a major cost driver, as it requires licensed professionals to ensure safety and code compliance.
- Labor: The cost of skilled carpenters, plumbers, and electricians in Southern California reflects the expertise needed to deliver a flawless, lasting result.
We advise all our clients to request a detailed, line-item quote that breaks down every cost. This transparency is essential for avoiding unexpected expenses and ensuring the project aligns with your budget.
Can I Put an Island on Top of My Existing Flooring?
Yes, in most cases, an island can be installed over existing flooring, provided the floor is level and in excellent condition. However, it must be done correctly.
The island must be securely anchored to the subfloor, not just the finished flooring. A professional will drill through the flooring to attach anchoring blocks directly to the subfloor structure. When done properly, this process is clean and will not damage the surrounding floor. That said, if you plan to replace your kitchen floors in the near future, the best practice is to remove the old flooring first, install the island, and then lay the new flooring up to the island’s base.
What Is the Biggest Mistake Homeowners Make?
The most common and costly mistake we see is improper planning, specifically regarding scale and workflow.
It is easy to be inspired by a photo of a massive island, but placing it in an average-sized kitchen can create a dysfunctional space with cramped walkways and blocked appliances. This is why we strongly recommend using painter’s tape to outline the island’s footprint on the floor and living with it for a few days to assess the flow.
The other major error is underestimating the complexity of adding utilities. Attempting to DIY electrical or plumbing work can lead to failed inspections, safety hazards, and the kind of extensive water damage we are often called to remediate. Always hire licensed and insured professionals for this critical part of the job.
For more answers to common remodeling questions, please visit our Sparkle Restoration FAQs page.
Your kitchen is the heart of your home, and a new island is an investment in its functionality, beauty, and value. If you are ready to transform your space with a team renowned for quality, integrity, and award-winning expertise, Sparkle Restoration Services is here to guide you. As an IICRC Master Certified firm and licensed General Contractor, we are the premier choice for luxury remodeling in Orange County.
Schedule your free, no-obligation design consultation today and let’s begin turning your vision into a stunning reality.
Ready to create a space that’s as beautiful as it is functional? Schedule your complimentary design consultation today by visiting Ready to Work with Sparkle?