
A successful kitchen island installation begins long before the first cabinet is assembled. The entire project hinges on meticulous planning that marries your design aspirations with the practical realities of your kitchen's layout. At Sparkle Restoration Services, we know that getting this initial phase right is the single most critical step to ensuring your new island enhances your workflow and becomes the beautiful, functional hub you envision for your Orange County home.
Planning Your Perfect Kitchen Island
A kitchen island is more than extra counter space—it can completely redefine how you use your kitchen. For discerning homeowners in Southern California, where open-concept living and high-end finishes are the standard, a well-planned island is a cornerstone of any luxury remodel. This is the stage where form must meet function, ensuring the final result is both stunning and practical.
It's no surprise that these functional centerpieces are in high demand. The global market for kitchen islands was valued at USD 11.41 billion in 2024 and is projected to climb to over USD 16.86 billion by 2032. This reflects a significant shift toward kitchens that serve as multitasking hubs for cooking, gathering, and entertaining.
Measure for Workflow and Clearance
Before you fall in love with a design on Pinterest, it's essential to bring out the tape measure. The objective is to maintain a functional "work triangle"—the ergonomic path between your sink, refrigerator, and stove—while leaving ample room for movement.
The National Kitchen & Bath Association (NKBA) provides authoritative guidelines on this matter. They recommend at least 42 inches of clearance for walkways in a single-cook kitchen and a more generous 48 inches if two people often cook together. Compromising this space can lead to a cramped, frustrating kitchen environment.
A common mistake we observe in Newport Beach homes is prioritizing a massive island over comfortable movement. An island that's too large for the room can disrupt the natural flow, making the kitchen feel smaller and more chaotic.
Essential Island Planning Checklist
Use this checklist to confirm your space meets the key requirements for a functional and elegant kitchen island.
| Checklist Item | Recommended Guideline | Why It Matters |
|---|---|---|
| Walkway Clearance | 42-48 inches on all sides | Ensures safe and efficient movement around the island without creating bottlenecks. |
| Work Triangle Integrity | Path between sink, stove, and fridge is unobstructed | A clear work triangle is the cornerstone of an ergonomic and functional kitchen layout. |
| Island-to-Appliance Space | 36-42 inches in front of appliances | Allows appliance doors (oven, dishwasher, fridge) to open fully without blocking the walkway. |
| Seating Overhang | 12-15 inches for counter-height seating | Provides comfortable legroom for anyone sitting at the island, preventing cramped knees. |
| Landing Zone Space | At least 15 inches of clear counter next to sinks/cooktops | Offers a safe spot to place hot pans or prepped ingredients without cluttering the main work area. |
Confirming these items are addressed is a foundational step toward ensuring your island is a valuable asset, not a daily hindrance.
Choosing a Style That Complements Your Home
The aesthetic of your island should integrate seamlessly with your home's architectural style. A sleek, minimalist waterfall island might be perfect for a modern home in Irvine but could feel out of place in a more traditional residence. Consider how the island fits into the overall floor plan. A long, narrow island often enhances a galley kitchen, while a large, open-concept space can accommodate a T-shaped island with built-in seating.
As a licensed general contractor, our team specializes in creating cohesive designs through our professional design-build services, ensuring your new island feels like a natural extension of your home from day one.
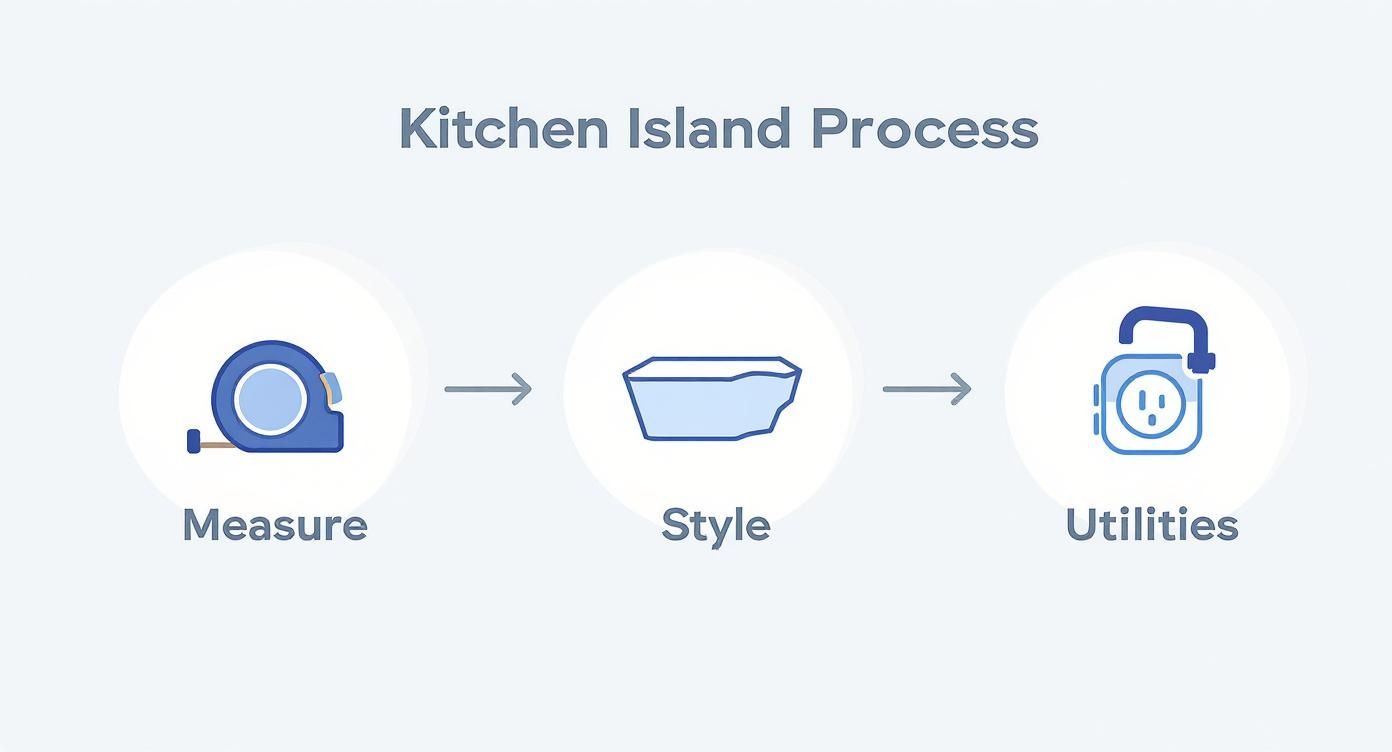
This simple breakdown illustrates the correct planning sequence. It's crucial to resolve practical considerations, like spacing and utilities, before committing to a specific aesthetic.
Map Out Electrical and Plumbing Needs
Finally, you must define the island's intended function. Will it house a prep sink? A dishwasher or an under-counter beverage fridge? What about outlets for a stand mixer or a built-in charging station?
Each of these features requires careful planning for plumbing and electrical lines, which must be routed correctly and comply with all local building codes. Addressing these needs early on prevents costly, project-derailing changes later. For a comprehensive overview of how an island fits into a full redesign, this complete kitchen renovation guide is an excellent resource covering the entire process.
Prepping Your Floor and Kitchen Space
With a solid plan in place, it’s time to prepare the physical space for your new island. This foundational work is what separates a professional, lasting result from one that causes future complications. Taking the time to prepare the area correctly is what guarantees your island will be stable, secure, and look as though it was always meant to be there.

Here is a simple but incredibly effective professional tip: use painter's tape to outline the island's exact footprint on your floor. This isn't just for marking the location; it's about experiencing the island’s impact on your kitchen’s flow. Walk around the taped area, open your refrigerator and dishwasher doors, and simulate your daily routine. This is your final opportunity to confirm the clearances feel right before any work begins.
Ensuring a Level Foundation
One of the most critical checks is ensuring your floor is level. An uneven surface is the primary cause of a wobbly, unstable island. Not only is this an annoyance, but it also places constant stress on cabinet joints and can lead to cracks in countertop seams over time.
Use a long level—at least four feet is recommended—and check the entire area within your tape outline from multiple directions. If you discover any low spots, they must be addressed now. For a concrete subfloor, a self-leveling compound is an excellent solution. On wood subfloors, shims can be used strategically. The goal is a perfectly flat plane for the island's base.
As a licensed General Contractor serving Orange County, we've seen it all. Take it from our experience: 90% of installation issues can be traced directly back to an improperly prepared surface. A level floor isn't just a suggestion; it's a non-negotiable first step to a rock-solid kitchen island.
Protecting and Integrating with Your Flooring
For homeowners in Orange County with beautiful, high-end flooring, the intersection of the island and the floor is a major consideration. The correct approach depends on your flooring type and whether it's a new installation or a retrofit.
- For New Flooring: The ideal method is to install the island base directly onto the subfloor before the new flooring is laid. The flooring is then installed up to the island's base. This anchors the island to the home's structure and allows the flooring to expand and contract naturally.
- For Existing Flooring: If you're adding an island to a kitchen with existing floors, the island will sit directly on top. Protecting this surface during installation is crucial. Use heavy-duty floor protection like Ram Board to prevent scratches, dents, or chips in materials like luxury vinyl tile or hardwood.
Making the right decision here is vital for both aesthetics and long-term stability. For expert guidance on integrating a new island with your existing surfaces, our professional flooring sales and installation services ensure a seamless, professional finish.
Navigating Electrical and Plumbing Hookups
https://www.youtube.com/embed/CWgaP90CGmo
This is where a kitchen island project requires specialized expertise. Adding power and water transforms an island from a simple piece of furniture into the functional heart of your kitchen. However, this phase introduces significant complexity and risk. It’s not merely about connecting wires and pipes; it’s about doing so safely and in compliance with strict local building codes.
In Orange County, electrical and plumbing regulations exist to protect you, your family, and your property. A single wiring mistake can create a dangerous fire hazard, while a poorly installed drain line can lead to chronic plumbing issues and potential health risks.
Core Electrical Requirements
Electrifying an island often involves running new circuits and strategically placing outlets. Understanding what this entails, such as exploring professional wiring and rewiring services, highlights why this work demands a licensed electrician.
Here’s what a code-compliant installation involves:
- Dedicated Circuits: Any major appliance integrated into your island, like a microwave drawer or wine cooler, will almost certainly require its own dedicated circuit to prevent tripping breakers and overloading your system.
- GFCI Protection: This is a non-negotiable safety mandate. The National Electric Code (NEC) requires that all outlets within six feet of a sink have Ground Fault Circuit Interrupter (GFCI) protection to prevent electric shock.
- Outlet Placement: Functionality is paramount. Codes typically require at least one electrical outlet for the first nine square feet of countertop space, with another for every eighteen square feet thereafter, ensuring power is always within reach.
As a BBB Torch Award Winner for Ethics, we believe in complete transparency with our clients. While some aspects of a remodel can be DIY projects, electrical work is not one of them. The risk of fire or injury is simply too high to justify cutting corners.
Plumbing Essentials for Island Sinks and Appliances
Extending plumbing to an island is far more complex than hooking up a standard countertop faucet. It requires carefully routing hot and cold supply lines through the floor and designing a properly vented drainage system.
Venting is a common challenge. Without a proper vent, an island sink will gurgle, drain slowly, and allow unpleasant sewer gases to enter your kitchen. Since a traditional vent stack through the roof is not feasible, the standard solution is an air admittance valve (AAV), often called a Studor vent. This device allows air into the drain line to facilitate drainage without permitting gases to escape.
This is precisely the kind of technical challenge we manage every day as part of our comprehensive remodeling and construction services. When you partner with a licensed and certified team like Sparkle Restoration, you gain the peace of mind that every connection is secure, every pipe is properly vented, and your island is installed to the highest standards of safety and craftsmanship. We are here to turn the chaos of a remodel into calm.
How to Assemble and Secure the Island Base
This is the phase where your kitchen island transitions from a plan on paper to a tangible part of your kitchen. Assembling and securing the base correctly is absolutely critical. A wobbly or unanchored island is not just an inconvenience—it's a genuine hazard, especially when topped with the immense weight of a stone countertop.

Whether you are using stock cabinets or a custom-built unit, the objective remains the same: to create a single, rigid structure that feels like an integral part of your home.
Assembling and Aligning the Cabinetry
First, carefully assemble each cabinet box according to the manufacturer's instructions. Position them on the floor markings you made earlier. Now, the process of joining them requires finesse.
Use cabinet clamps to pull the face frames of adjoining cabinets tightly together, ensuring their front surfaces are perfectly flush. Drill pilot holes through the sides of the face frames and connect them using 2.5-inch cabinet screws. Place screws near the top and bottom of each connection point for maximum stability.
Here is a professional tip for achieving that seamless, high-end look: always use shims. Even if you believe your floor is perfectly level, minor variations almost always exist. Slide thin wood shims under the cabinets to achieve perfect alignment before driving the final screws. This small step prevents rocking and ensures your countertop has a flawless fit.
Anchoring the Island for Ultimate Stability
An island should never simply rest on the floor. It must be anchored directly to the subfloor to prevent tipping or shifting. The most reliable method is to install hidden blocking on the interior.
This is our trusted method for a rock-solid installation:
- Install Interior Blocking: Cut 2×4 lumber to fit snugly along the inside perimeter of the cabinet base, creating a sturdy frame on the subfloor.
- Secure the Blocking: Fasten this 2×4 frame directly to the subfloor with long, heavy-duty screws, driving them into the floor joists whenever possible for the strongest hold.
- Attach Cabinets to Blocking: From inside the cabinets, drive screws down through the cabinet base and into the blocking you just installed.
This technique locks the entire island structure to your home’s subfloor, creating a permanent foundation. This is more important than ever, as kitchens have become the social centers of the home. Projections show that by 2026, roughly 80% of new kitchens will feature an island, highlighting its role as a central gathering place.
A securely anchored base is what distinguishes a permanent, valuable addition to your home from a few boxes on the floor. We applied these exact standards on a recent restoration and kitchen remodel in Irvine, CA, delivering a result that was both beautiful and built to last.
Installing Countertops and Finishing Details
The countertop is the crown jewel of your new kitchen island. This is the moment the project transforms from a collection of boxes into a beautiful, functional centerpiece. Achieving a perfect result here requires precision and patience.

When working with heavy materials like quartz or granite, "close enough" is not an option. That is why professionals insist on creating a precise template after the island base is fully installed. This template is then used to cut the stone slab with incredible accuracy, ensuring every angle, overhang, and cutout for a sink or cooktop is flawless. Attempting to rely solely on a tape measure often leads to disappointing gaps or uneven edges that compromise the entire look.
Securing the Countertop
Once your custom countertop is delivered, it's time to lock it into place. Given the sheer weight of a stone slab, this requires a powerful, permanent bond to ensure it never shifts.
Professionals achieve this by applying a continuous bead of 100% silicone adhesive along the top edges of the cabinets. This type of adhesive is the industry standard because it's incredibly strong yet remains flexible enough to accommodate the natural, minor movements of a house over time.
With the silicone applied, the installation team carefully lowers the heavy slab onto the base, making micro-adjustments to center it perfectly before the adhesive sets.
Never underestimate the weight of a stone countertop. A standard slab can easily exceed 500 pounds. This is absolutely a job for a team of professionals with the proper equipment. Attempting this as a DIY project can lead to serious injury or a very expensive cracked countertop.
Adding the Finishing Touches
The difference between a good island installation and a great one lies in the details. These final steps are what truly integrate the island into your kitchen, giving it a polished, custom-built appearance.
Here is the final checklist to bring your project to completion:
- Install Decorative Panels: This is a transformative step. Adding decorative end panels or trim to the sides and back of the island conceals raw cabinet edges and seams, creating the look of a single, seamless piece of furniture.
- Attach Hardware: It's time to install drawer pulls and cabinet handles. Your best tool for this task is a hardware jig—a simple template that guarantees every handle is perfectly aligned, achieving a clean, professional look.
- Caulk and Seal: Apply a thin, neat bead of caulk where the countertop meets the base and along any panel seams. This creates a clean finish and prevents crumbs and spills from getting into difficult-to-clean crevices.
- Connect Fixtures: Finally, the licensed professionals return. The plumber and electrician will connect the faucet to the water lines and install the final outlets, switches, and lighting. They will test everything—hot and cold water, every outlet—to ensure your island is 100% ready for use.
Your Kitchen Island Installation Questions Answered
Even with the most detailed plan, questions invariably arise during a kitchen island installation. Drawing from our years of experience in luxury remodels across Orange County, we've compiled answers to the questions we hear most often from our clients to provide you with clarity and confidence.
A common initial question is, "Can I install an island on top of my existing flooring?" The answer depends on the type of floor. For floating floors like luxury vinyl plank or laminate, the answer is a definitive no. These floors require space to expand and contract, and placing a heavy, fixed island on them can cause buckling and damage. However, for floors that are glued down, nailed, or tiled, you can generally install the island directly on top without issue.
How Much Does a Kitchen Island Installation Cost?
This is often the most pressing question, and the reality is that costs can vary significantly. For a straightforward, prefabricated island with no new plumbing or electrical, installation costs might be a few thousand dollars.
However, for a custom island with a quartz countertop, a prep sink, and new electrical outlets for your Newport Beach home, you are looking at a more significant investment. These projects typically range from $7,000 to $15,000 or more.
Several key factors drive the final price:
- Materials: The cost of your chosen cabinetry, countertops (e.g., quartz vs. granite vs. butcher block), and hardware.
- Utilities: The complexity of running new plumbing for a sink or dishwasher and electrical for outlets and lighting is a major cost factor.
- Labor: The project will require licensed plumbers, electricians, and carpenters, whose professional time is part of the budget.
- Demolition: If existing structures must be removed to accommodate the new island, this will add to the cost.
What are the Most Popular Island Features?
Today, homeowners expect their islands to be more than just extra counter space. We see a tremendous demand for functional additions that enhance convenience. For instance, searches for 'kitchen island with seating' reached a peak in early 2025. Concurrently, interest in 'kitchen island with storage' increased by over 114% in just one year, highlighting that maximizing utility is a top priority.
As an IICRC Master Certified firm and licensed General Contractor, we understand how smart design choices impact a home's long-term value and livability. Integrating features like a built-in microwave drawer, a beverage fridge, or pop-up outlets not only improves your daily life but also adds significant appeal for future buyers.
These are the thoughtful additions that elevate a standard island into the hardworking centerpiece of your kitchen. For more detailed answers, please explore our general remodeling and construction FAQs, which cover a wide range of topics our clients frequently ask about.
Ready to transform your kitchen with a professionally installed island? The experts at Sparkle Restoration Services are here to guide you every step of the way, from design to completion, ensuring a flawless result that enhances your home's beauty and function. As an award-winning, licensed general contractor, we turn chaos into calm, fast.
Schedule your free, no-obligation design consultation today.
Ready to create a space that’s as beautiful as it is functional? Schedule your complimentary design consultation today by visiting Ready to Work with Sparkle?