
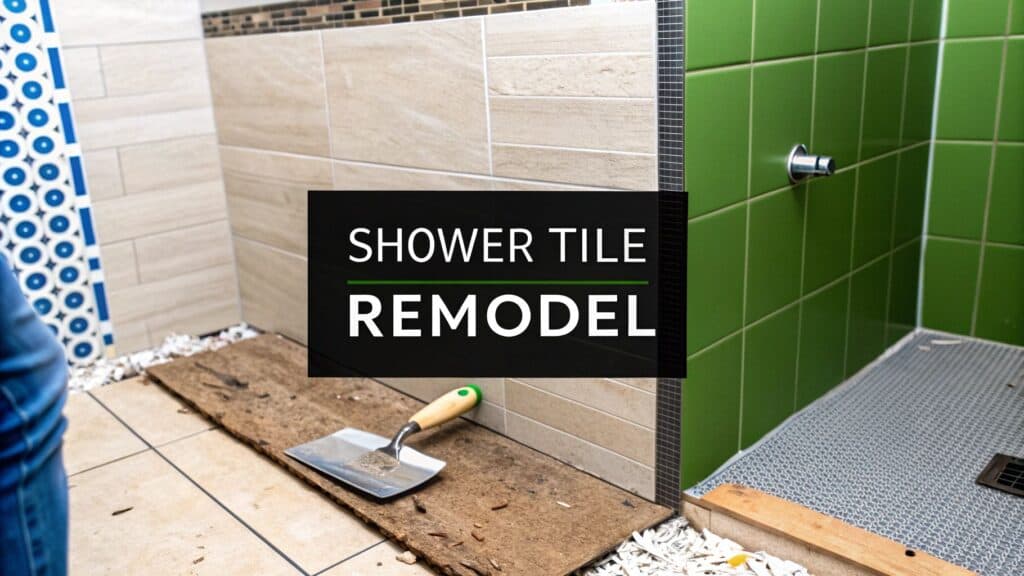
Embarking on a shower tile remodel is one of the most transformative upgrades you can make to your Orange County home. It’s a project that delivers exceptional returns in both property value and daily enjoyment, blending your personal style with critical functionality. A fresh, impeccably executed design can rejuvenate your entire bathroom.
However, the key to a successful project—one that is both beautiful and built to last—is a meticulous plan that balances design, durability, and flawless waterproofing. As a licensed general contractor and IICRC Master Certified firm, we know this last part is non-negotiable; it’s the invisible shield that protects your investment and your home for the long haul.
Why a Shower Tile Remodel Is a Smart Investment for Your Home
A professional shower tile remodel is far more than a cosmetic touch-up. It is a fundamental improvement that directly impacts your home’s long-term health and its market appeal. For discerning homeowners in communities like Newport Beach and Irvine, the ROI isn’t just measured in dollars, but in the peace of mind that comes from knowing the job was executed with uncompromising quality.

A professionally managed remodel is your opportunity to address underlying issues head-on, preventing the kind of costly water damage we at Sparkle Restoration Services see far too often. It’s also the perfect moment to replace dated designs with modern functionality and luxury. Whether you envision a spacious walk-in shower or elegant built-in niches for storage, the possibilities are endless for transforming a utilitarian space into a personal sanctuary.
Key Benefits of a Professional Remodel
When a shower remodel is planned and executed with expert care, the advantages are significant and long-lasting.
- Increased Property Value: A modern, beautifully designed bathroom is a powerful selling point. A well-executed bathroom remodel can yield a return on investment of over 60%, placing it among the most financially sound home improvements you can undertake.
- Enhanced Durability and Safety: Old, cracked tiles and failing grout lines aren’t just an eyesore—they are genuine safety hazards that create pathways for leaks and mold growth. A proper remodel, built on a foundation of expert waterproofing, eliminates these risks. As an IICRC Master Certified firm, we emphasize that what’s behind the tile is just as critical as the tile you see.
- Improved Aesthetics and Comfort: This is your opportunity to create a space that is a true reflection of your style. Whether you prefer the timeless elegance of natural stone or the sleek, clean lines of large-format porcelain, new tile instantly elevates the entire room’s ambiance.
- Reduced Maintenance: Modern materials have advanced significantly. Options like epoxy grout, for instance, are non-porous and incredibly resistant to stains and mildew. This translates to far less time spent scrubbing and more time enjoying your pristine new shower.
At Sparkle Restoration Services, our philosophy is to “Turn Chaos Into Calm, Fast.” For a remodel, this begins with a clear vision and an absolute commitment to quality craftsmanship from day one. Our process is designed to be seamless, transparent, and focused on delivering a final result that doesn’t just meet your expectations—it exceeds them.
Choosing the Best Tile for Your Shower
The tile you select is more than just a surface; it’s the heart of your shower tile remodel. While it sets the aesthetic tone for the entire bathroom, this decision runs much deeper than appearance alone. You need a material that not only reflects your style but can also withstand the daily demands of a wet, high-traffic environment—especially here in Orange County, where hard water can be a challenge.
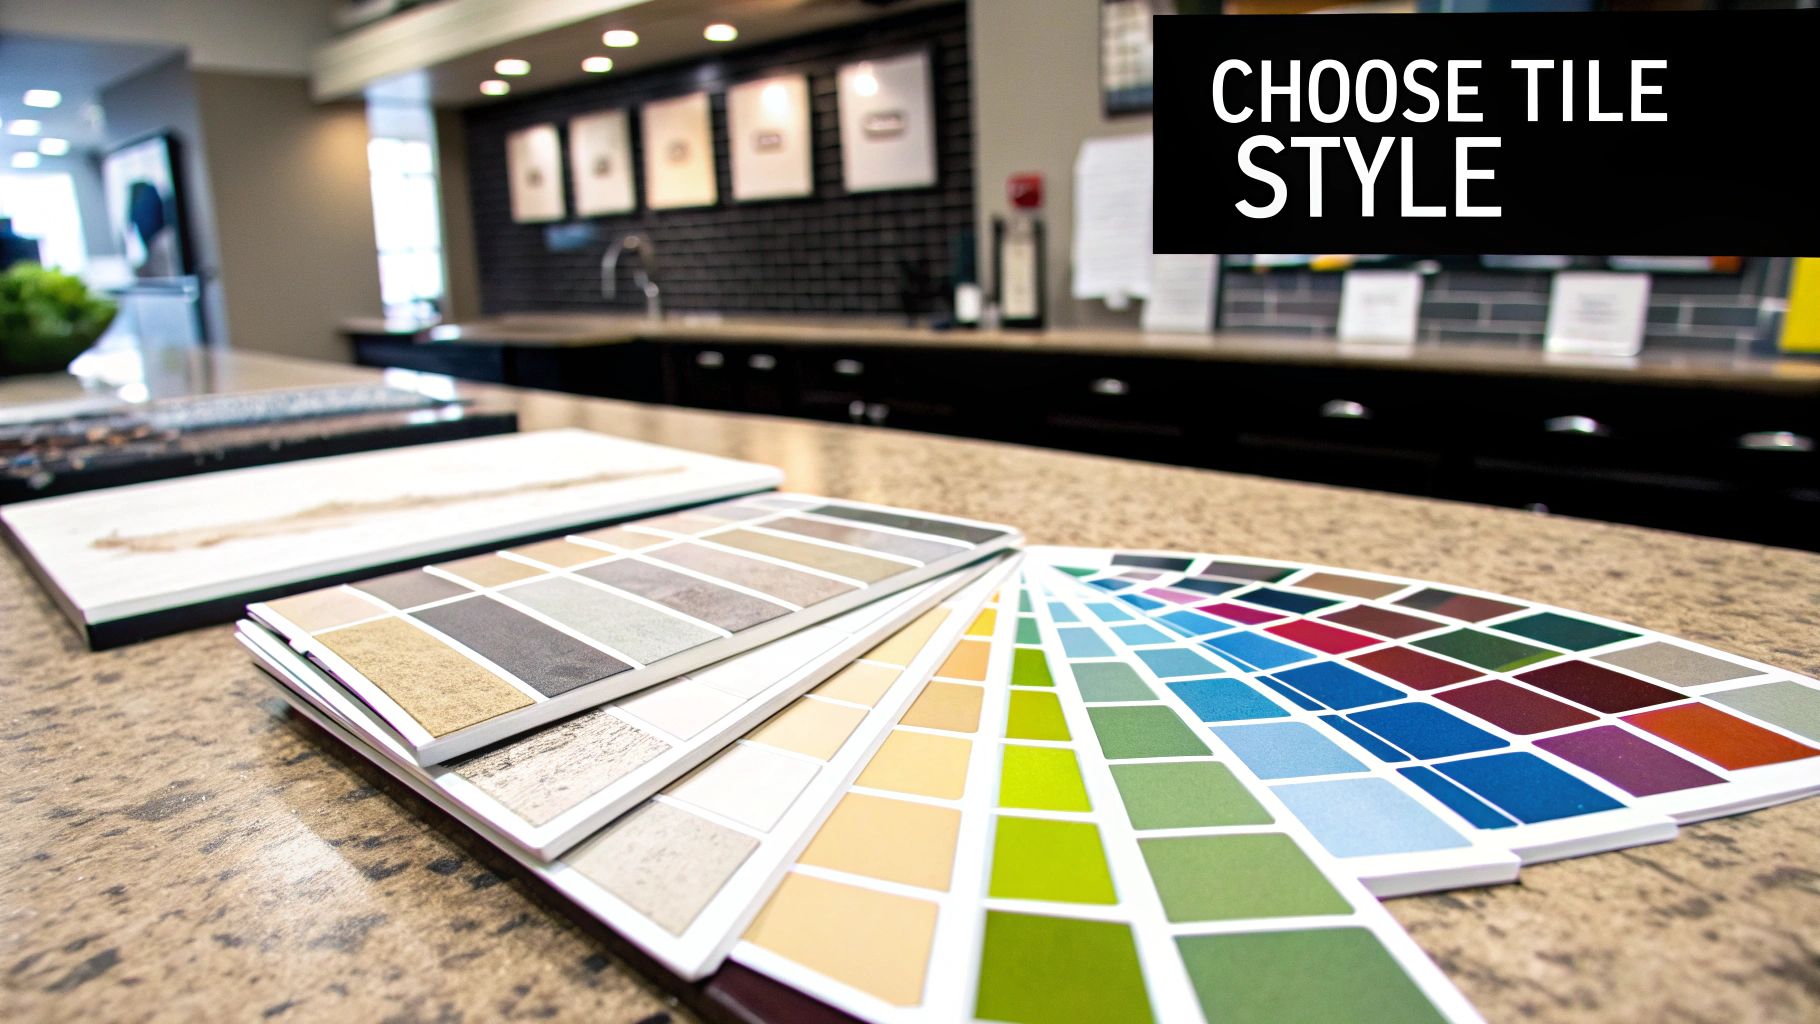
Understanding the practical differences between the most common tile options is key to a remodel you will be delighted with for years to come. Let’s break down the top contenders for your Southern California home.
Porcelain and Ceramic: The Workhorse Options
While the terms are often used interchangeably, “porcelain” and “ceramic” are not the same. Both are clay-based and fired in a kiln, but porcelain is crafted from a more refined clay and fired at significantly higher temperatures. This process makes it denser, less porous, and substantially more durable than standard ceramic.
For a shower, that distinction is crucial. Porcelain has an incredibly low water absorption rate (less than 0.5%), making it a champion against moisture and staining. It is the ideal choice for a busy family bathroom or for anyone who desires a high-performance material without demanding maintenance.
While ceramic is typically more budget-friendly, porcelain’s superior durability often provides better long-term value. In fact, while about 60% of homeowners choose ceramic-based tiles for bathroom remodels, 25% of them specifically select porcelain for its resilience.
Natural Stone: Timeless Luxury
For a high-end, organic aesthetic, nothing surpasses the beauty of natural stone like marble, travertine, or slate. Each tile is unique, with its own veining and color variations that create an irreplicable, luxurious look. Marble brings classic elegance, while travertine can evoke the warm, earthy feel of a luxury spa.
However, this beauty requires a commitment to maintenance. Natural stone is porous and must be sealed regularly to protect it from water damage, stains, and etching from common cleaning products. Neglecting this crucial step can lead to expensive repairs down the line. It is a trade-off: you achieve an unparalleled, one-of-a-kind look, but you must commit to the upkeep.
Glass and Mosaic Tiles: Artistic Accents
To add a touch of modern flair, glass tiles are a fantastic choice. They reflect light beautifully, which can make a smaller shower feel significantly brighter and more open. Our design-build team often uses them to create stunning accent bands or full feature walls that become a dramatic focal point.
Mosaic tiles offer similar creative freedom. Available in nearly every material imaginable—from stone and glass to metal—they can be arranged into intricate, custom patterns. Mosaics are particularly well-suited for shower floors, as the increased number of grout lines provides excellent natural slip resistance.
Choosing the right tile material is a balance of aesthetics, budget, and practicality. To simplify your decision, here’s a quick comparison of the top choices.
Shower Tile Material Comparison
| Material Type | Average Cost (per sq. ft.) | Durability | Water Resistance | Maintenance Level |
|---|---|---|---|---|
| Ceramic | $2 – $15 | Good | Good (when glazed) | Low |
| Porcelain | $3 – $30 | Excellent | Excellent | Very Low |
| Natural Stone | $5 – $50+ | Good to Excellent | Poor (requires sealing) | High |
| Glass | $10 – $50+ | Good | Excellent | Low |
This table provides a solid starting point, but remember that real-world costs and performance can vary based on specific products and the quality of installation.
The Impact of Tile Size and Grout Lines
Once you have selected a material, the next consideration is size. The dimensions of your tile have a significant impact on both the final aesthetic and the amount of time you will spend cleaning.
- Large-Format Tiles: Tiles that are 12×24 inches or larger create a sleek, modern look with minimal grout lines. This is a major advantage for maintenance—less grout means fewer places for soap scum and mildew to accumulate. They can also create an optical illusion, making a small shower feel more expansive.
- Small and Mosaic Tiles: Smaller tiles, such as classic subway tile or detailed mosaics, deliver a more traditional or intricate style. They inherently have more grout, but this can be a functional benefit on shower floors, where the grid provides superior grip and safety.
Expert Tip: When choosing grout, we strongly recommend upgrading to an epoxy-based product. Unlike traditional cement grout, epoxy is non-porous and incredibly resistant to stains and mildew. It is a smart upfront investment that practically eliminates scrubbing and the need for periodic resealing.
Finding the right tile comes down to balancing your design vision with the realities of your budget and maintenance preferences. Thinking these choices through carefully will ensure your shower tile remodel not only looks amazing upon completion but also performs beautifully for years to come. For a complete overview of the remodeling journey, take a look at our guide on planning a stress-free bathroom remodel.
The Critical Role of Shower Waterproofing
Let’s discuss what happens behind the beautiful tile and gleaming new fixtures in your shower. There is an invisible shield protecting your home’s structure, and it is unequivocally the most important component of the entire project. That shield is your waterproofing system.
While tile and grout appear solid, they are only water-resistant, not waterproof. Over time, moisture will inevitably find a way through. Without a flawless waterproof barrier behind it, that water can cause devastating structural rot and foster a toxic mold colony within your walls.
This is precisely where many shower remodels go wrong, typically due to rushed work or inexperience. At Sparkle Restoration, we are not just licensed general contractors; we are also IICRC Master Certified water damage specialists. This dual expertise provides us with a unique, and sometimes sobering, perspective. We have seen firsthand the nightmare that unfolds when this critical step is not taken seriously.
Understanding Modern Waterproofing Systems
Decades ago, waterproofing a shower involved layering tar paper under a thick mortar bed. It was the best technology available, but that system was notorious for failing over time. Fortunately, methods have advanced considerably, and today we rely on two primary approaches that offer vastly superior protection.
- Liquid-Applied Membranes: This can be visualized as painting on a thick, seamless rubber barrier. Products like RedGard or Hydro Ban are rolled directly onto the cement backer board, creating a flexible, continuous membrane that can accommodate the minor structural shifts that naturally occur in a home.
- Sheet Membranes: Industry-leading systems like Schluter-KERDI utilize a polyethylene fabric sheet. This sheet is bonded to the shower walls and floor with thin-set mortar, and then every seam, corner, and screw penetration is meticulously overlapped and sealed with a special banding. When installed correctly, this method creates an incredibly robust and uniform barrier.
Which system is superior? The choice often depends on the specifics of the project, the substrate condition, and the installer’s training. Both are exceptional when installed by a professional who understands that every inch must be perfectly sealed.
The image below illustrates the essential preparation that must occur before any membrane is applied.
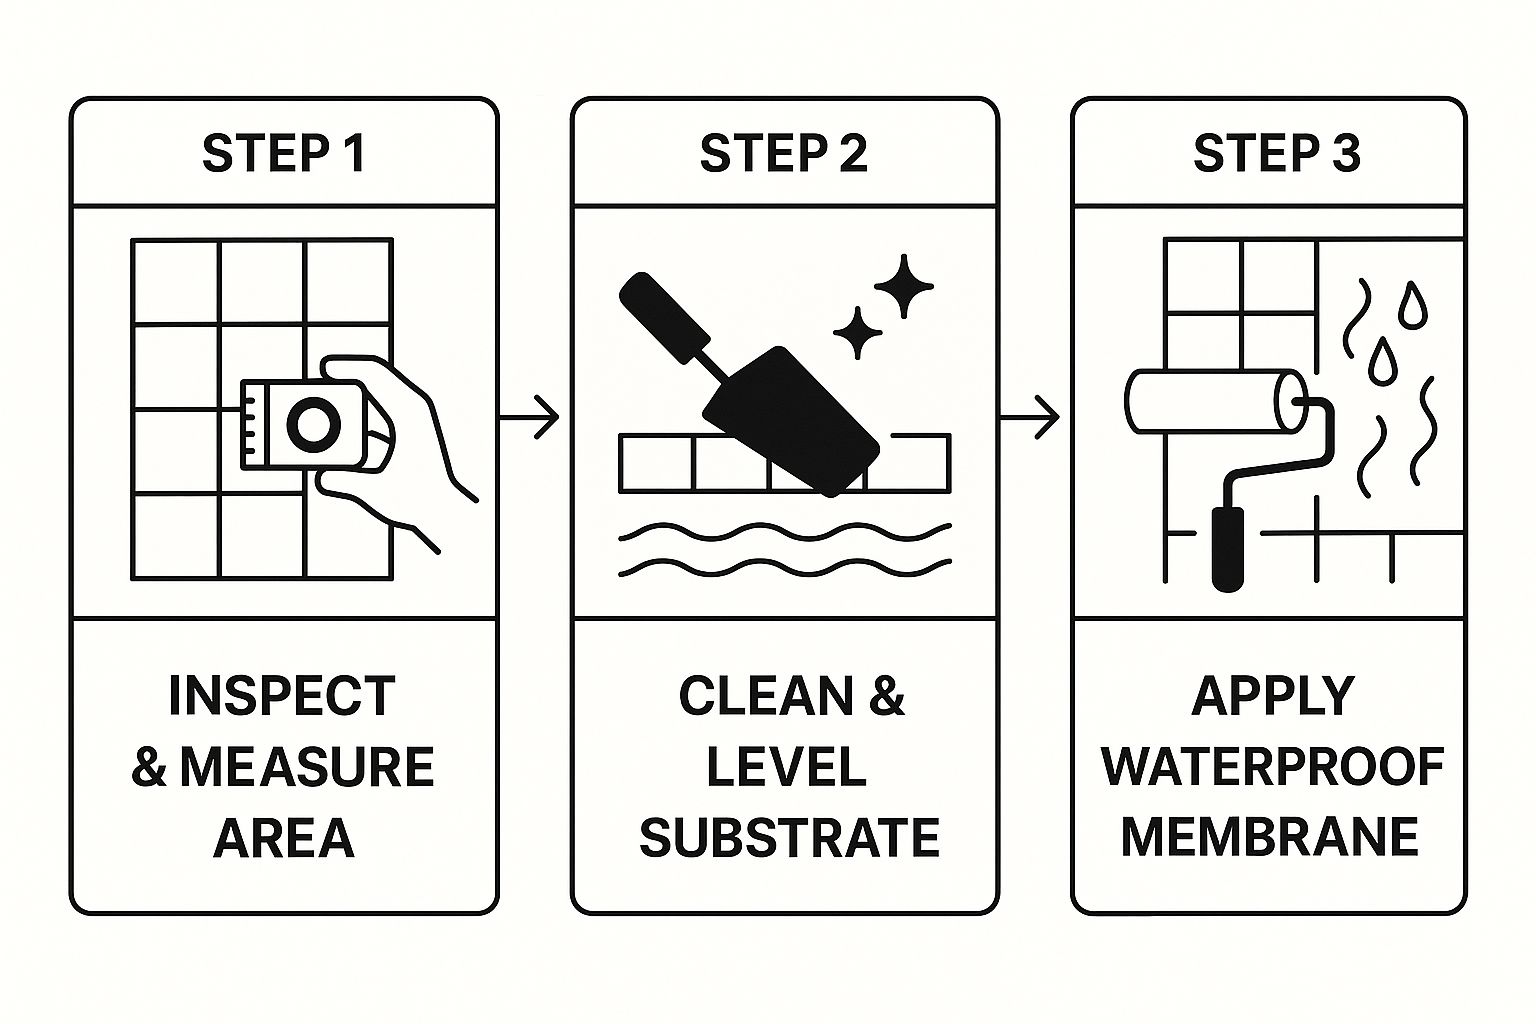
As you can see, a successful waterproofing job starts with a flawless foundation long before the first drop of membrane is applied.
Where Waterproofing Failures Happen
A waterproofing system is only as strong as its weakest link. After decades in the field, we know exactly where those weak links are. Meticulous attention to these details is what separates a professional, leak-free shower from one that’s destined for failure.
The most common failure points are penetrations and transitions. Every spot where the membrane is cut—for the shower valve, shower head arm, or a built-in niche—is a high-risk area. A true professional uses specialized seals and precise techniques to make these points completely watertight. Corners are another critical zone. Both liquid and sheet systems require reinforced corners to prevent cracks from forming as the house settles.
Finally, the seam where the shower walls meet the shower pan or tub is absolutely vital. This connection must be flawlessly integrated to prevent water from wicking into the subfloor. Even a minuscule gap here can lead to a slow, hidden leak that you won’t discover for years, causing extensive damage.
“The single biggest mistake in a shower remodel is cutting corners on waterproofing. We’ve been called to homes in Newport Beach and Irvine for what appeared to be minor tile issues, only to uncover thousands of dollars in hidden water damage and mold. A properly waterproofed shower isn’t an expense—it’s the best insurance you can buy for your home.”
As a BBB Torch Award Winner for Ethics, we believe in educating our clients so they understand why executing every step correctly the first time is so important. The real integrity of your home depends on what’s happening behind that beautiful tile.
Investing in a meticulous, professional waterproofing application provides peace of mind, ensuring your new shower is built on a foundation of security. If you ever suspect a leak or are dealing with the fallout from a poor installation, it’s crucial to know the signs of hidden trouble. Our team specializes in comprehensive water damage restoration services in Orange County, and we can provide the expert assessment and solutions you need.
Putting The Pieces Together: Professional Tile and Grout Installation
With the critical work of waterproofing complete, we arrive at the part of the remodel that everyone loves to see: the tile installation. This is where your vision truly begins to take shape, turning boxes of materials into a gorgeous, functional shower. Achieving that perfect look isn’t about simply attaching tiles to the wall; it’s an art that relies on precision, patience, and a deep understanding of the materials.

It all begins with a detailed layout plan. A professional installer spends time mapping out the entire design before a single tile is set. This crucial step prevents rookie mistakes, such as ending up with awkward, narrow slivers of tile in a highly visible corner or a pattern that appears unbalanced.
Next comes the thin-set mortar, the specialized adhesive that secures everything for decades. Mixing it to the correct consistency—akin to creamy peanut butter—is a skill honed through experience. Too dry, and the tiles won’t bond properly; too wet, and they will sag down the wall. Achieving the perfect mix is key to ensuring every tile is locked in for the long haul.
The Details That Define a Flawless Finish
The true difference between an amateur job and a professional installation lies in the details you might not notice at first glance but can’t unsee once you do. It’s all about a steady hand and a trained eye.
- Perfectly Uniform Grout Lines: Professionals use high-quality spacers and tile leveling systems. This isn’t just for aesthetics; it guarantees that every grout line is identical, creating the clean, satisfying grid that signifies quality craftsmanship.
- Skillful, Intricate Cuts: Cutting tile to fit perfectly around a shower valve, a window, or inside a niche is where true skill shines. A master tiler uses specialized tools to create clean, precise cuts that hug every fixture, leaving no unsightly gaps.
- A Completely Flat Surface: Ever run your hand over a tile wall and felt one edge sitting higher than its neighbor? That’s called lippage, and it’s a clear indicator of amateur work. Professionals use leveling clips and their expertise to create a surface that is perfectly smooth to the touch.
Here at Sparkle Restoration Services, our reputation is built on this very attention to detail. As a BBB Torch Award Winner for Ethics, we believe that true quality is found in the craftsmanship you can see and, just as importantly, the structural integrity you can’t.
The Big Grout Debate: Epoxy vs. Cement
Once the tile has cured, it’s time for grout. This decision is far more important than most homeowners realize, as it has a major impact on your shower’s long-term durability and maintenance requirements.
Traditional cement-based grout is what most people are familiar with. It’s affordable and functional, but its greatest weakness is its porosity. It acts like a sponge for water, soap scum, and bacteria. To combat this, it must be sealed after installation and then resealed annually to keep stains and mildew at bay.
Modern epoxy grout, on the other hand, is a complete game-changer. It’s a two-part system that cures into a hard, non-porous plastic. Because it’s virtually waterproof, it naturally resists stains, mold, and mildew without ever needing a sealer. While it costs more upfront, the long-term benefit of near-zero maintenance makes it a smart investment for a shower you use every day.
For the vast majority of our projects in Orange County, we strongly recommend epoxy grout. Its superior performance provides peace of mind and keeps your shower looking brand new with minimal effort.
The Final Step: Sealing and Protecting Your Investment
If you choose a natural stone tile or a traditional cement grout, sealing is the final, critical step that cannot be skipped. A high-quality penetrating sealer soaks into these porous surfaces to form an invisible shield against water and oils.
This barrier is your first and best line of defense against discolored grout and mildew. Forgetting to seal leaves your beautiful new tile work vulnerable from day one, which can lead to grimy grout that is nearly impossible to clean later on. The quality of your installer and the materials they choose are paramount. Making the right hire from the start is everything, which is why we’ve put together a guide on how to hire a contractor for your bathroom remodel to help you find a team that masters these important details.
Maintaining Your New Shower for Years to Come
Your incredible shower tile remodel is complete, and it looks fantastic. This result is a testament to quality materials and meticulous installation. Now, the goal is to keep it that way. The secret isn’t complicated—it’s a simple, consistent maintenance routine to protect your investment and ensure your shower looks just as pristine years from now as it does today.
Think of this as proactive care, not a chore. A few minutes each week prevents minor issues like soap scum or mildew from escalating into major headaches. This approach not only preserves the beauty of your tile and grout but also protects the critical waterproof barrier behind them.
Your Weekly and Monthly Cleaning Routine
Regular cleaning is your primary defense against common issues like soap scum, hard water stains, and mildew. Consistency is far more effective than delaying for a massive deep-scrubbing session later.
- Weekly Wipe-Down: Once a week, spray the shower walls and floor with a quality pH-neutral, non-abrasive cleaner. Let it sit for a few minutes to break down residue, then wipe everything down with a soft cloth or sponge and rinse thoroughly. Avoid harsh chemicals like bleach or ammonia, which can damage grout and certain types of tile.
- Monthly Grout Check: Once a month, give your grout lines focused attention. Use a soft-bristled brush with a paste made from baking soda and water, or a specialized grout cleaner, to lift out any stubborn discoloration.
To keep everything looking its best, it helps to know the right techniques. This detailed guide offers some excellent advice on how to clean tile and grout using methods that are both safe and effective.
Spotting Trouble Before It Starts
Vigilance goes a long way in catching potential problems when they are small and easy to resolve. While cleaning, perform a quick inspection, paying close attention to these key areas:
- Failing Caulk: Check the seams where the tile meets the shower pan or tub, and especially in the corners. If you see caulk that is peeling, cracked, or has gaps, it’s time to act. It must be removed and replaced immediately to prevent water intrusion.
- Cracked Grout: Examine your grout lines for any cracks, no matter how small. These tiny fissures can compromise the surface, creating a pathway for water to seep behind the tile.
- Discoloration: If you notice persistent discoloration in the grout, particularly in the corners, it could be an early sign of mildew. Catching it early prevents it from spreading and becoming a more significant issue.
As a company that has earned the BBB Torch Award for Ethics, we believe in empowering homeowners. A few minutes of inspection each month can save you from the stress and expense of a significant water damage restoration project down the road.
The Importance of Resealing Your Grout
If your shower has traditional cement-based grout, sealing is a non-negotiable maintenance task. The sealer creates an invisible barrier that repels water, soap scum, and stains, keeping your grout looking clean and new.
How often should you reseal? A good rule of thumb is once every 12-18 months, but this can vary based on usage. A primary shower used daily by a family might need it more often, while a guest bathroom shower can likely go longer.
There’s a simple test to determine if it’s time. Sprinkle a few drops of water on the grout. If the water beads up, your sealer is still effective. If the water soaks in and darkens the grout, it’s time to reapply.
This proactive maintenance is more important than ever. The global ceramic tiles market is booming, with forecasts projecting it to reach between USD 310 billion and USD 410 billion by 2030–2034. This growth is fueled by homeowners demanding premium, durable materials. Protecting these high-quality materials is the best way to ensure they deliver long-term value and enjoyment.
Common Shower Remodel Questions
Embarking on a shower tile remodel brings up many questions. As Orange County’s trusted remodeling and restoration experts, we’ve guided countless homeowners through this process. Here are the direct, honest answers to the questions we hear most often, drawn from our decades of hands-on experience.
How Long Does a Shower Tile Remodel Actually Take?
This is typically the first question clients ask, and for good reason—you need to plan for the time your bathroom will be a construction zone. A standard shower tile remodel takes anywhere from 3 to 7 days, but this window can expand depending on the project’s complexity.
Here’s a general timeline:
- Day 1: Demolition and Prep. We begin by carefully removing the old tile, backer board, and fixtures. This is also our first opportunity to inspect the wall studs for any hidden water damage or mold that must be addressed.
- Day 2-3: Waterproofing. This is the single most critical phase of the job, and it cannot be rushed. Whether applying multiple coats of a liquid membrane or installing a sheet system like Schluter-KERDI, proper curing time is essential to create a perfect, seamless barrier.
- Day 4-5: Tiling. The transformative phase begins as our craftsmen meticulously set the tile. The duration depends heavily on the tile and design—a wall of simple, large-format tiles is installed much faster than an intricate mosaic pattern.
- Day 6-7: Grout, Sealing, and Finishing Touches. Once the tile mortar has fully cured, we apply grout, seal it (if necessary), install your new fixtures, and perform a final, thorough cleanup.
Keep in mind that projects with custom benches, elaborate niches, or major plumbing relocations will extend the timeline. At Sparkle, we provide a detailed, transparent schedule before work begins, so you know exactly what to expect.
What Is the Biggest Mistake People Make in a Shower Remodel?
Without question, the most catastrophic mistake is skimping on waterproofing. It is a common misconception that tile and grout are waterproof. They are not. They are only water-resistant, and over time, moisture and vapor will penetrate them.
As IICRC Master Certified water damage experts, we’ve been called to “fix” brand-new, beautiful showers that began leaking just months after completion. The culprit is almost always a failed waterproofing system hiding behind the tile, leading to hidden mold, rotted studs, and extensive, costly repairs.
A professional installation that builds a continuous, flawless waterproof membrane is the best insurance policy for your home. It’s the unseen foundation that ensures your remodel lasts for decades, not just a few years.
Should I Tile Over My Old Shower Tile?
While it may seem like a tempting shortcut to save time and money, we almost never recommend tiling over existing tile in a shower. This approach is fraught with risks and typically creates more problems than it solves.
First, you cannot inspect what you cannot see. There is no way to know if hidden moisture damage, mold, or rot exists behind the old tile. Covering it up simply traps the problem, allowing it to worsen undetected.
Second, the integrity of your new tile job depends entirely on the bond of the old tile—and in an older shower, that bond is often compromised. A proper remodel demands a clean slate, allowing us to build a solid, fully integrated waterproofing system from the studs out. It is the only way to guarantee a high-quality, long-lasting result that truly protects your home.
Is Epoxy Grout Worth the Extra Cost for a Shower?
Absolutely. For a wet, high-use area like a shower, choosing epoxy grout is one of the smartest upgrades you can make. While it costs more upfront than traditional cement-based grout, the long-term payoff is immense.
The key difference is porosity. Cement grout is like a tiny sponge, absorbing water, soap scum, and oils. This is why it stains easily and requires annual sealing to prevent mildew.
Epoxy grout, conversely, is non-porous. It cures to a hard, plastic-like finish that is virtually waterproof. This means:
- It never needs to be sealed.
- It’s incredibly resistant to stains and discoloration.
- It naturally inhibits mold and mildew growth.
Over the life of your shower, the time and money you save on scrubbing, harsh chemicals, and resealing make epoxy grout a fantastic value. It keeps your shower looking brand new for years with minimal effort.
Have more questions? Feel free to explore our comprehensive FAQs.
Ready to transform your bathroom with a flawless shower tile remodel? The experts at Sparkle Restoration Services are here to turn your vision into a stunning reality with the quality and integrity your home deserves.
Schedule Your Free, No-Obligation Consultation Today
Ready to create a space that’s as beautiful as it is functional? Schedule your complimentary design consultation today by visiting Ready to Work with Sparkle?