
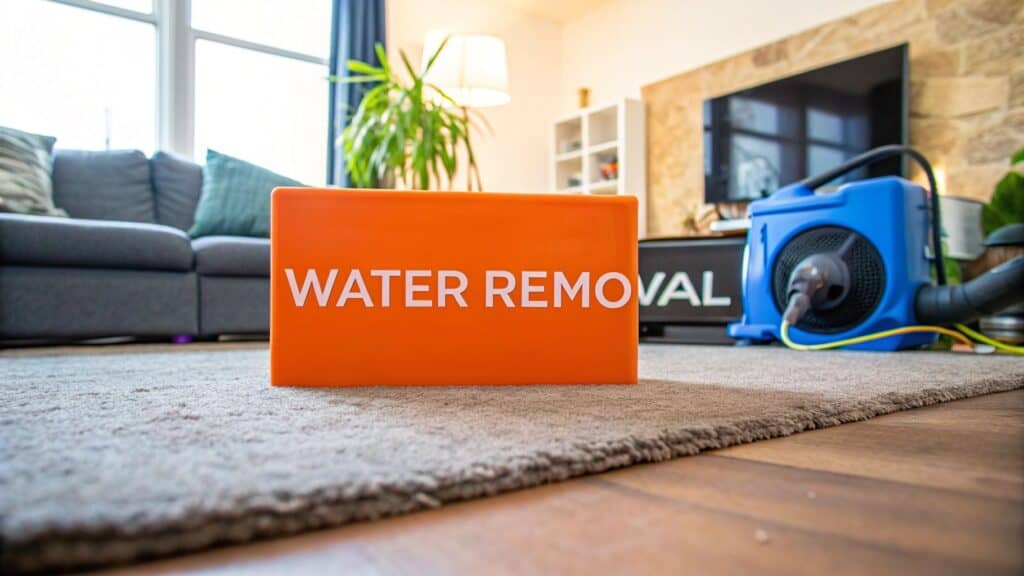
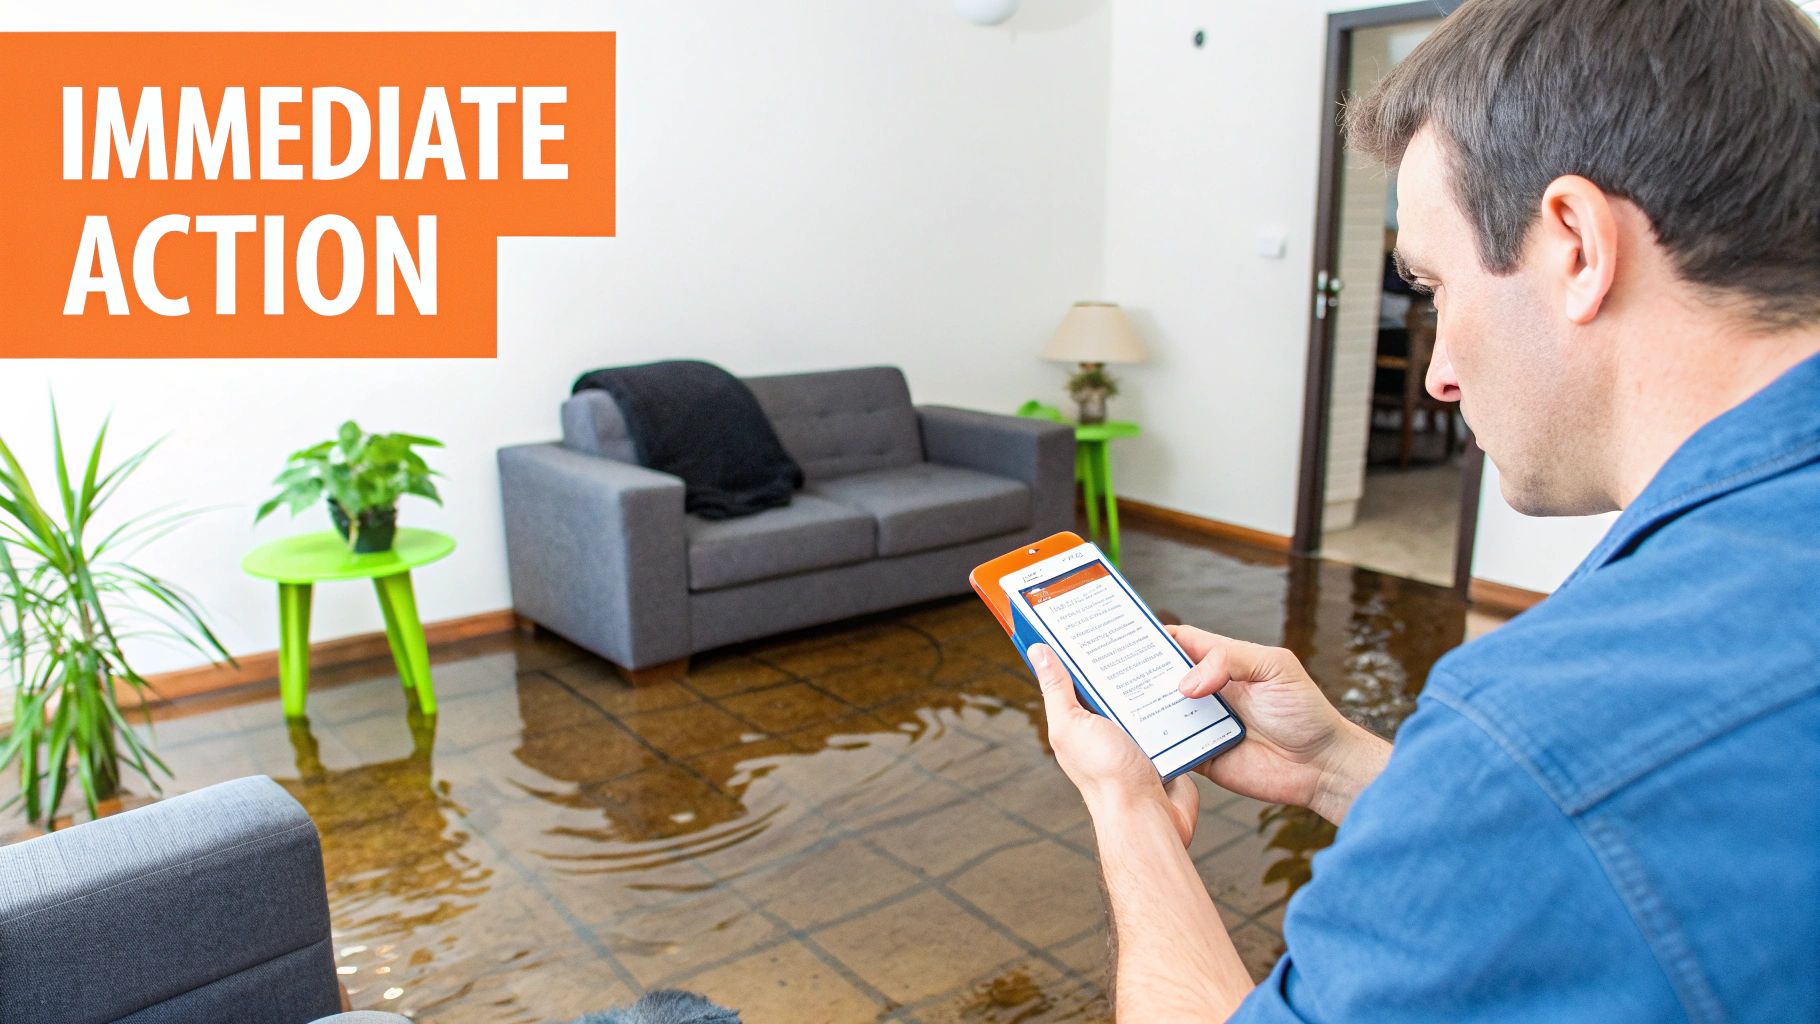
You're standing in your Orange County home, staring at a soaked carpet. It’s a gut-wrenching moment that can happen to anyone. Whether it's a burst pipe, a faulty washing machine hose, or a leaky dishwasher, that initial feeling of panic is completely understandable.
Take a deep breath. What you do in these first few moments is critical. As IICRC Master Certified professionals, we know that a calm, methodical response now will make all the difference. This isn't just about cleaning a mess; it's about protecting your property's value, ensuring your family's health, and turning chaos into calm, fast.
Safety First: De-energize the Area
Before you take a single step into a wet area, your first thought must be safety. Water and electricity are a lethal combination.
Head straight for your home's circuit breaker panel. Your goal is to shut off all power to the affected rooms. If you are even slightly unsure which breakers control which rooms, take the safest route and shut off the main breaker for the entire house. This single action eliminates the most immediate danger, allowing you to assess the situation without the risk of a life-threatening electrical shock.
Play Detective: Identify the Water Source
With the power off, it's time to identify the water's source. This is a crucial step because the source determines the category of water you’re dealing with, which dictates the entire restoration protocol.
The IICRC defines three categories of water damage:
- Category 1 (Clean Water): This originates from a sanitary source like a broken water supply line or an overflowing tub. It’s harmless at first, but don't get complacent. If left for more than 24-48 hours, it will begin to collect bacteria from the carpet and degrade into Category 2.
- Category 2 (Gray Water): This water is already contaminated and can cause illness. Think washing machine overflows, dishwasher discharge, or toilet overflows containing only urine.
- Category 3 (Black Water): This is grossly contaminated and dangerous, posing a serious health risk. Common sources are sewage backups, toilet overflows with feces, or any floodwater that has entered from outdoors.
Expert Guidance for Homeowners: If you suspect you're dealing with Category 2 or 3 water, stop immediately. The health risks are too significant for a DIY approach. This is the definitive signal to call a certified professional like Sparkle Restoration Services. Our team is equipped with the proper personal protective equipment (PPE) and cleaning protocols to handle these hazards safely.
Take Initial Protective Measures
If you've confirmed it's clean water and feel safe to proceed, take a few steps to mitigate further damage.
Start by moving any furniture, area rugs, and personal items out of the wet zone. For heavy furniture you cannot move, slip pieces of aluminum foil or plastic blocks under the legs. This simple trick prevents rust from metal feet and tannins from wood from permanently staining your carpet.
This proactive approach not only saves your belongings but also prepares the area for effective water removal. Having a clear plan transforms a chaotic moment into a controlled response. For a more detailed guide on being prepared, check out our article on building a water emergency first aid kit. These deliberate steps set the stage for a smoother, more successful restoration.
When you're staring at a soaked carpet, the right tools separate a manageable situation from a full-blown disaster. Having professional-grade equipment is your first line of defense, letting you take immediate, effective action. This isn’t about just grabbing any old thing from the garage; it’s about having the correct tools that we professionals rely on to stop damage in its tracks.
The Essential Wet/Dry Vacuum
First, your most important ally is a powerful wet/dry vacuum. To be clear: this is not your everyday household vacuum cleaner. Attempting to use a standard vacuum on a wet carpet is a recipe for disaster—it's a serious electrical shock hazard and will destroy the machine.
A wet/dry vac, on the other hand, is built to safely extract large volumes of water. You'll want a model with significant suction power (look for the peak horsepower, or HP), a large tank capacity (at least 5 gallons), and a wide floor nozzle. This is the workhorse that will pull the bulk of the standing water out of your carpet fibers, a job no other tool can truly handle.
Creating Airflow with High-Velocity Fans
Once you've removed the standing water, the name of the game is evaporation. To win, you need to get the air moving, and fast. While a few box fans are better than nothing, high-velocity air movers—what pros often call "snail fans"—are in a completely different league.
These specialized fans are designed to sit at an angle, blasting a concentrated sheet of air directly across the carpet’s surface. This powerful, targeted airflow breaks the water’s surface tension and dramatically speeds up evaporation. For a typical room in a Newport Beach home, setting up two or three of these fans will create an incredibly effective drying vortex.
Pro-Tip: Always position your fans to push the damp air toward an open window or, even better, a dehumidifier. You want to avoid blowing that moist air into other dry parts of the house, which can just spread the problem around.
Capturing Airborne Moisture with a Dehumidifier
While fans tackle the water you can see, a good dehumidifier goes after the invisible enemy: humidity. As water evaporates from your carpet, it saturates the air with moisture. If you don't remove it, that moisture will find the next coldest surface—windows, walls, furniture—and condense, leading to secondary damage.
A quality dehumidifier is like a magnet for that water vapor, pulling it right out of the air and collecting it in a tank. This lowers the room's relative humidity, which not only stops secondary damage but also helps the carpet dry out much faster. In a coastal climate like Orange County, managing indoor humidity is already a battle, making this tool non-negotiable for effective restoration.
Uncovering Hidden Dampness
So, how do you know when everything is truly dry? Just touching the carpet is the oldest mistake in the book. The surface might feel dry to the touch, but moisture could still be trapped deep in the padding or subfloor, just waiting to feed mold growth.
This is why a moisture meter is absolutely essential. This simple handheld tool uses small pins or a sensor pad to give you a real, quantifiable reading of the moisture content inside materials. It lets you "see" through the carpet into the subfloor or check your baseboards and drywall, confirming everything is back to a safe, dry standard.
And don't forget the basics: Personal Protective Equipment (PPE). Waterproof boots are a must to keep your feet dry and prevent slipping. A solid pair of gloves will protect your hands from whatever contaminants might be in the water. No matter if you're a seasoned pro or a prepared homeowner, safety always comes first.
The Process Of Extracting Water From Your Carpet
With your gear assembled, it's time to get to work. This is where the real effort begins, and it's a process that rewards patience and a methodical approach. You're about to move from a soggy mess to a dry, stable environment, one step at a time.
First, extract the standing water. Your wet/dry vacuum is your best friend right now. Go slow. Work across the carpet in overlapping passes, just like you're mowing a lawn. Press the vacuum nozzle firmly into the carpet to compress the fibers and pad underneath. This compression is what helps the vacuum suck out water trapped deep down.
You'll likely be surprised at how much water comes up. Be prepared to empty the vacuum's tank repeatedly. This initial extraction is the most critical part of the entire DIY process. Why? Because every gallon you pull out now is a gallon your fans and dehumidifier won't have to deal with later.
Getting A Look Under The Surface
Once the vacuum stops pulling significant amounts of water, it's time to investigate what's happening underneath. A carpet that feels just slightly damp on top can be hiding a completely soaked pad and subfloor. If you ignore this hidden moisture, you're practically rolling out the welcome mat for mold and structural rot.
To see what you're dealing with, you must pull the carpet back. Start in a corner and use a pair of pliers to carefully grab the carpet tufts and lift it off the tack strip—that's the sharp, nail-studded wood that holds everything in place. You'll want to peel back a large enough area to get a clear look at both the padding and the subfloor. Trust us, this isn't a step you can afford to skip.
Now comes the tough decision: can the carpet padding be saved?
The Hard Truth About Carpet Padding: In our extensive experience as restoration experts, we can tell you that carpet padding almost never survives a serious soaking. It's essentially a giant sponge. It traps moisture and contaminants, making it nearly impossible to dry completely before mold begins to grow. In over 95% of cases, the smartest and safest decision is to cut out the wet padding and dispose of it.
This diagram shows the essential tools that professionals use for extraction and drying. It's a system, not just a single piece of equipment.
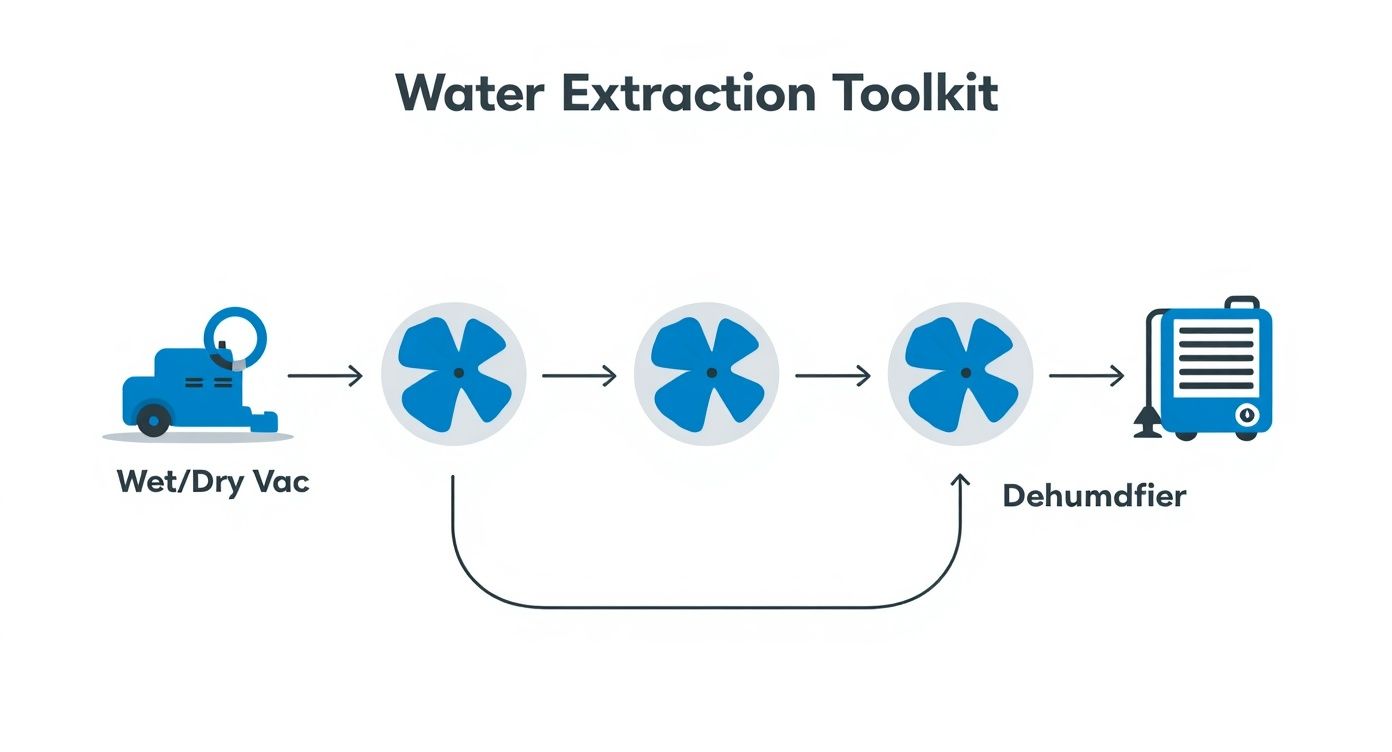
As you can see, a successful job depends on these tools working in concert, from extracting bulk water to pulling the final bits of moisture from the air itself.
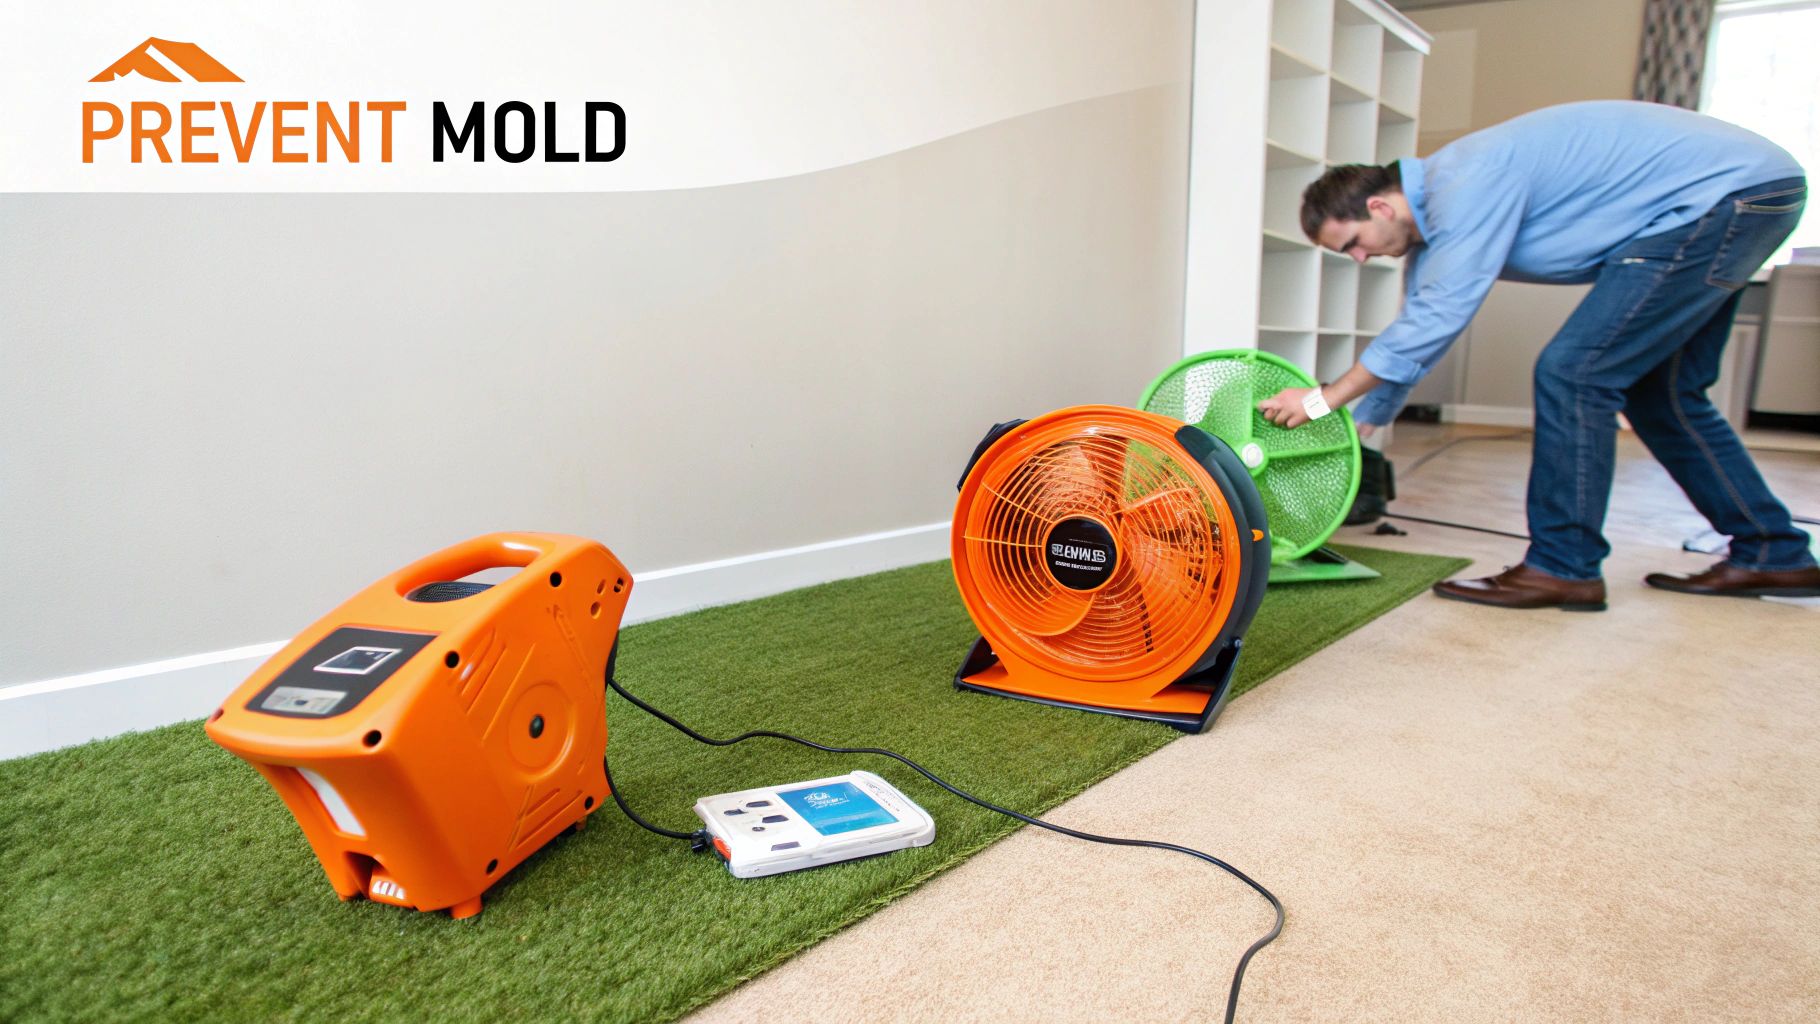
Creating The Perfect Drying Environment
After removing the wet padding, your new focus is drying the carpet itself and the now-exposed subfloor. This is where strategic airflow comes into play. You need to create a "drying vortex" in the room using your fans and dehumidifier.
Position your fans on the floor, angled to blow air directly across the damp carpet surface. Arrange them to create a continuous, circular airflow around the room. This constant motion is what lifts moisture off the surfaces and sends it into the air.
Next, place your dehumidifier in the middle of the room. As the fans keep the moist air circulating, the dehumidifier will capture that vapor, condense it into water in its collection tank, and pump drier air back into the vortex. It’s a systematic attack on moisture that's far more effective than just aiming one fan at a wet spot.
The right equipment makes all the difference. High-powered extractors and commercial dehumidifiers used by IICRC-certified firms like Sparkle can pull up to 90% of moisture from both carpet and pad in a remarkably short time, which is the key to stopping secondary damage like mold before it starts.
Don't forget that the backing of the carpet still needs to dry, even with the padding gone. You can prop up the sections you pulled back using wood blocks or other objects to ensure air can circulate underneath. For carpets that were only lightly affected, a thorough professional cleaning might be enough. You can learn more about our specialized carpet and furniture cleaning services that are designed to restore and protect high-value textiles.
Following this methodical process—extraction, inspection, and strategic drying—is what will make your DIY effort a success, preventing those lingering musty smells and hidden mold problems down the road. It takes effort, but the peace of mind is worth it.
How to Properly Dry Your Carpet and Prevent Mold
Getting the standing water out is a massive relief, but our years of experience have taught us that it's just the first half of the battle. The true expertise in professional water removal from carpet lies in what comes next: the science of drying. A successful restoration isn't just a carpet that feels dry; it's a room where every material—the subfloor, the drywall, even the air—is returned to a safe and stable moisture level.
You are in a race against the clock. Mold, that dreaded four-letter word no Orange County homeowner wants to hear, can begin to grow on damp surfaces in as little as 24 to 48 hours. This is where your fans and dehumidifier earn their keep, working in tandem to protect your property and health.
The Science of Creating a Drying Vortex
Simply placing a fan in the corner of a wet room and hoping for the best is ineffective. You must create a strategic airflow system that actively pulls moisture from materials and suspends it in the air where your equipment can capture it. We call this creating a "drying vortex."
Start with your high-velocity fans. Position them to blow air directly across the surface of the damp carpet. The goal is to create a continuous, circular airflow pattern around the room. This constant movement is key—it breaks the surface tension of the water molecules, encouraging them to evaporate much faster.
Now, place your dehumidifier in the middle of the room. As the fans whip that humid air around, the dehumidifier acts as a powerful moisture magnet. It sucks in the damp air, condenses the water vapor into its collection tank, and exhausts drier air back into the vortex. This creates a cycle that constantly lowers the room's overall humidity.
A critical mistake homeowners often make is thinking 'dry to the touch' means the job is done. Moisture loves to hide deep within porous materials like drywall, wood baseboards, and the subfloor. A dry surface can easily conceal a dangerously damp core.
Mapping for Hidden Moisture
How do you find this hidden moisture? The only way to be certain is with a professional moisture meter. This tool is non-negotiable for confirming a space is truly dry. It allows you to "map" the entire affected area for dampness you can't see or feel.
Be methodical. Test all surrounding materials that may have been affected:
- Drywall: Check the bottom few feet of the walls, as water wicks upward surprisingly fast.
- Baseboards: Wood is porous and can hold onto moisture for a long time.
- Subfloor: Test the exposed subfloor thoroughly, paying close attention to corners and areas along walls.
- Carpet and Pad: Even after it feels dry, check the carpet, its backing, and any remaining padding to ensure they’ve returned to safe moisture levels.
This systematic approach is the only way to guarantee no pockets of moisture are left behind to cause serious problems down the road.
Realistic Timelines and Signs of Success
How long this all takes depends on the severity of the water damage, the humidity in your home, and the power of your equipment. For a smaller, well-managed incident, you can typically expect the drying process to take anywhere from three to five days.
Quick and effective water extraction is crucial to preventing permanent issues like fiber damage and mold. When drying is delayed or done incorrectly, the restoration costs can skyrocket. In fact, the U.S. restoration industry, which deals with these exact scenarios, is projected to hit $7.1 billion by 2025—a clear indicator of how big and costly this problem can be.
So, how do you know when you've finally won?
- Consistent Moisture Readings: Your moisture meter shows that the carpet, subfloor, and nearby walls are all back to their normal, pre-damage moisture content.
- No Musty Odors: A clean, neutral smell is your friend. If you can still detect any musty or mildewy scent, it means there's still a moisture problem hiding somewhere.
- Dehumidifier Stops Collecting Water: When the collection tank on your dehumidifier stays empty for a full 24-hour cycle, it’s a strong sign that the excess moisture has been removed from the air.
Taking these steps is vital for protecting your home's integrity and your family's health. To learn more about the best practices, you can read up on how to dry a wet carpet and prevent mold effectively. If you do spot any signs of mold, it is critical to act immediately; our expert guide on mold remediation can walk you through the necessary steps.
Knowing When DIY Is Not Enough
Every hands-on homeowner knows the satisfaction of tackling a project themselves. But when it comes to water damage, knowing when to put down the tools and pick up the phone is the most important skill you can have. Calling a professional isn't admitting defeat; it’s a strategic move to protect your home, your family’s health, and your wallet.
Certain situations simply carry too much risk for a DIY fix. Learning to spot these red flags is critical for proper water removal from carpet and preventing a small problem from spiraling into a catastrophe.
Non-Negotiable Scenarios for Professional Help
Some water emergencies are immediately outside a homeowner’s capabilities. Trying to manage these yourself can lead to much bigger headaches, from permanent structural damage to serious health issues. As an award-winning, licensed General Contractor, we've seen the consequences of delayed professional response.
Here are the clear signs that you need to call our IICRC-certified team right away:
- Widespread Damage: If the water has saturated more than one room or covers a large area (over 100 square feet), you’re dealing with a volume of water that consumer-grade equipment cannot handle effectively or quickly enough.
- Contaminated Water (Category 2 or 3): Any water from a sewage backup, a toilet overflow that includes feces, or flooding from the outside is considered "black water." It's loaded with dangerous bacteria and pathogens that require professional-grade PPE and specific decontamination methods to handle safely.
- Prolonged Saturation: Has the water been sitting for more than 24-48 hours? If so, you must assume that microbial growth has already begun, even if you can't see or smell it yet. The risk of widespread mold contamination is too high at this point.
The stakes are incredibly high with significant water intrusion. If you attempt to handle a major event yourself and miss something, your insurance company might deny the claim. Insurers often require certified professionals for mitigation to ensure the damage doesn't worsen.
The True Cost of Waiting or Mishandling
Putting off the call to a professional in these scenarios is a gamble that rarely pays off. Flood-related damages cost over $40 billion globally each year, and a staggering 98% of basements will eventually experience some kind of water damage. When you're facing this, one of the first things you need to figure out is Does Homeowners Insurance Cover Water Damage.
For homeowners in Orange County, the risk goes beyond just the initial cleanup cost. Improper drying can trap hidden moisture inside walls and under floors, leading to structural rot that silently compromises your home's integrity. We’ve seen it time and again in complex jobs, like our recent water damage mitigation and restoration in Irvine, CA, where a seemingly small leak concealed a much larger issue underneath.
Bringing in a professional ensures every layer of your home is properly assessed, dried, and restored. It's about turning chaos into calm with expertise you can trust. If you're facing water damage, don't hesitate—contact Sparkle Restoration for 24/7 emergency services and a free consultation.
Common Questions About Carpet Water Removal
When you're dealing with a soaked carpet in your Orange County home, questions come fast and furious. It’s a stressful situation, and uncertainty is normal. Getting clear, expert answers is the first step toward regaining control. As a BBB Torch Award winner for ethics and excellence, we believe in educating our clients. Here are some of the most common concerns we hear from homeowners just like you.
Can My Water-Damaged Carpet Actually Be Saved?
This is almost always the first question we're asked. The answer is a solid "it depends," but the odds are often better than you might think.
Two primary factors determine the outcome: the water's source and how quickly you act. If it was clean water (Category 1) from a supply line and you began extraction within 24 hours, there's an excellent chance the carpet can be professionally cleaned, dried, and saved.
However, if the water was contaminated (Category 2 or 3) or has been sitting for more than 48 hours, replacement is almost always the safer, healthier choice. The risk of permanent bacterial contamination and mold growth is too significant to ignore.
What Does That Musty Smell Mean and Will It Go Away?
That distinct, musty odor is a major red flag. It’s the smell of microbial growth—bacteria and mold feasting on the damp, organic materials in your carpet and padding.
If you catch it early and the drying is done correctly, that smell should disappear completely. But if it lingers after the carpet feels dry, it means moisture is still trapped somewhere. We often find it hiding in the padding, the subfloor, or even the baseboards. A professional moisture meter is the only way to hunt down these hidden damp spots and eliminate the source of the odor for good.
How Long Will It Take for My Carpet to Dry Completely?
The drying timeline varies, but "dry to the touch" is not the finish line. That's a classic misconception. For a minor incident handled correctly with professional-grade equipment, you should plan for a drying period of at least three to five days.
This isn't just about the surface fibers; it's about allowing the carpet backing, subfloor, and surrounding air enough time to return to a safe, stable moisture level. Rushing this process is the most common error we see, and it almost always leads to bigger problems down the road.
One of the biggest misconceptions is that a carpet is dry once the surface feels dry. The truth is, the padding and subfloor can hold onto moisture for much longer. This creates a hidden breeding ground for mold. True dryness isn't a feeling—it's a scientific measurement.
Will My Homeowners Insurance Cover This?
Navigating insurance can be complex, but there’s a general rule of thumb. Homeowners insurance typically covers damage from events that are both sudden and accidental. A burst pipe, an overflowing washing machine, or a failed water heater usually fall into this category.
What's often not covered is damage from gradual leaks or poor maintenance, like a slow-leaking faucet that has been ignored. Furthermore, flood damage from natural disasters requires a separate flood insurance policy.
Your best course of action is to contact your insurance agent immediately to understand your specific policy coverage. They often prefer having a certified professional handle the mitigation, which ensures the work is done to industry standards and can make your claims process much smoother. For a more detailed look at common queries, feel free to explore our full list of frequently asked questions.
Ready to create a space that’s as beautiful as it is functional? Schedule your complimentary design consultation today by visiting Ready to Work with Sparkle?